If you missed the previous parts in this article series please read:
- Clustered Continuous Replication Failover with Standby Continuous Replication (Part 1)
- Clustered Continuous Replication Failover with Standby Continuous Replication (Part 2)
If you would like to be notified when Neil Hobson releases the next part of this article series please sign up to the MSExchange.org Real time article update newsletter.
So far in the first two parts of this article we have covered the implementation of Standby Continuous Replication (SCR) between two Clustered Continuous Replication (CCR) environments and successfully recovered the Clustered Mailbox Server (CMS). We left part two knowing that the CMS and other cluster resources could successfully be moved between the two cluster nodes of the CCR environment in the backup datacenter. In the last part of this article, we will complete the picture by looking at what is required to be done to allow the CMS to be recovered back to the production datacenter.
Move Back to the Production Datacenter
The situation now is that we have our CMS called CCREX01 running on the cluster called E2K7CLU02 which itself comprises the two nodes NH-W2K3-SRV01 and NH-W2K3-SRV05. However, it is possible at some point in the future the original datacenter will be available again and possibly the original CCR cluster nodes NH-W2K3-SRV03 and NH-W2K3-SRV04. Many organizations prefer to run their systems from a primary datacenter location and thus the situation of moving back to the primary datacenter must be addressed. The original cluster still believes it has a CMS configured on it and so this must be removed. Here is the procedure to accomplish this.
First, I will bring both NH-W2K3-SRV03 and NH-W2K3-SRV04 back online. Of course, this assumes that the required services such as Active Directory, Hub Transport and Client Access Servers are already up and running back at the production datacenter. At the time of the original failure at the production datacenter, the active cluster node was NH-W2K3-SRV03 and so running Cluster Administrator on this node shows us that all CMS resources are in an offline state as you would expect. This is shown in Figure 9.

Figure 9: Offline Cluster Resources
To remove the CMS resources from the cluster we need to run the Exchange 2007 setup.com program on node NH-W2K3-SRV03 with the /ClearLocalCMS switch. We also need to specify the CMS name. The full command to use is:
setup.com /ClearLocalCMS /CMSName:CCREX01
Figure 10 shows the output as a result of running the above command.
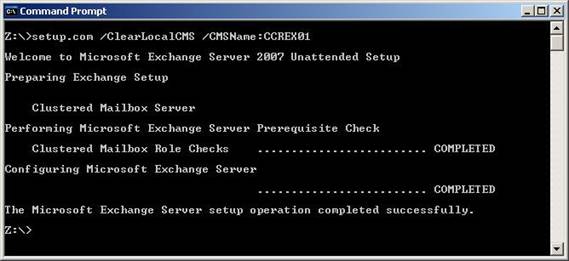
Figure 10: Clearing the Local CMS
Once this has finished, refreshing Cluster Administrator confirms that the CMS resources have been removed. If you think about it, servers NH-W2K3-SRV03 and NH-W2K3-SRV04 now have the same configuration that servers NH-W2K3-SRV01 and NH-W2K3-SRV05 had before we started the SCR replication process; we effectively have a mirror of our previous setup.
Activate SCR to Production Datacenter
Since we have a mirror of our previous setup, we now need to mirror the SCR configuration that we performed earlier in this article. In other words, we need to enable SCR from the backup datacenter, currently hosting the CMS, to the production datacenter. NH-W2K3-SRV03 will be selected as the target for SCR and therefore we now need to run the following two cmdlets:
Enable-StorageGroupCopy “CCREX01\First Storage Group” –StandbyMachine NH-W2K3-SRV03 –ReplayLagTime 0.0:0:0
Enable-StorageGroupCopy “CCREX01\Second Storage Group” –StandbyMachine NH-W2K3-SRV03 –ReplayLagTime 0.0:0:0
Of course, in my scenario I simply powered off NH-W2K3-SRV03 and NH-W2K3-SRV04 which therefore means that the old database and log files are still there to be used. However, in this article Iam going to assume a full re-seed is still required along with the implementation of SCR back to the production datacenter. We have already covered the results of these cmdlets in part one of this article so I will not include another screen shot here.
Database Reseed
With NH-W2K3-SRV03 now having SCR enabled and a copy of the database, it is also important to think about seeding the database onto NH-W2K3-SRV04 which can either be done after the CMS is brought online on NH-W2K3-SRV03, or it can be speeded up by ensuring that NH-W2K3-SRV04 is also configured as an SCR target of the CMS. Since this is a lab environment I am working with, I do not mind re-seeding the database onto NH-W2K3-SRV04 but make sure you consider these options in your production environment. I have already covered the database re-seeding operation within part two of this article so I will not be covering it again here.
Dismount the Databases
Before the switch back to NH-W2K3-SRV03 is made, the next step is to dismount the databases running on CCREX01 since, unlike the first time we switched the CMS between nodes, this time the CMS is still running and servicing the users. The databases must first be dismounted to make sure that they no longer generate any new transaction logs that would then have to be shipped over to NH-W2K3-SRV03. Continuing our theme of using the EMS within this article, the database dismount process can be achieved by using the Dismount-Database cmdlet twice as shown below:
Dismount-Database “CCREX01\First Storage Group\Mailbox Database”
Dismount-Database “CCREX01\Second Storage Group\Public Folder Database”
There is really not much to say about the output of running these cmdlets, as all you will receive from the above cmdlet is an “are you sure?” message unless you suppress it. To suppress this prompt, just use the –Confirm:$false parameter at the end of the cmdlets above.
Restore the Storage Groups
Next the storage groups must be prepared for mounting via the Restore-StorageGroupCopy cmdlet. The two cmdlets to use are:
Restore-StorageGroupCopy “CCREX01\First Storage Group” –StandbyMachine NH-W2K3-SRV03
Restore-StorageGroupCopy “CCREX01\Second Storage Group” –StandbyMachine NH-W2K3-SRV03
You may remember in part two of this article that we used the Restore-StorageGroupCopy cmdlet with the –Force parameter. This is not required this time since the CMS nodes are running and thus any required information is available. I will not include a screen shot here since no output is generated as a result of running these cmdlets.
Stop the CMS
The CMS running in the backup datacenter now needs to be stopped using the Stop-ClusteredMailboxServer cmdlet, because this time the CMS is still running whereas in the original failover situation it was not. The full cmdlet to use is:
Stop-ClusteredMailboxServer CCREX01 –StopReason “Moving back to production data center”
In the above cmdlet, we see the –StopReason parameter that is used to add into the event log the reason for the stopping of the CMS. If you examine the event log after issuing this cmdlet, you should find an event with an ID of 105 with your chosen phrase in it. Running the Stop-ClusteredMailboxServer cmdlet should give you an output similar to that shown in Figure 11. You should also check that the CMS resources are offline using Cluster Administrator.

Figure 11: Stopping the CMS
Recover the CMS
After doing this we are now back to the point where we need to recover the CMS to the server NH-W2K3-SRV03. We have already looked at this process in part two of this article so I will only briefly cover it again here. Just remember, however, that you need to specify the IP address of the CMS when using the /RecoverCMS switch and so, this time, you are going to be giving the CMS an IP address within the production datacentre IP subnet. In fact, you would most likely give the CMS its original IP address back.
Figure 12 shows the second time I have recovered the CMS, this time using the original IP address of 172.16.6.80.
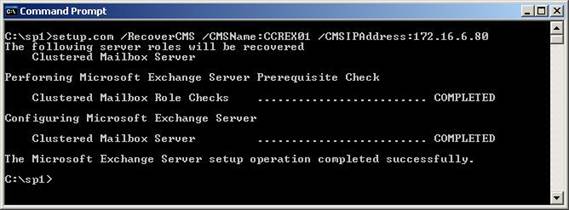
Figure 12: Recovering the CMS
Once recovered, the databases can be remounted in the same way we have already seen in part two of this article. In my lab, I would then re-seed the databases back onto NH-W2K3-SRV04 at this point, although if I had chosen to also enable SCR for NH-W2K3-SRV04 earlier, I would also have to run the Resume-StorageGroupCopy cmdlet for each storage group to re-enable replication between the two nodes. When all databases have been mounted and replication is occurring between the two cluster nodes, we have successfully moved our CMS from one CCR environment to another and back again by using SCR.
The last thing to do is to make sure the backup datacenter is primed so that it can handle any future incidents at the production datacenter. There are only two major steps to do and we have already covered them both within the parts of this article so I shall only list the steps here:
- Remove the local CMS from the cluster E2K7CLU02 running at the backup datacenter.
- Re-enable SCR from the source CCR environment to the target standby cluster.
Summary
Hopefully you have seen within the three parts of this article that moving a CMS from one CCR environment to another is possible using SCR. There is no doubt that many organizations will be looking to implement SCR if they have not done so already. If you are thinking about site resilience, take the time to read up on SCR as it just might be the solution for you.
If you missed the previous parts in this article series please read:
- Clustered Continuous Replication Failover with Standby Continuous Replication (Part 1)
- Clustered Continuous Replication Failover with Standby Continuous Replication (Part 2)
If you would like to be notified when Neil Hobson releases the next part of this article series please sign up to the MSExchange.org Real time article update newsletter.


