Introduction
This article is all about Thumbnailphoto attribute, we are going to upload users’ image files to that attribute and then the new applications like Outlook 2010 and future UC applications will be able to use that information to display the user picture.
Before starting the process to configure and test, we need to check a few requirements, as follows:
The ThumbnailPhoto attribute is limited to 102400 bytes which means 10KB. This limit is defined in the RangeUpper value of the attribute.
The file format is JPG
Keep in mind that information is going to Active Directory which means it may affect replication and also NTDS database size
Configuring Global Catalog
The first step of the process is to configure the replication of the attribute to the Global Catalog. The process is pretty straight forward and you can repeat these following steps:
Logged on a Domain Controller
Click on Start, Run and type in regsrv32 schmmgmt.dll and click OK, as shown in Figure 01
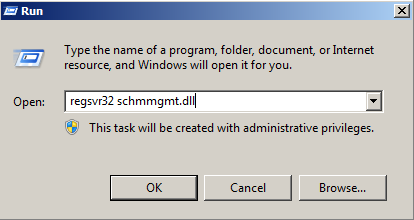
Figure 01
A dialog box saying “DllRegisterServer in schmmgmt.dll succeeded” will show up. Just click on OK.
Now that we have the Active Directory Schema registered we need to open it to configure the replication of the attribute. You can repeat these following steps to enable the replication, as follows:
Logged on the same session where you have just executed the previous steps
Click on Start, Run and type mmc and click on OK
Click on File menu item and then click on Add/Remove Snap-ins…
Click on Active Directory Schema on the Available snap-ins section, and then click on Add > button, as shown in the Figure 02. Click OK.
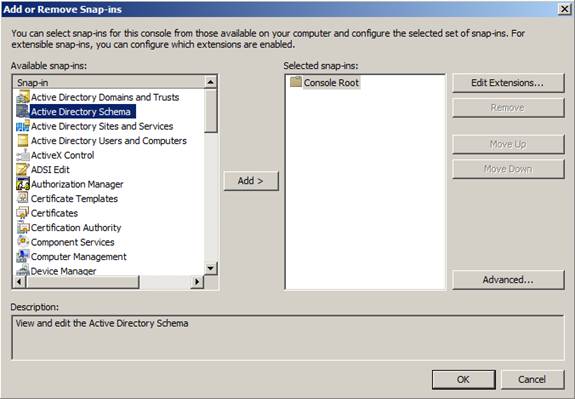
Figure 02
Expand Active Directory Schema [<Your-Server-Name>] item
Click on Attributes
Look for thumbnailPhoto attribute and double click on it
Check the option Replicate this attribute to the Global Catalog and click on OK, as shown in Figure 03.
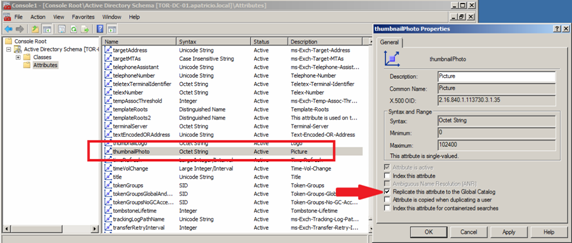
Figure 03
That’s all we need from Active Directory, now it is time to upload the image files to the users’ thumbnailphoto attribute and start testing it.
Importing display pictures to the Active Directory Users
The cmdlet used to import users’ pictures to Active Directory is the Import-RecipientDataProperty. This cmdlet can be used to import image or audio to the users. In this article we will cover just the image portion of this cmdlet. The syntax to use is described below and requires only two pieces of information from the administrator: Mailbox name and the path of the picture.
Import-RecipientDataProperty -Identity <Mailbox> -Picture -FileData ([Byte[]]$(Get-Content -path <Picture Path > -Encoding Byte -ReadCount 0))
The process to import a picture (C:\Photos\Anderson.jpg in the example) to another user (Anderson in the example) can be seen in the Figure 04.
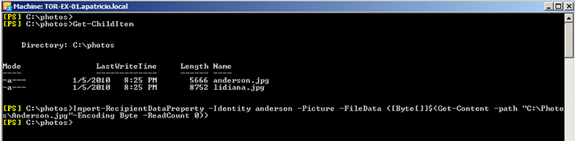
Figure 04
An easy way to validate the procedure that we have just done is to check the thumbnailphoto attribute on that previous user and if it is not empty then we know that the user’s display picture was uploaded. In Figure 05 we are using the Active Directory Users and Computer of a Windows Server 2008 which has the Attribute Editor page to check the information out.
If you have Windows Server 2003 you can install Support Tools and then check the attribute out using ADSIEdit.msc. If you have Windows Server 2008 or higher and you can’t see the Attribute Editor tab, then click on View and then Advanced Features, after that try to check the properties of the user again.
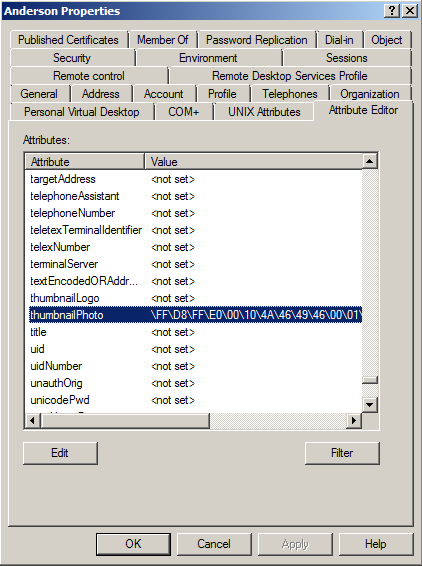
Figure 05
Testing what we have done so far
Okay, attribute is configured to replicate and we have just uploaded a picture to a user. Now, it’s time to test! Outlook 2010 uses a lot the user’s picture and we will be able to see it all over the place, a couple of examples where you will notice the display pictures:
Global Address List dialog box
Outlook initial page (clicking on Office button) as shown in Figure 06
Reading pane
Contact card (Figure 07)
Meeting Requests
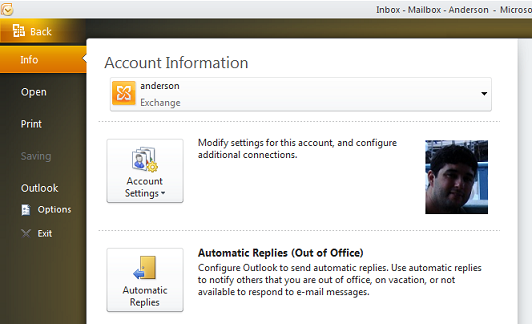
Figure 06
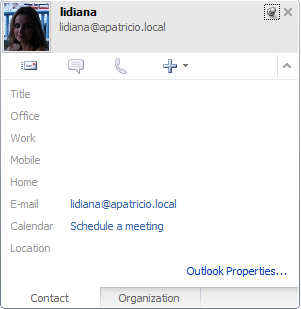
Figure 07
Creating a script to facilitate the upload process
In order to facilitate the process to upload images for one or more users I created a simple script to do that work. The script can be changed to meet your requirements, feel free to change it and if you add any new improvement, please let me know :). The script does some tests, such as path validation and image size.
Before using the scripts let us go over a few key points about its functionalities:
The script is based on the JPG file names. The username and file name must match, for example: Anderson (mailbox) and anderson.jpg (file) will work fine
The default folder that script uses to locate the JPG files is the C:\Photos. You can change that just by editing the Script and changing the $DefaultPhotoPath variable
If all pre-requisites are not met , the script will exit without doing any operation in Active Directory
Run the script through Exchange Management Shell
Okay, let us test the script for a single user. First of all, let us make sure that we have a JPG with the name of the user on the default folder (C:\Photos). And let’s run the following syntax:
.\UploadPhoto.ps1 <mailbox-name>
After testing path and size of the picture, the script will upload the file to Active Directory, as show in Figure 08
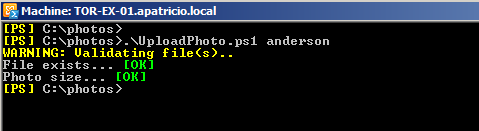
Figure 08
I also created a –all switch for the script, where the script will list all JPG files of the default folder and, based on the file name, it will upload it to the Active Directory user. In the Figure 09, I ran the script and I had two files (anderson.jpg and Lidiana.jpg) alongside the users anderson and lidiana respectively, were updated.

Figure 09
Finally, here is a copy of the script demonstrated above:
param([Switch]$all, [String]$UserName)
#Default Values. Change them based on your environment.
$DefaultPhotoPath = ‘C:\Photos’
Function CheckPhoto(){
 Write-Warning “Validating file(s)..”
 Write-Host “File exists… ” -nonewline
 If (Test-Path $PhotoPath)
 {
 Write-Host “[OK]” -ForeGroundColor Green
 Write-host “Photo size… ” -nonewline
 $PhotoSize = Get-ChildItem $PhotoPath | select Length
 If ($PhotoSize.Length -le 10000) { Write-Host “[OK]” -ForeGroundColor Green } Else { Write-Host “[Fail]” -ForeGroundColor Red; exit }
 }
 Else
 {
 Write-Host “[Fail]” -ForeGroundColor Red
 Exit
 }
}
Function UploadAll(){
ForEach ($TempFile in Get-ChildItem $DefaultPhotoPath | Where-Object { $_.Extension -eq “.jpg” } )
{
$TempUserName = $TempFile.Name.substring(0, $TempFile.Name.Length – 4)
Write-Host $TempUserName -ForeGroundColor Yellow -NoNewLine
Import-RecipientDataProperty -Identity $TempUserName -Picture -FileData ([Byte[]]$(Get-Content -path $TempFile.Fullname -Encoding Byte -ReadCount 0))
Write-Host “[Done]” -ForeGroundColor Green
}
}If ( $all -eq $true)
{
Write-Warning ” ## This action will upload all pictures of C:\Photos to the AD users.”
Write-Warning ” ## All pictures must have the same name of the usernames”
Write-Warning “Are you sure that you want upload all pictures to the users (Y/N)?”
$Opt = Read-Host
If ( $Opt -eq ‘y’ ) { UploadAll; } Else { Write-Host “No changes were made.”; Exit }
}
Else
{
$PhotoPath = $DefaultPhotoPaty + $UserName + ‘.jpg’
CheckPhoto;
If ( $AbortMission -eq ‘$true’ ) { Write-Error “Please, review the errors and try again.” } Else { Import-RecipientDataProperty -Identity $UserName -Picture -FileData ([Byte[]]$(Get-Content -path $PhotoPath -Encoding Byte -ReadCount 0)) }
}
How to manipulate pictures using C#
If you do not want to use a script or a cmdlet to play with the thumbnailphoto attribute, you always can create your own application to do that. There is a Microsoft KB entitled How to Manipulate the ThumbNailPhoto Attribute of a User Object in the Active Directory and it can be found at this address http://support.microsoft.com/kb/292029. On this specific KB there is a sample of C# application that allows manipulation of that attribute.
How to remove the current picture?
Well, we have been working a lot to upload images to Active Directory but in some point of the process you will be asked to remove it, right? There are, in fact, a couple of easy ways to remove the display picture from a user object.
The first one that you may be thinking is to go the user’s properties and clear the value of ThumbnailPhoto and it will work just fine.
The first one is okay however we have a second option that is more elegant, we can use Set-Mailbox with –RemovePicture switch, the syntax is shown below:
Set-Mailbox <Mailbox> -RemovePicture
Conclusion
In this article we went over the process of how to configure and send photos to the end-users. The script is just a start point. You can be adapting that script to your needs or creating your own script to allow end-users to update their own personal images.
An example of the usage of that script has allowed end-users to save their own photo to a shared folder (they can just copy and paste to a shared folder, or a web application that allows them to upload their display picture) and then use a task scheduler task or something like that to run the uploadphotos.ps1 –all to update the display image to the Active Directory.
More information:
ThumbnailPhoto attribute by MSDN


The ThumbnailPhoto attribute is limited to 102400 bytes which means 10KB.
…wich means 10KB… Realy?
102400 bytes = 100KB