
SOURCE: TheDigitalArtist on Pixabay
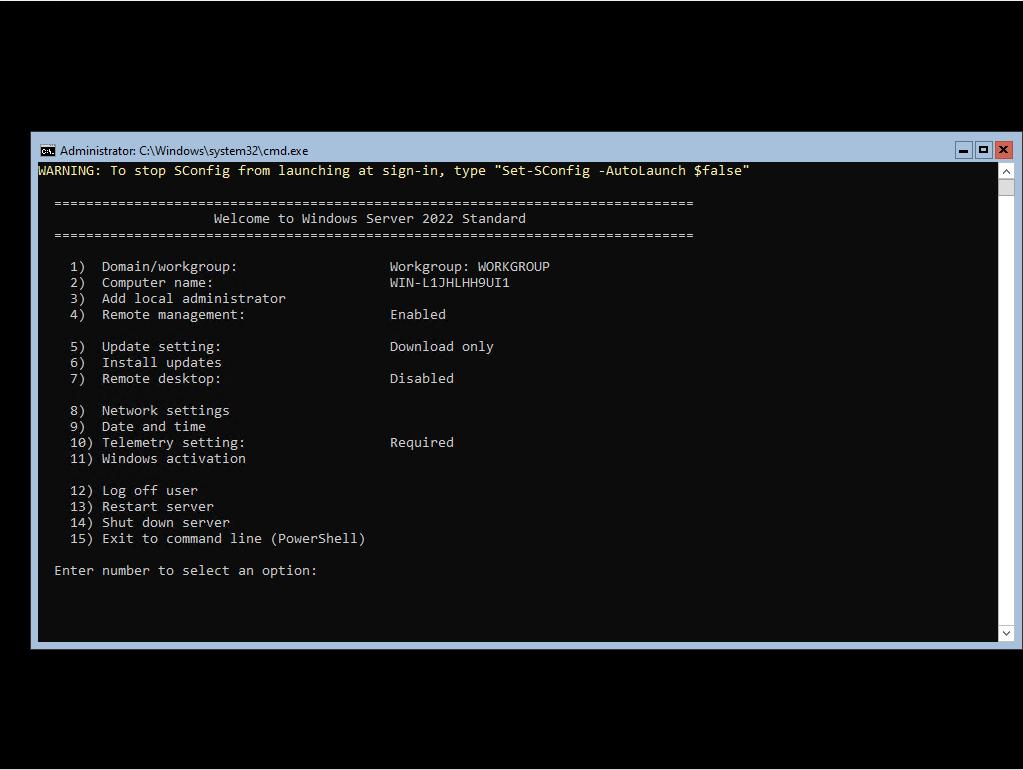
You’d think the process of deploying Microsoft’s Hyper-V couldn’t be simpler. Simply install Windows and then the Hyper-V role. Unfortunately, it really isn’t that simple. This is because you need to complete several other tasks to ensure a successful deployment. It’s also very easy to forget about these tasks.
That said, I’ve created a checklist of some easy-to-miss steps in the deployment process to help you get started on the right foot for Hyper-V. I also divided the checklist into categories, depending on which stage of the deployment process you’re in. After going over this checklist, you should be all good to go!
Before I Begin
Before I get started, consider the following:
- This isn’t intended to be a completely comprehensive checklist. Every Hyper-V deployment is different, so the required tasks will differ from one business to the next. I’ve based this checklist on my own experiences with deploying Hyper-V. Microsoft also offers a checklist, which you can find on its website
- Subtasks are beyond the scope of this checklist. For example, you can have numerous tasks associated with setting up failover clustering. These tasks go well beyond what I’m covering here
Alright, now that that’s all said and done, here’s the checklist!
Hyper-V Host Deployment Checklist
You’ll find 4 main checklist categories. As mentioned above, these categories depend on which stage of the deployment process you’re in. Underneath each category, you’ll find a checklist to ensure you don’t miss any important tasks.
1. Ensure Host Hardware Is Ready
First, you need to ensure that your host hardware is ready for provisioning. You could just take a new server out of the box, mount it in a rack, and install Windows. But you’ll be better off doing a little prep work before deploying an OS on a new server. Some tasks you might consider completing include:
- Update the server’s firmware to the latest version
- Verify that the host adheres to Microsoft’s hardware compatibility list for Hyper-V. Ensure that any additional hardware (such as PCIe cards) you install in the server also adheres to Microsoft’s hardware requirements
- Check if you need to update the firmware for any ancillary devices. These devices include NICs, storage controllers, or even hard disks. Note that firmware updates don’t exist for every hardware device
2. Use the Right OS
In this next step, you need to ensure you have the necessary Windows licenses and that you’re running an appropriate version of Windows Server. Here are a few things to consider:
- Ensure you have a Windows Server license for your Hyper-V server. The Windows Server edition you choose will majorly affect the overall cost. Windows Server Standard Edition, for example, only allows for one virtual machine (VM) per license. On the other hand, Windows Server Datacenter Edition licenses support multiple VMs
- Check if you have to stack your Windows Server licenses. For instance, a Windows Server Standard Edition license only supports up to 16 cores. The same applies to the Datacenter Edition. Servers with more than 16 cores will require additional licenses
- Purchase licenses for any VMs running an OS other than Windows Server. You need to do this even though Windows Server Datacenter Edition allows for unlimited VMs
- Purchase Client Access licenses (CALs) for each user or device accessing your server
- Run Hyper-V on a server-core deployment, which doesn’t include the Windows desktop. This is regardless of whether you’re running Windows Server Standard Edition or Datacenter Edition
- Install all available updates after installing Windows Server
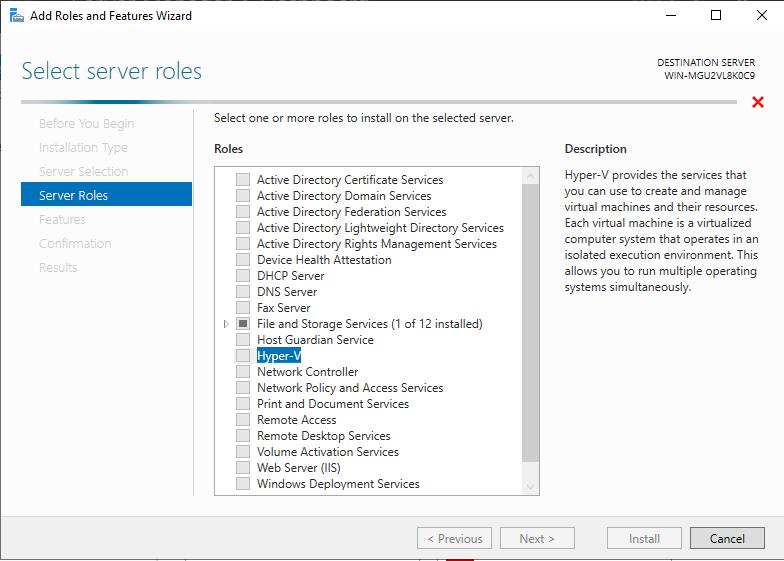
3. Install Hyper-V
Once you’ve installed and updated Windows, it’s time to install Hyper-V and the required supporting software, if any. Consider the following:
- Install the Hyper-V role manually. You can’t find Hyper-V installed by default with Windows Server. You also shouldn’t install any other Windows Server roles on the server
- Install the Failover Clustering Feature if the Hyper-V host will be a part of a failover cluster
- Install a backup agent on your Hyper-V server (you may require other configuration tasks for non-agent-based backup solutions) if you’re using a backup solution that requires the use of agents. Also, ensure you have the required licenses to back up an additional server
- Install antivirus and make sure that you exclude Hyper-V from the active scanning process. Microsoft maintains a list of the Hyper-V components you should exclude from malware scanning
- Verify you didn’t install any applications (other than low-level utilities such as antiviruses and backup agents) on the host OS
4. Finalize Post-Installation Tasks
Once you’ve installed Hyper-V and any required supporting software, you might need to work on some post-deployment tasks. Some of these tasks include:
- Join the Hyper-V host to a domain if doing so is appropriate for your business
- Enable management for your Hyper-V host and the VMs that will reside on it. The Hyper-V Manager is the default management tool for Hyper-V, but it isn’t the only option available. You can also manage Hyper-V using PowerShell or System Center Virtual Machine Manager. In addition, some businesses enable RDP on their host servers (to allow remote access), while others leave RDP disabled for security reasons
- Create or join the host to an existing failover cluster if you installed the Failover Clustering role
- Ensure the host adheres to your desired state configuration. Even if you don’t use Microsoft’s Desired State Configuration tool, you need to configure the host to adhere to your organization’s security policies
- Set the default virtual machine path to the appropriate location. The default virtual machine path points to the system drive by default, but you might need to redirect it
- Verify that the Windows clock and time zone are set correctly
- Adjust the power management settings as required by your business
- Enable the host for live migration
And we’re done! If you’ve reached this point, you’re probably all good to go in terms of Hyper-V host deployment. Let’s wrap up now.
The Bottom Line
Deploying Microsoft Hyper-V involves much more than just installing the Hyper-V role. You must complete several other tasks as well. These tasks range from preparing the server hardware and purchasing the correct software licenses to adjusting the server’s clock and power profile.
The checklist above gives you a good idea of the tasks that are easy to miss when deploying Hyper-V. You might want to save it as a reference for the future. Overall, I hope it proved to be useful to you and your business.
Do you have more questions about Hyper-V deployments and other related topics? Check out the FAQ and Resources sections below!
FAQ
What happens if I can’t see some of my server’s hardware listed on the Windows Compatible Products List?
If you can’t see a server or its connected hardware listed on the Windows Compatible Products List, that server may still be able to run Windows. An omission from the list doesn’t necessarily indicate that you’ll have problems getting Windows to work properly. It means that Microsoft hasn’t certified the hardware for use with Windows. In other words, Microsoft doesn’t guarantee that Windows will work properly on the device.
What should I worry about when running Windows on hardware that isn’t on the Windows Compatible Product List?
You shouldn’t worry about any issues from a licensing perspective. But if you experience problems, you may have trouble getting Microsoft support to resolve the issue if they suspect it lies with your hardware. You may also have difficulty explaining to your boss why you chose to run a production workload on non-certified hardware.
Can I run Hyper-V on Windows Server Essentials?
Yes, Windows Server Essentials does support Hyper-V. However, Windows Server 2022 Essentials is only available from an OEM. You can, however, purchase Windows Server 2019 Essentials licenses from Microsoft.
Why does Microsoft recommend against installing other roles alongside the Hyper-V role?
They recommend against it for several reasons. For one, doing so might weaken security or diminish performance. One of the main reasons Microsoft recommends against installing the Hyper-V role with other roles is that those additional roles could result in more frequent update-related reboots.
Why is it important to adjust a Hyper-V server’s power management settings?
While it’s true that electricity is one of a data center’s greatest costs, minimizing a Hyper-V host’s power consumption can adversely affect the server’s performance. As such, it’s a good idea to balance power efficiency and server performance.
Resources
TechGenix: Article on Failover Clusters
Learn how to create a failover cluster in System Center Virtual Machine Manager.
TechGenix: Article on Deploying Windows Admin Center without Internet
Find out how to deploy the Windows Admin Center if your hosts aren’t connected to the internet.
TechGenix: Article on Virtualization vs Containerization
Read about the differences between virtualization and containerization and which is better for you.
Microsoft: Article on Power Plans and Slow Server Performance
Discover why using the wrong power plan can degrade your server’s performance.
Microsoft: Article on Hyper-V Live Migration
Check out how Hyper-V’s live migration works.


