You “surf” the Internet, you hear about “Intranet” and like to create now your own Website, on your own small network ?
1) Implementation via Network-access and Browsing Files
just create a directory for the WWW-data and Share it out for “Read-Access”:

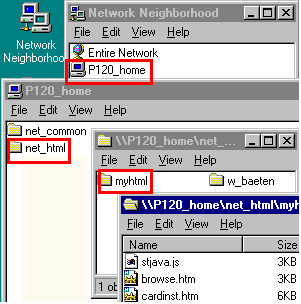
In this example, I called the directory for the WWW-data “NET_HTML”, which will be shared with “Read-Only” Permissions, in addition, I created a directory “NET_COMMON” with “Full-Access” permissions for data-exchange on the network.
Copy your WWW-data to the shared “NET_HTML” directory, which you access now on other systems via the “Network Neighborhood“:
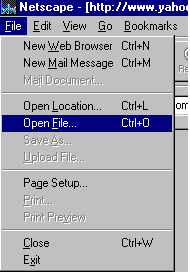
You could now map a Network-drive. When now starting your Internet Browser, press the “STOP”-button and then select from the File-menu: “Open File“:
Select now the Network-drive (if you mapped one) or “browse” now from here the Network:

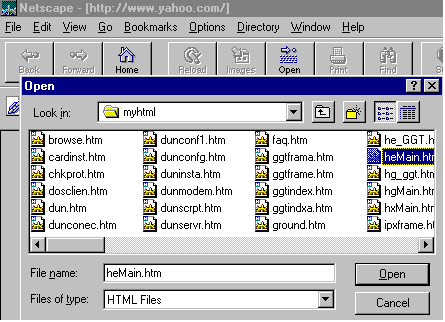
Until you find the Web-Page, from which to start your “surfing”. Limitation: when browsing via directly reading from the disk, you will not be able to use any server-based Scripting (like ASP). That requires a Webserver processing such scripts before transmitting the
pages to the Web-browser for display.
2) Using the “Microsoft Personal Webserver”
Update: You can download the “Option Pack for Windows95” with a new version of PWS, which is equivalent to the PWS provided with the Windows98 CD-ROM.
The first method used regular network access and works therefore with any protocol. But if you insist on using a “REAL” Webserver (like the “Microsoft Personal Web Server”, often just referred to as “PWS“, downloadable from the Microsoft Website under “Free Downloads” / ” Windows95“), you have first to make a CLEAN TCP/IP-setup ( see also : TCP/IP basics):
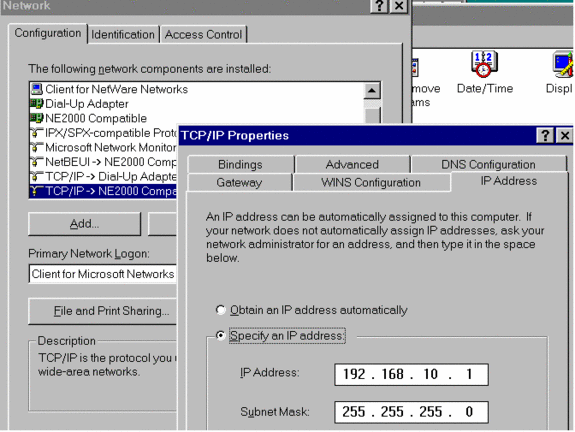

Configure your local Network card with a “Static” TCP/IP address (see above), while your “Dial-Up Adapters” (on the left) are usually configured to obtain their IP address automatically, when they connect to their ISP, which then assigns via DHCP the IP-address.
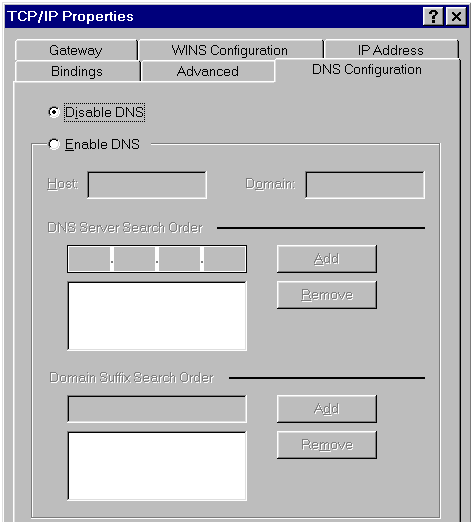
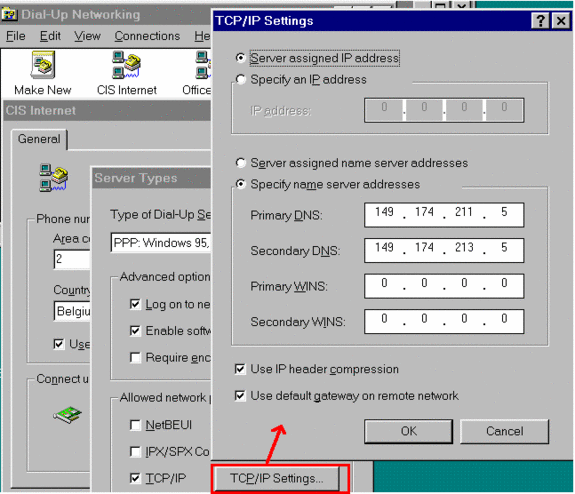
But make sure, that in the TCP/IP properties for ALL adapters the “DNS Configuration” is DISABLED, unless you are connected to a server with an active DNS-system. The fields for “Host” and “Domain” should be empty (Otherwise the MS PWS will give you a very hard time!) But since you MUST have a DNS-specification for your “Dial-Up Adapter“/Internet connection, define the DNS-addresses are part of the Properties /Server/TCP-settings of the Dial-Up connection.

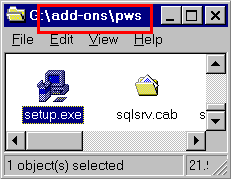
Personal Web Server (PWS) is included on the Windows98 CD-ROM in:
\add-ons\PWS, just run the SETUP.EXE
Now, that we have a “Clean” TCP/IP” setup, we can install the Microsoft PWS:

After the reboot, PWS is part for your Network-configuration:

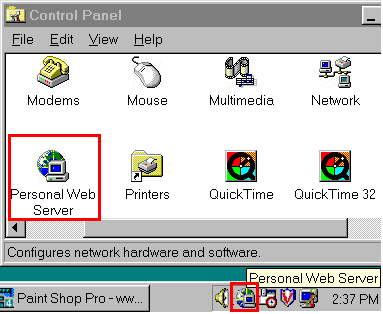
In the properties, you can only define, whether to use “local Security” (which you have to do on a Win95 PC-to-PC network) or not (when you are connected to a server, from where you can “borrow” the Security system). There is now a new icon in your task-bar and your “Control-Panel”:
Look at the Properties of the PWS:

It define the name of your Web-Server (which is based on your computer name) and your Webserver-Root directory. Copy your Web-pages to your Web-root directory (in this case: C:\WebShare\WWWRoot) and make sure, that your main-page is called “DEFAULT.HTM”. Done!

You are now ready to browse your own new Website: Start your Web-Browser and enter as address the IP-address of the system hosting PWS:

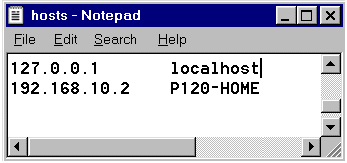
If you edit in ‘C:\WINDOWS’ your “HOSTS” file (if it is not present, copy/rename it from “HOSTS.SAM”) and enter the IP-address together with the system-name, you can use your system name as URL-address:

If you do not like the PWS-default setup, you can start the PWS-Administration from the PWS-properties:

PWS is now generating temporary HTML-pages and starts up your Web-Browser to display them:
If your “Dial-Up Adapter Connect To” screen pops up, just select “Cancel”. If you followed now my advise to make a CLEAN TCP/IP-setup, you get the PWS-main-page:

As example, you could change the location of your Web-Root directory or the Default-main-page:

Just be aware about a limitation of PWS, if you have on your system also the “File and Print Sharing for Microsoft Networks” installed:

You cannot create your own “User-List”, unless you de-install the “File and Print Sharing”. PWS can also be configured to create an FTP-site, but that is a different story, which I will not anymore explain here. For usage of FTP,see FTP : File Transfer Protocol


this post was made before i was born
go to bed you noob child