If you missed the first part in this article series please read Re-installing the Cluster nodes in an Exchange 2007 CCR-based Mailbox Server Setup (Part 1).
Introduction
In the previous article, we uninstalled the passive clustered mailbox role from the first CCR node, evicted the node from the Windows cluster and then re-added the node to the Windows cluster after the operating system had been re-installed and configured accordingly.
In this part two of this articles series, we can move on where we left off in part one by installing the passive mailbox role. To do so, launch Exchange 2007 Setup.exe, and then click Install Microsoft Exchange Server 2007 SP1 (Figure 2.1).
Note:
The clustered mailbox server in the lab I’m using for the purpose of this article is running Exchange 2007 SP1, which is why I use the Exchange Server 2007 SP1 binaries to re-install the passive Mailbox role. If you’re CMS haven’t yet been upgraded to Exchange 2007 SP1, it’s important you use the Exchange 2007 RTM binaries to re-install the passive Mailbox role.
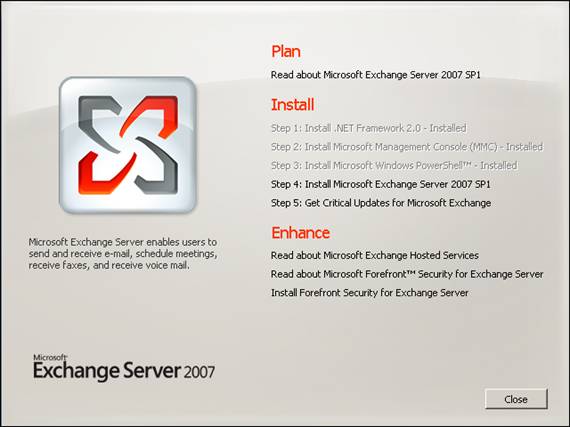
Figure 2.1: Exchange Server 2007 SP1 splash screen
On Introduction page, click Next > accept the License Agreement and click Next. Decide whether or not you want to enable error reporting, and then click Next once again.
On the Exchange 2007 Setup Installation Type page, select Custom Exchange Server Installation and click Next (Figure 2.2).
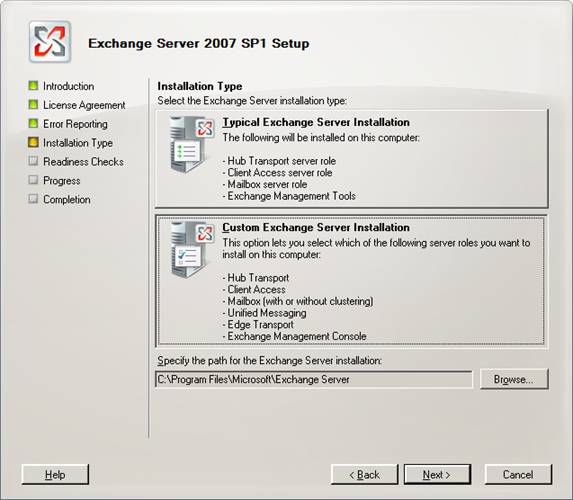
Figure 2.2: Selecting a Custom Exchange Server Installation
Now tick Passive Clustered Mailbox Role. If you installed the Exchange 2007 binaries at another location than the default, this is also the page on which you change the installation path (Figure 2.3). Click Next.

Figure 2.3: Selecting Passive Clustered Mailbox Role and specifying the Installation path
The readiness checks will now be performed. This will normally complete without any issues or errors, but if you like me forgot to remove the database and log files from the Database or Log file LUNs, you’ll receive an error similar to the one shown in Figure 2.4.

Figure 2.4: Readiness Check error as databases are present on the database LUN
When removed, you should see a Readiness Checks page like the one in Figure x (of course without the 32-bit version warning). Click Install.
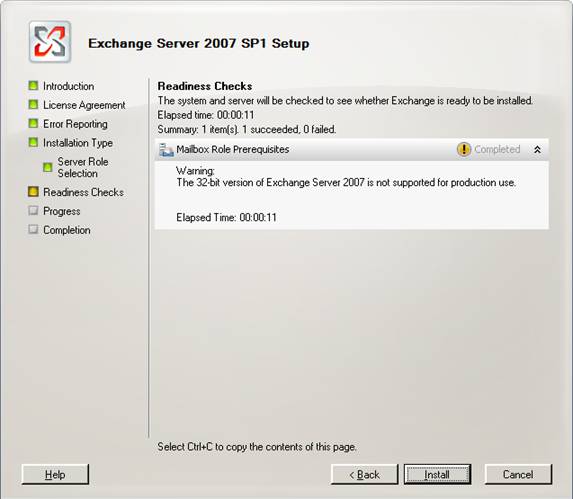
Figure 2.5: Readiness Checks Completed Successfully
The installation process will now begin and after a few minutes you should get a completion page as shown below (Figure 2.6).
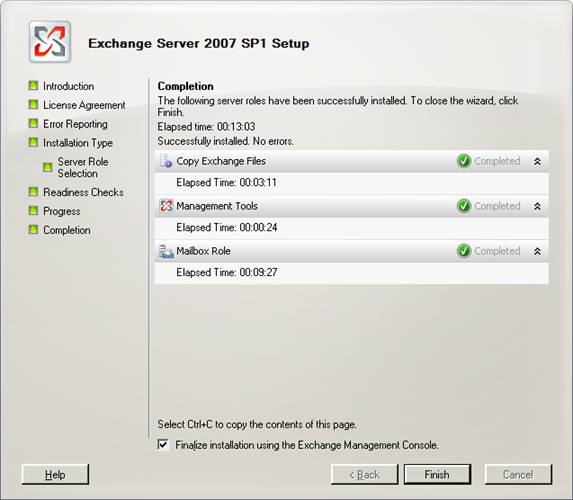
Figure 2.6: Installation of Passive Clustered Mailbox Role installed successfully
Now that the Exchange 2007 SP1 binaries have been installed, we must reboot the node before continuing with the next steps.
Next step is to reseed the storage group copies, so that the CCR node gets up to date replicas of each the active databases. This can be done using the Exchange Management Shell and when speaking Exchange 2007 SP1 the Exchange Management Console (EMC) UI. In this article, we’ll use the EMC UI, so launch the EMC. In the EMC, select the clustered mailbox server under the Server Configuration work center. As we can see in Figure 2.7 below, the copy status is currently in a failed mode, which is expected.
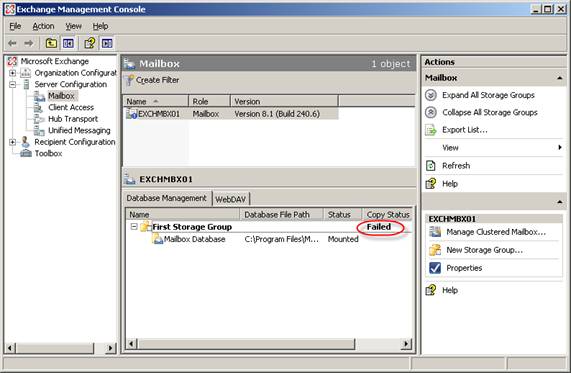
Figure 2.7: Copy status is currently in a Failed state
If we open the Property page for one of the storage groups and click on the Cluster Continuous Replication tab, we can also see that no logs have been copied to the newly installed CCR node.
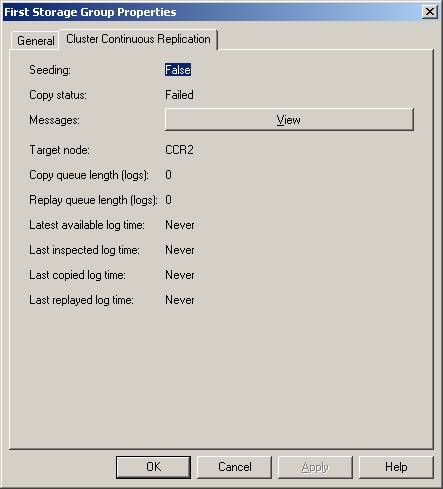
Figure 2.8: No logs have been copied to the new CCR node
To seed the passive node, select a storage group and click Update Storage Group Copy in the Action pane (Figure 2.9).
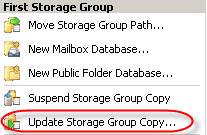
Figure 2.9: Update Storage Group Copy
On the Update Storage Group Copy Introduction page, click Next (Figure 2.10).
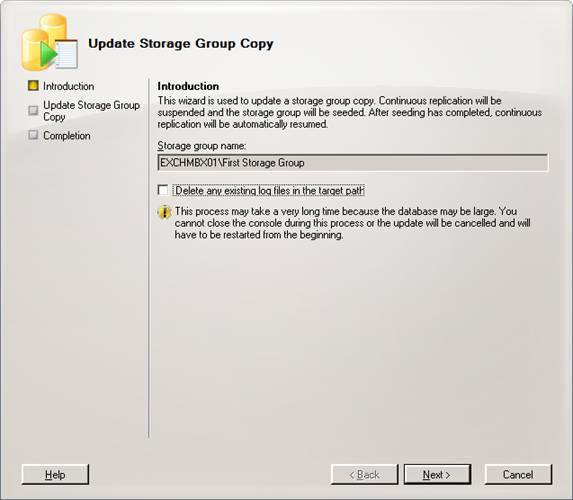
Figure 2.10: Update Storage Group Copy Wizard
On the Summary page, click Update (Figure 2.11).
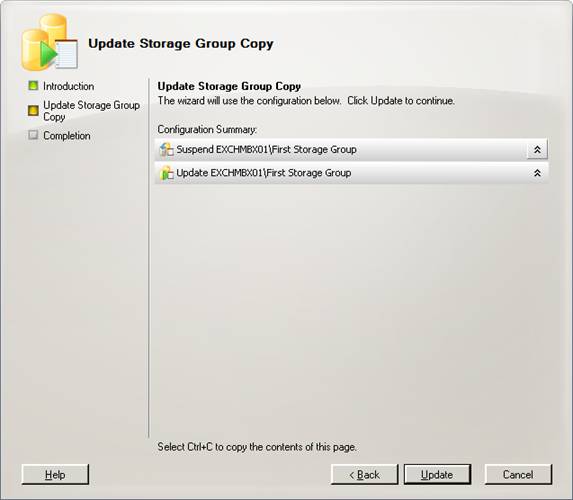
Figure 2.11: Update Storage Group Copy page
If you receive the warning shown in Figure 2.12, click Yes.
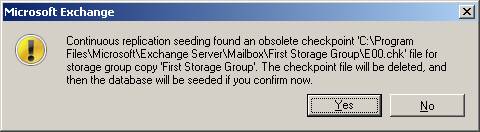
Figure 2.12: Checkpoint File Warning
After a while (depending on the size of the databases) you’ll be taken to the Completion page (Figure 2.13), where you simply click Finish.
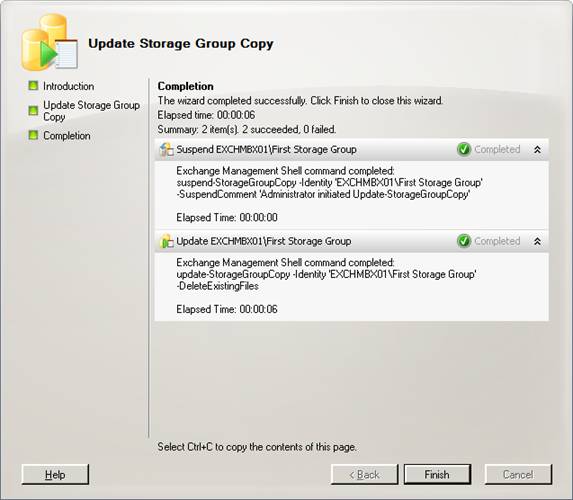
Figure 2.13: Completion page
The storage group will now be in a healthy state (Figure 2.14) and any log files will have been copied to the passive node (Figure 2.15).
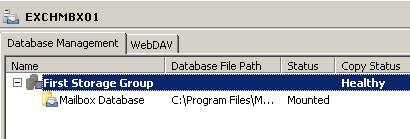
Figure 2.14: Healthy Copy Status
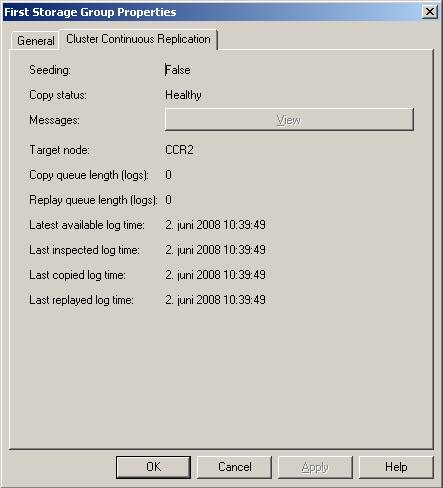
Figure 2.15: Log file copy dates updated
You must run the Update Storage Group Copy wizard for any existing storage groups.
Re-installing the Second CCR Node
Time has come to re-install the second CCR node. Since the steps are identical to the ones we went through in order to re-install the first CCR node, I won’t repeat them. Just go back to part one of this articles series and follow each step until you end up here again.
Summary
As you have seen throughout this article, although CCR-based clustered Mailbox server scenarios can be complex, it is a straightforward task to re-install the nodes in such as scenario. But with that said, if you do not follow the right steps in the right order, your day (or perhaps week!) can quickly be ruined. This article helps you through the process without any downtime to your end users at all.
If you missed the first part in this article series please read Re-installing the Cluster nodes in an Exchange 2007 CCR-based Mailbox Server Setup (Part 1).


