Introduction
With Exchange Server 2007 Microsoft introduced the Exchange Powershell Administration interface. Most administrative tasks can now be performed using Powershell commands and even the GUI creates Powershell commands from the GUI interface.
Starting with this article I will introduce this powerful tool to you and start a series which will take an in depth look at some of the tasks that can be performed. We will look at how to administer Exchange Server 2007 from the command shell. First, we will start with the general administrative tasks an Exchange Administrator performs during his general working day with some examples of how they work.
Creating new Mailboxes
Let’s take a look at how to create new Mailboxes with the Powershell CMDLet “New-Mailbox”. The syntax is:

Figure 1: Syntax of New-Mailbox Cmdlet
As you can see in the figure above there are a lot of attributes that can be used but you do not need to use all of them. Only a few are mandatory.
As a first example, we will create an Active Directory User named “John Doe” and the corresponding mailbox for him. The mailbox is located on First Storage Group, in Mailbox Database. The password not specified so the Exchange Management Shell will ask for it. In addition it must be reset at the next logon.
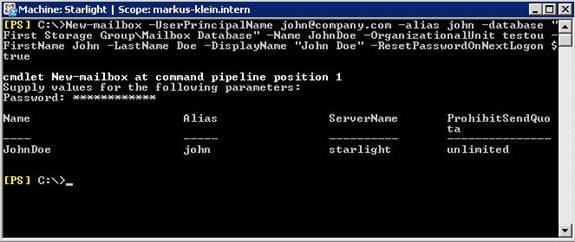
Figure 2: Creating a User using the New-Mailbox Cmdlet
The next example shows how to create a user in Active Directory and a resource mailbox for laser pointer equipment. The resource mailbox is located on First Storage Group, in Mailbox Database. The password must be reset at the next logon. The Exchange Management Shell will prompt you for the value of the initial password, because it is not specified.
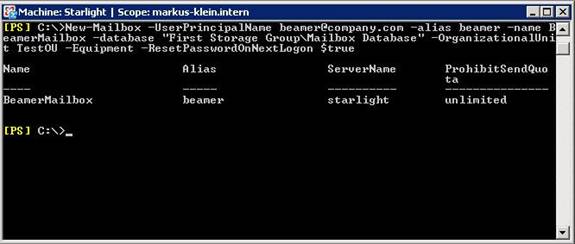
Figure 3: Creating an Equipment Mailbox using the New-Mailbox Cmdlet
Removing a Mailbox
Another interesting everyday day task is removing a mailbox. As you will see, this is quite easy, too. Here is the syntax:
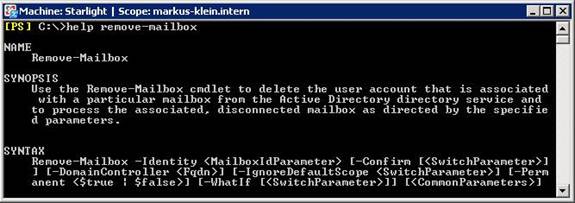
Figure 4: Syntax of the Remove-Mailbox Cmdlet
Let’s take a look on how to disconnect a user mailbox from a user account and remove it from Active Directory. The mailbox will remain in the Exchange database for the deleted mailbox retention period configured for the mailbox database.
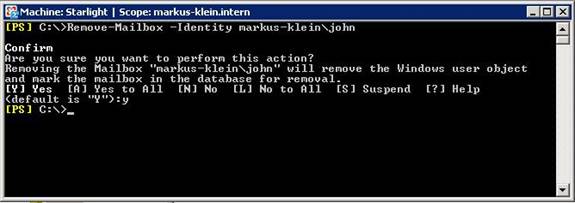
Figure 5: Disconnection a mailbox from a user account and removing it from Active Directory
So within this example you will see that there are questions from the management shell that try to make sure that you know what you are trying to do. So there is only a minimal risk using the Exchange Management Shell.
Modifying Mailbox Settings
Now let’s take a look at another more complex CMDLet called “Set-Mailbox”. Here is the complete syntax:
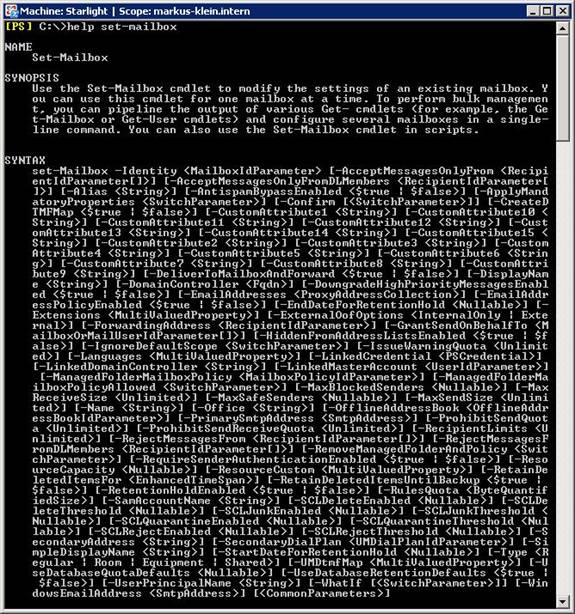
Figure 6: Syntax of the Set-Mailbox Cmdlet
As you might have recognized from all the syntax, this is a really powerful Cmdlet and you can do a lot of tasks using it. It can be used for:
- Configuring to accept only mails from specific users
- Configuring to be able to send only mails to specific recipients
- Linking Mailboxes to specific users
- Configuring email addresses for users
- Setting retention periods
- And many others
As a first example we will look at how to forward John Does’ e-mail messages to Jane Doe’s ([email protected]) mailbox.
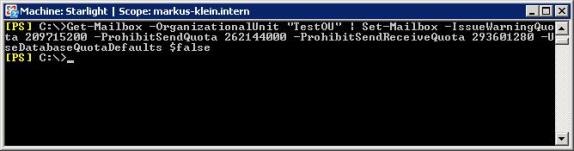
Figure 7: Configuring a forwarding address for John
Now we use the Get-Mailbox command to find all the mailboxes in the TestOU and then use the Set-Mailbox command to configure these mailboxes. The custom warning, prohibit send, and prohibit send and receive limits are set to 200 megabytes (MB), 250 MB, and 280 MB respectively, and the mailbox database’s default limits are ignored. This command can be used to configure a specific set of mailboxes to have larger or smaller limits than other mailboxes in the organization.
Figure 8: Configuring a mailbox limits (1)
A third example uses the Get-User command to find all users in the TestOU department and then uses the Set-Mailbox command to change the maximum message size for sending messages up to 2 MB.
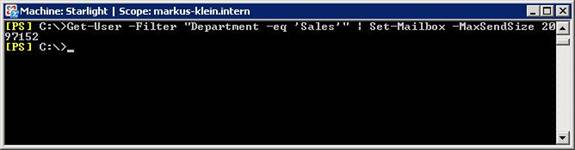
Figure 9: Configuring a mailbox limits (2)
Moving a mailbox
Next we will have a look on how to move a mailbox using the “Move-Mailbox” CMDLet. The syntax is:
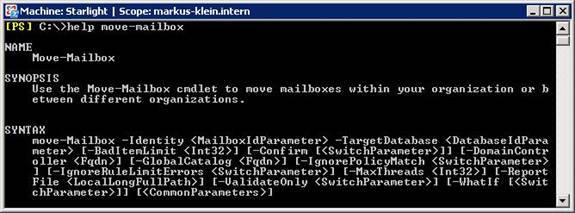
Figure 10: Syntax of the Move-Mailbox Cmdlet
This Cmdlet is very important during migration phases, too. You can configure the move mailbox commands directly from Powershell Scripts. When you are migrating from Exchange Server 2000, there is no other way to move mailboxes to Exchange Server 2007, because the Exchange System Manager from Exchange Server 2000 does not support this operation like it does with Exchange Server 2003.
But as you will see in the following example it is very interesting during the normal administration tasks for example to move a mailbox to another mailbox database on the same server or another server in the same or another Active Directory forest.
Now we will use the Move-Mailbox to John Doe’s mailbox ([email protected]) to a new mailbox database named TestMBX and you will recognize that it is not very hard to do.
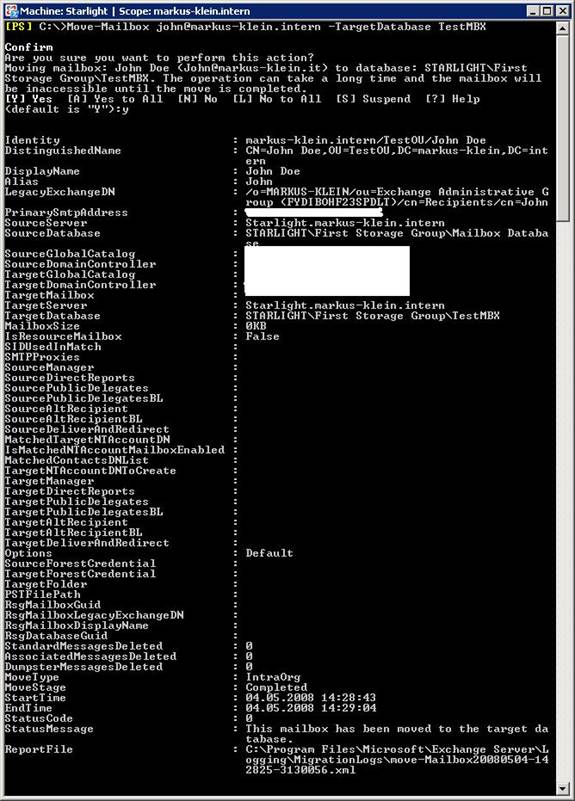
Figure 11: Moving a mailbox to another Mailbox Database
Displaying user mailbox size
A final task for this article is to display the mailbox size of a user. The complete syntax is as follows:
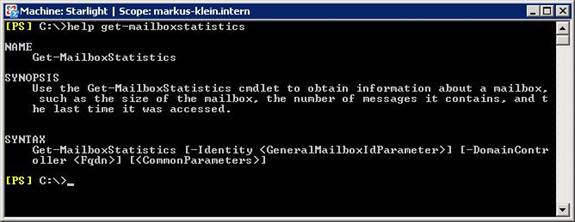
Figure 12: Syntax of the Get-MailboxStatistics Cmdlet
First we will retrieve the mailbox statistics for all mailboxes on the local server.
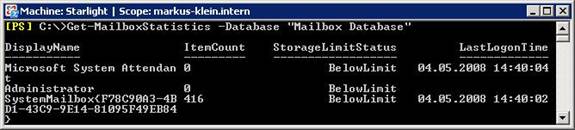
Figure 13: Retrieving all Mailbox information of a specific database
Using Pipes you will have an easy way to generate mailbox statistics that can be saved as a Microsoft Excel File or HTML. This makes it quite easy to distribute it to users using Email or an Intranet, because if you currently do not have this problem it might pop up within the next months: Your users will have increasing amounts of mailbox data so they will soon exceed their mailbox quotas.
Conclusion
As you have seen the administration of Exchange Server 2007 is quite easy using the complex Powershell CMDLets. They are quite easy and logical, so you do not have to blow a fuse while using them. And if you do not know the syntax for each cmdlet (which is quite normal for every administrator or consultant), the help command will show you how to use it properly.
If you still have more questions, please do not hesitate to contact me directly.


