Although Windows 11 was officially released on Oct. 8, 2021, many people are finding that Windows Update simply is not giving them the option to upgrade from Windows 10 to Windows 11. There are two main reasons why you may not see the option to upgrade to Windows 11. The first reason is that many PCs do not meet the minimum hardware requirements. I’ll be talking more about that one later. The other reason is that Microsoft is staggering Windows 11 upgrades, so it may take some time before Windows 11 shows up as a Windows Update option, even if your PC meets the minimum requirements.
Performing an in-place upgrade
If you find yourself unable to use Windows Update to upgrade a Windows 10 PC to Windows 11, you can create Windows 11 installation media and use it to work around the problem.
You can download the Windows 11 installation media directly from Microsoft. The site offers three options for those who want to bypass Windows Update and go ahead and upgrade to Windows 11, as shown in the image below.
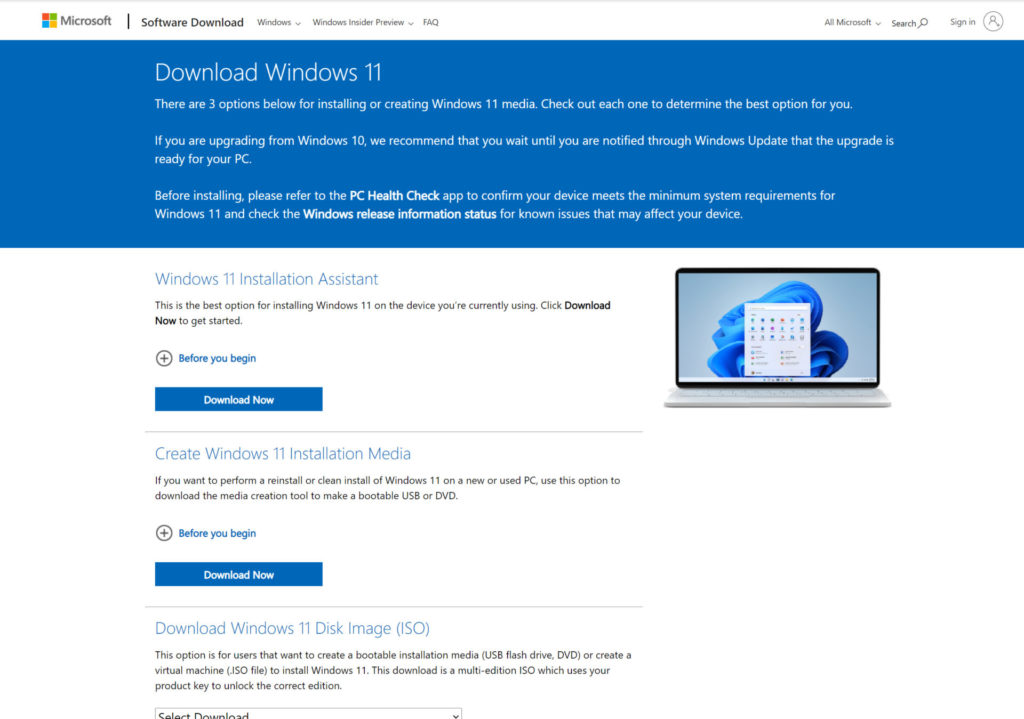
The first option is to use the Windows 11 Installation Assistant. The Windows 11 Update Assistant gives you an upgrade experience that’s somewhat similar to that of using Windows Update to upgrade to Windows 11. You don’t have to worry about downloading installation media or anything like that. Instead, the tool simply performs an in-place upgrade directly from the cloud.
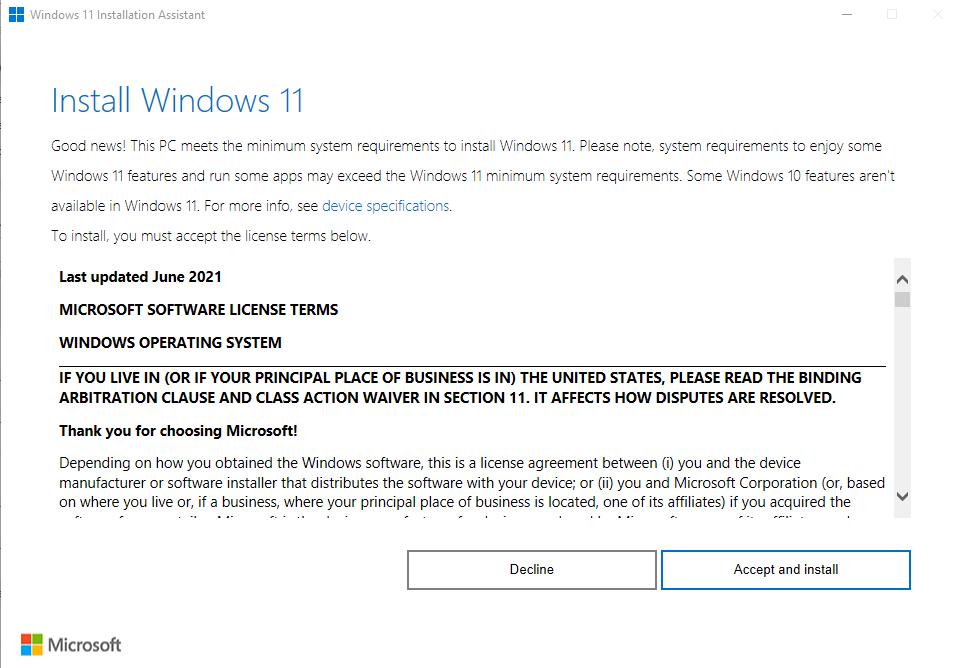
The first thing that the Windows 11 Installation Assistant does when you run it is to perform a quick health check on your PC. If the Installation Assistant discovers that your PC meets the requirements, it will display a screen like the one below, prompting you to accept the Windows 11 license agreement. Upon doing so, the installation process will begin.
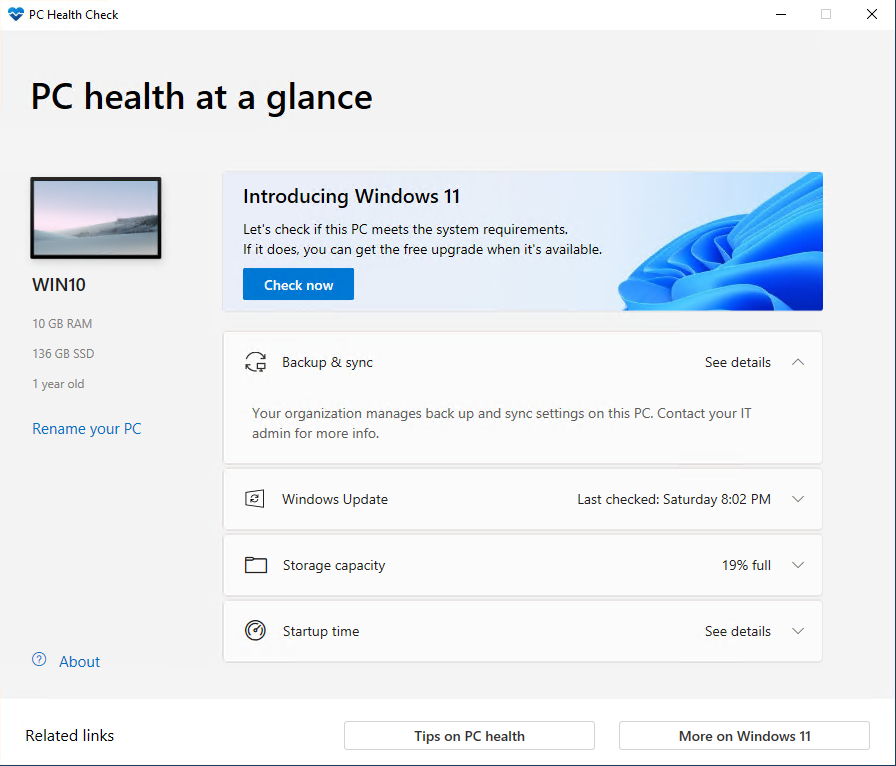
On the other hand, if the Windows 11 Installation Assistant finds that your hardware does not meet the required specs, you will be prompted to run the Windows PC Health Check app. You can download the app here. As its name suggests, the Windows PC Health Check app is designed to check your system to see if it is ready for Windows 11. Just install the app and then click the Check Now button, shown in the next image.
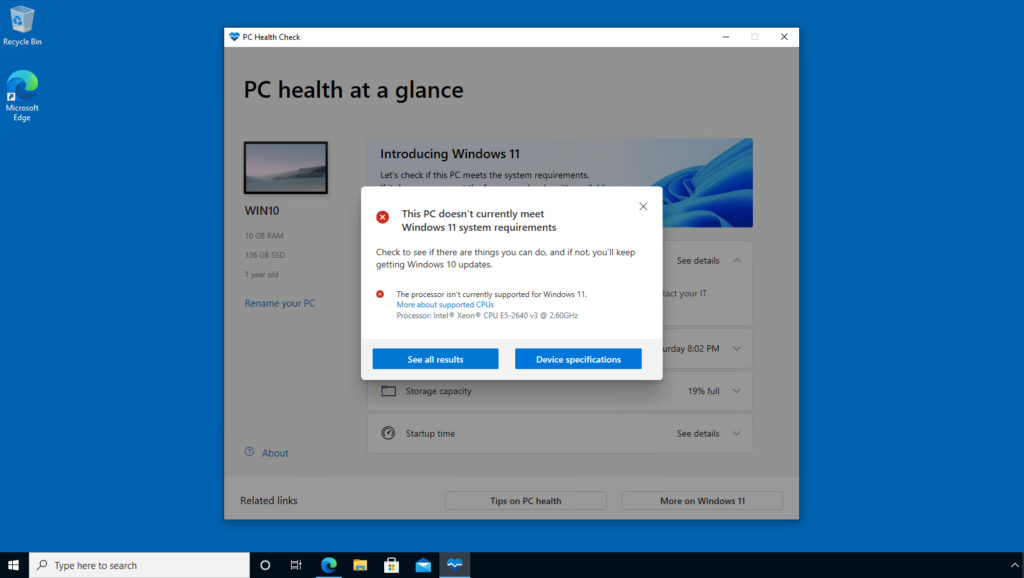
If there are issues preventing you from upgrading your PC to Windows 11, those issues will be displayed in a results window like the one below.
So what happens if you receive a warning message like the one shown above indicating that your hardware is not Windows 11 compatible? If that happens, then you have three options:
- Stick to using Windows 10
- Buy a new PC that is Windows 11 compatible
- Install Windows 11 anyway
Yes, installing Windows 11 onto a PC that does not meet the Windows 11 hardware requirements is often possible. However, Microsoft strongly discourages you from doing so. According to Microsoft, installing Windows 11 on a device that is listed as being incompatible can result in reliability and compatibility issues. However, what’s even more troubling is that if you choose to go ahead and install Windows 11, then Microsoft does not guarantee that you will receive any Windows 11 updates, including security updates. In other words, you should force a Windows 11 installation at your own risk.
As you may recall, the Windows 11 download page included two additional options. One option was to create installation media, and the other was to download an ISO file. During the Windows 11 Preview phase, you could simply download or create an ISO file and then use it to install Windows 11 even if the hardware didn’t quite pass muster. However, when Microsoft eventually released Windows 11, they built the hardware compatibility checks into the installation media, so this technique no longer works.
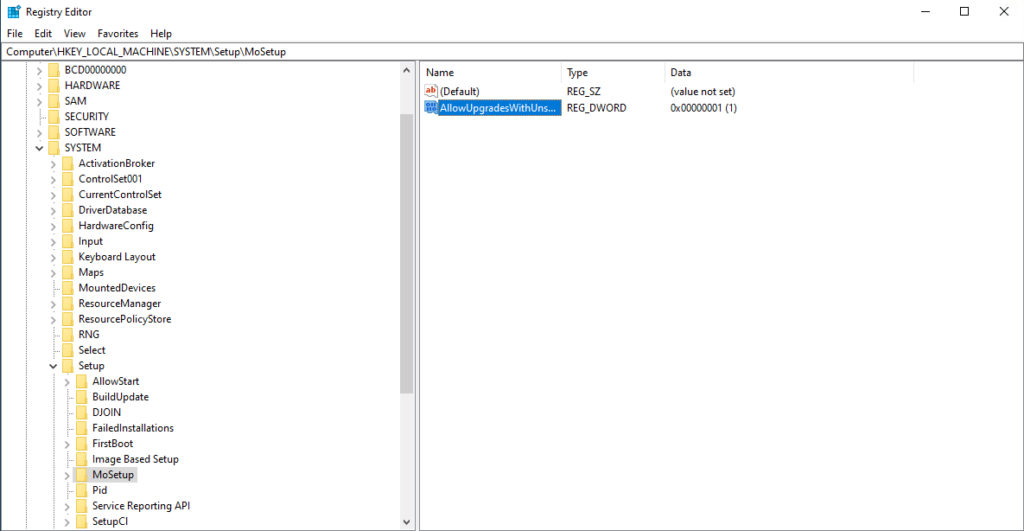
What you will need to do as an alternative is to open the Registry Editor and navigate to HKEY_LOCAL_MACHINE\SYSTEM\SETUP\MoSETUP. Now, right-click on MoSETUP and select the New | DWORD (32-Bit) Value options from the shortcut menu. The new value you are creating needs to be named AllowUpgradesWithUnsupportedTPMOrCPU, and its value must be set to 1, as shown below. There is no need to reboot the PC following the creation of this registry key.
In case you are wondering, if you try to install Windows 11 on unsupported hardware (from the installation media) without first creating the registry key, you will get the error shown below.

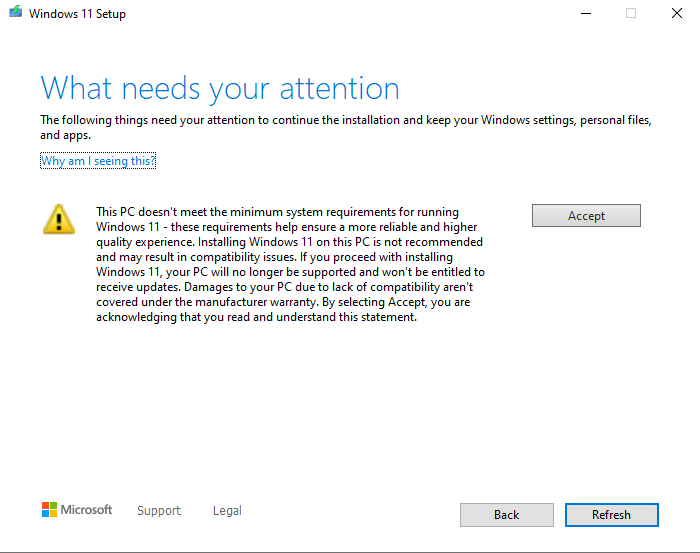
Creating the registry key doesn’t completely get rid of any error messages. Instead, you will end up seeing a stern warning message like the one shown below, and you will have to acknowledge and accept the risks to install Windows.
So what happens if you force a Windows 11 installation, experience problems, and end up wishing that you had stuck with Windows 10? Well, if it has been less than 10 days since you upgraded, you can roll your system back to Windows 10. To do so, just go to Settings and then click on System, followed by Recovery. As you can see in the next screenshot, there is an option to go back to Windows 10.

Keep in mind that when you downgrade to Windows 10, you may end up having to reinstall some of your apps. You will also lose any changes that you have made since upgrading to Windows 11. If you’re past the 10-day rollback limit, you may be out of luck. Which is why you should do a complete system image backup of your Windows 10 computer before installing Windows 11. Then you can downgrade at any time by restoring the system image.
Featured image: Shutterstock