Azure DevOps has built-in support for Wiki, which gives a lot of flexibility to document the entire project from a single location. There was a time that your documentation was a Microsoft Word document in a file server, which in most cases, only the author could remember its location and use. Using Azure DevOps, we can control the overall project, document, store the files, keep track of the changes, and have automatic build and releases in a single platform that is available on the Internet and works with your Windows, Linux, and Mac the same way.
The Azure DevOps Wiki uses markdown language, which was was created in 2004 by John Gruber in collaboration with Aaron Swartz, and it has been used in GitHub and Azure DevOps.
The language is not a complete language aimed at replacing HTML. The goal was to keep it easy to write and read, and there is some syntax that emulates the most common HTML tags. We are going to see a few examples of markdown language, and after that, we will be ready to create and format our documentation.
It is important to remember the hierarchy in Azure DevOps. You can have multiple organizations, and each organization may contain several projects. Every single project has a Wiki. The boundaries of a Wiki are at the project level and not the organization. Keep that in mind when planning your documentation structure.
Markdown language summary
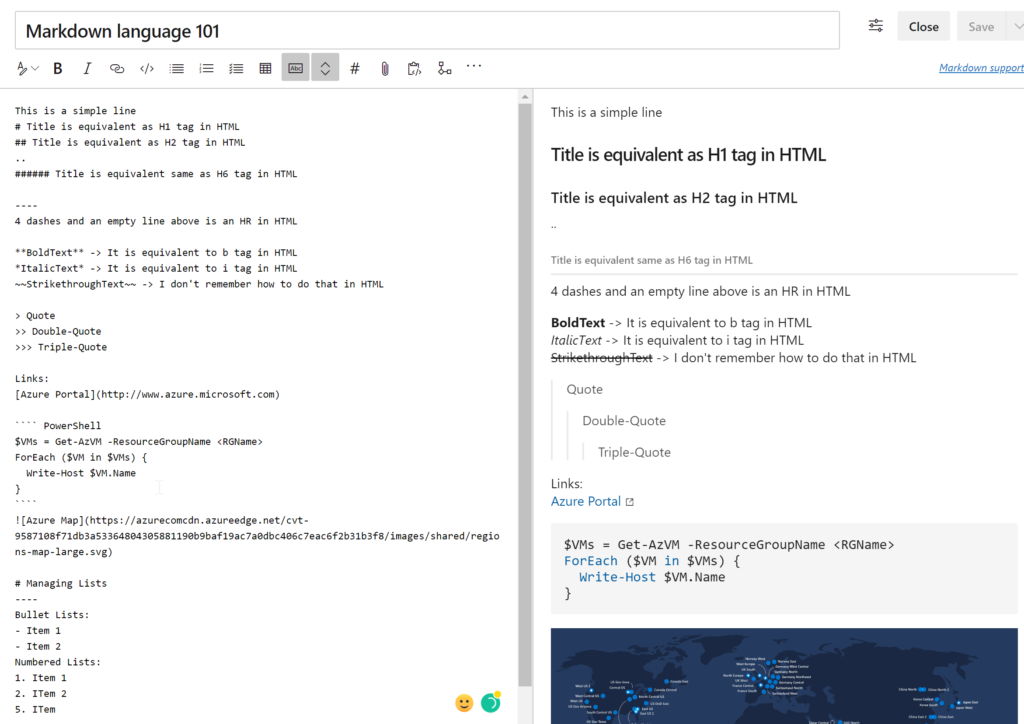
The following summary may help you to understand the differences between markdown language and HTML. Start typing on the Azure DevOps Wiki page, and as you need some formatting resources, check the table below.
You will be writing in markdown language quickly. Just allot some time to memorize the characters required to format text.
| Item | HTML equivalent | Markdown language |
| Heading | <h1>Title H1 </h1> | # Title H1 |
| Heading* | <h2> Title H2 </h2> | ## Title H2 |
| Horizontal Line | <hr> | <empty line>
—- |
| Text in Bold | <b> Text in bold </b> | **Text in bold** |
| Text in Italic | <i> Text in Italic </i> | *Text in Italic* |
| Text in strikethrough | <strike>Text strike</strike> | ~~Text strike~~ |
| Quote | – | > Quote Level 1 |
| Quote | – | >> Quote Level 2 (indented) |
| Links | <a href=http://www.azure.microsoft.com>Azure Portal </a> | [Azure Portal](Http://www.azure.microsoft.com |
| Code | <code>Get-AzVM</code> | ““ <Language Optional><code>
““ |
| Image | <img src=http://address.ca/img.svg> |  |
| Unordered List | <ul> <li> Item 01</li> </ul> |
– Item 01 |
| Ordered List | <ol> <li>Item Numbered 01 </li> </ol |
1. Item Numbered 01 |
* Heading can go up to H6 in HTML and in Markdown we represent with six ######
We will cover the details in Azure DevOps in our next section, but for now we can see on the left side the code in markdown language and how would be the output on the right side. That is going to be the experience to the user reading the document.
Creating your first AzureDevops Wiki
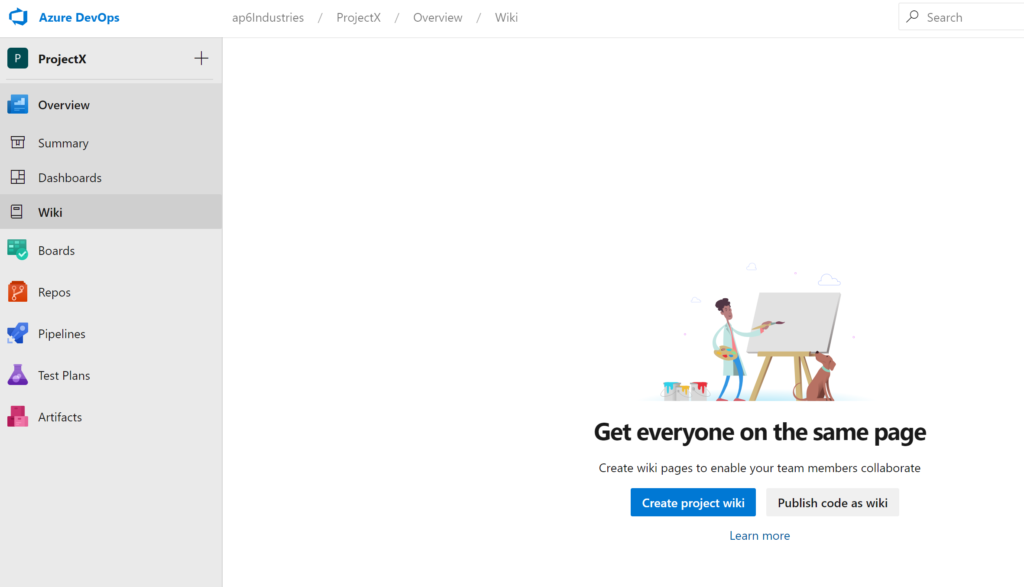
By default, any new project does not have any Wiki configured, and we can create them in two different ways: WikiProject or a Wiki as Code. We can also combine them to get the benefit of both worlds.
Let’s start creating a WikiProject, which creates a Repo Git to store all information about the Wiki, including the .md files, images, and so forth. Although it is a repo, it is hidden from view, which means that you cannot access it through repos or even project settings.
If you are as curious as I am, then you can access going to this website: https://dev.azure.com/<OrganizationName>/<ProjectName>/_git/<ProjectName>.wiki (Item 1). The master branch for this repo is called <ProjectName>.wiki (Item 3) and we can see every single page created through the portal being an individual .md file (Item 2)

Note: At the time of writing, there is no easy way to delete a WikiProject. The result will be the editor to create a new page, where we can start writing in our markdown language to start the documentation of our project.
Using the Azure DevOps Portal to manage your Wiki is a breeze. On the left side, we can create a page using the New page (Item 1) button, and the new page will be added at the same level of the pages that are being listed above (parent level).
We can also create sub-pages to an existent page, and it helps to nest documentation on the same thread. To do that, click on the ellipsis on the desired page (item 2), and click on Add sub-page (item 3).
In the same location, we can change the order of the pages by dragging and dropping them as we see fit.

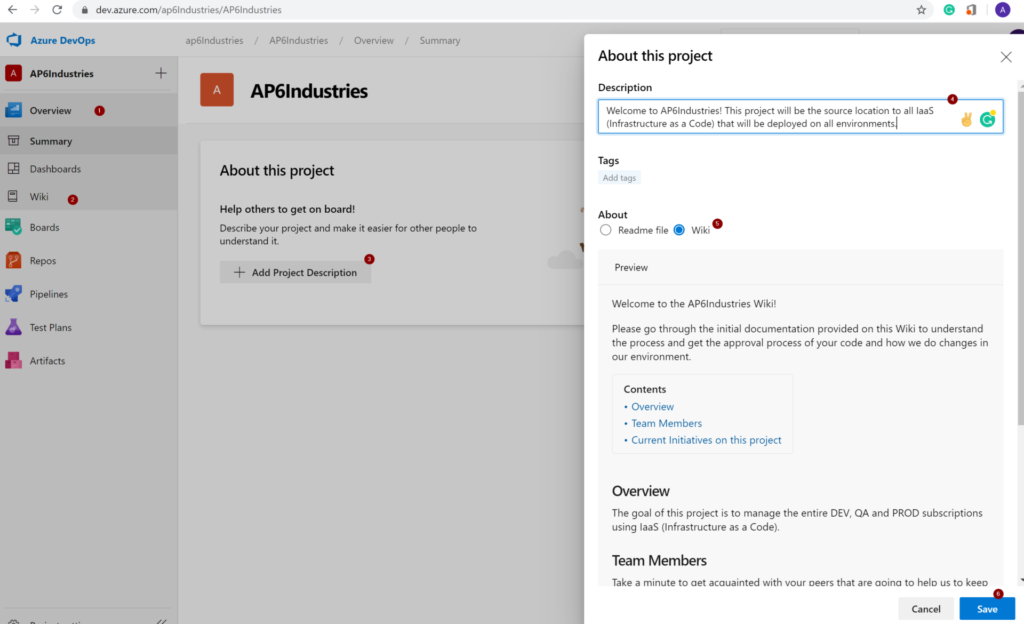
The Overview item provides a glimpse of the project, including stats, members, and a brief description of the project, which can be integrated with a Wiki.
The integration is effortless to implement. Logged in to the Azure DevOps Portal, click on Overview, and then + Add Project Description button. In the new blade, provide a short description, select either Readme file or Wiki. In this section, we are going to choose the Wiki (Item 3), and the first page (which should be the main one or welcome page) will show up, click on Save (Item 4).
From now on, the documentation will be on the first page of our Azure DevOps Portal. A simple visual aid that will help you to memorize is that the first page always has a Home icon associated with it.
Important note: The first page of the Wiki will always be displayed. If you change later on, the change will reflect automatically on the main page.
Adding Wiki-as-a-code
By default, when creating new repos, the option to add a README.md is defined automatically, and it is a file that can be written in markdown language the same way that we configure our pages in the WikiProject.
We can see that in action by looking at any existing repo. In the image below, we can choose the repo/README.md to keep the documentation up to date.

If the team decides to update the documentation at the repo level, we can take advantage of that process and incorporate it into the current Wiki.
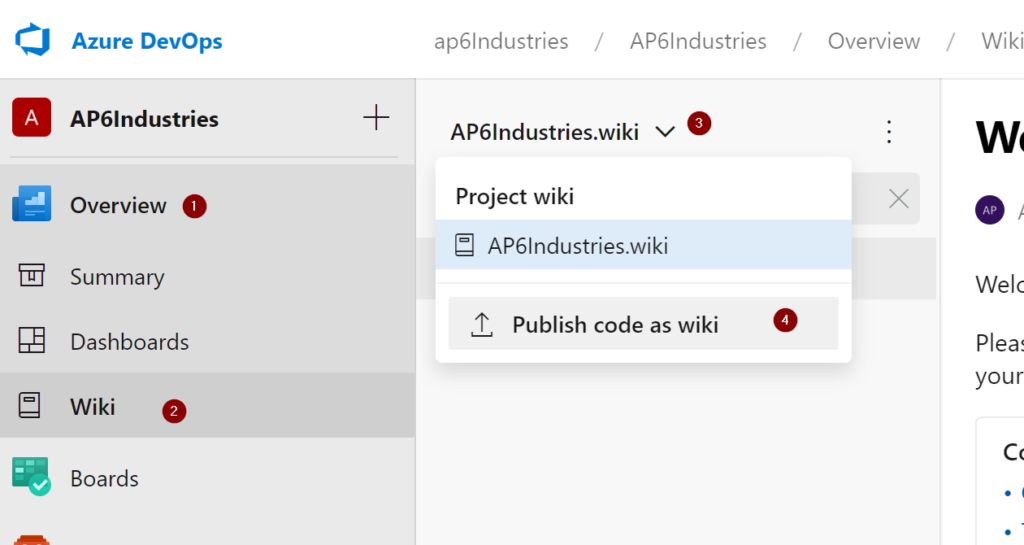
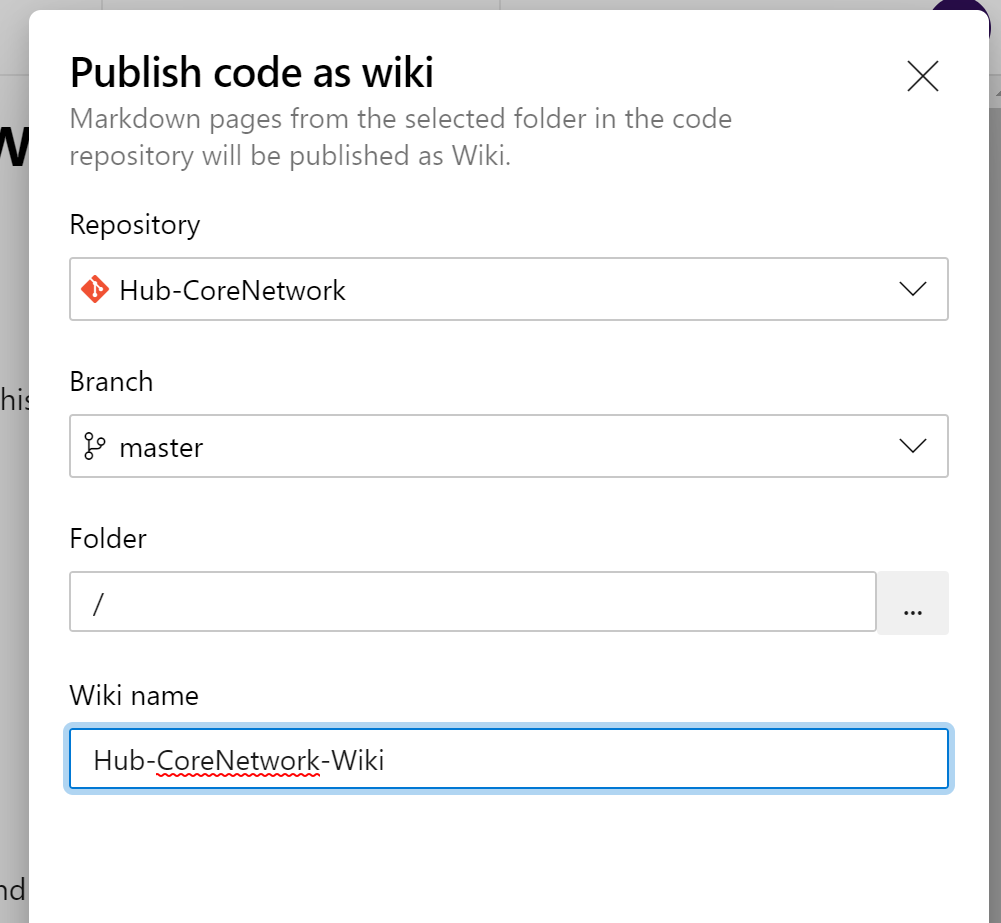
The process to add code as Wiki is this: Click on Overview (Item 1), Wiki (Item 2), click on the dropdown menu at <ProjectName>.wiki (Item 3), and then on Publish code as a Wiki (item 4).
In the new blade, select the repository, the branch, the folder (by default, the README.md is on the root), and define a Wiki name (we are going to use the current repo name added by the suffix -Wiki). Click on Publish.
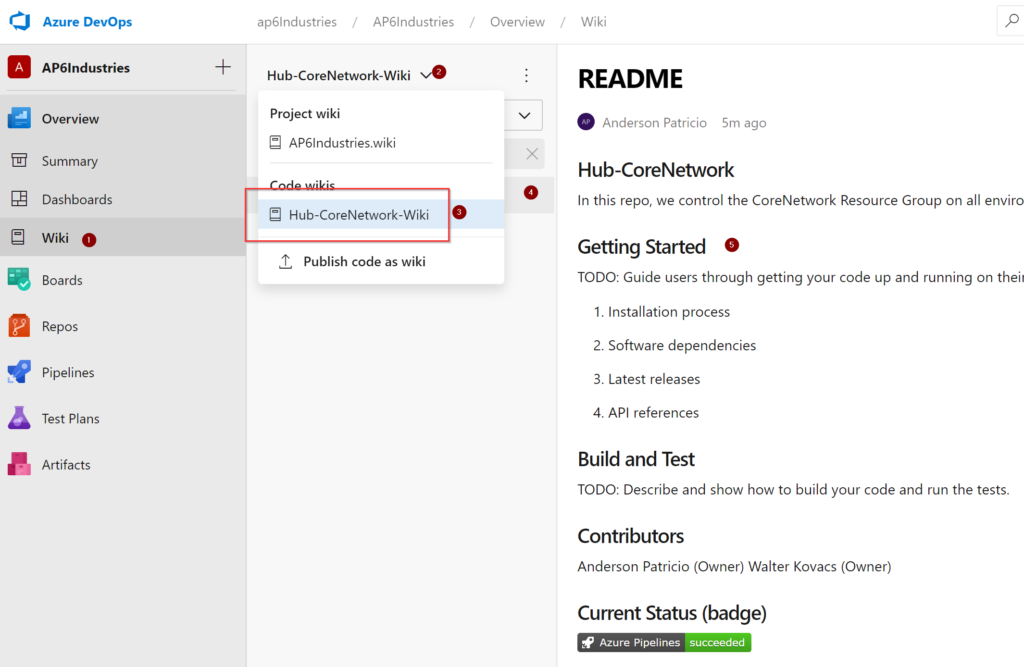
When we open Wiki (Item 1), we can navigate between the WikiProject (Item 2) or select from the Code Wiki that has been added previously (item 3). After choosing a Code Wiki, all the files with .md extension will be listed, click on them, and the content will be displayed on the right side.
Integrating both methods, we can have a WikiProject to be the main page of your project and use the actual README.md on your repos to have more concise and specific information about each workload/service of your current project.
Azure DevOps Wiki: Get started
So, now you know the basics of markdown language, how to manage pages in your brand-new Azure DevOps Wiki and the differences, and how we can integrate both Wiki Code and WikiProject.
Now it is your turn to start integrating Wiki into your Azure DevOps project!
Featured image: Shutterstock


Thanks. This is a great write-up on Mark Down Language and Azure WiKi. Do you have any updates on deleting the WikiProject?
Thank you for the helpful tips.
Will there be templates available at some point?
Also, this seems very similar to Microsoft Teams. Why have two products that offer similar capability when I have access to both? Seems like there should be an overlap and not a duplication when using this with Teams. I can understand it being offered with a standalone service.
Its weird that I am not able to edit my previous comment on this page.
I wanted to share the markup for creating a 2 column spreadsheet:
| Column title 1 | Column title 2 |
|–|–|
| Row 1 item | Row 1 desc. |