In a previous article here at TechGenix, we spoke about the requirements for building an Exchange 2019 environment. In this tutorial, we are going to show you how to set up a Windows Server 2019 domain controller for Exchange 2019. For some, this might be an easy task, but for the new IT admins just starting out, it can seem like a daunting task. We are not going to cover installing the virtual or physical machine with the Windows Server 2019 media, but once you are done and have logged into the server using the workgroup account, you can launch Server Manager if it’s not already open and we can begin.
Setting up a domain controller in Exchange 2019
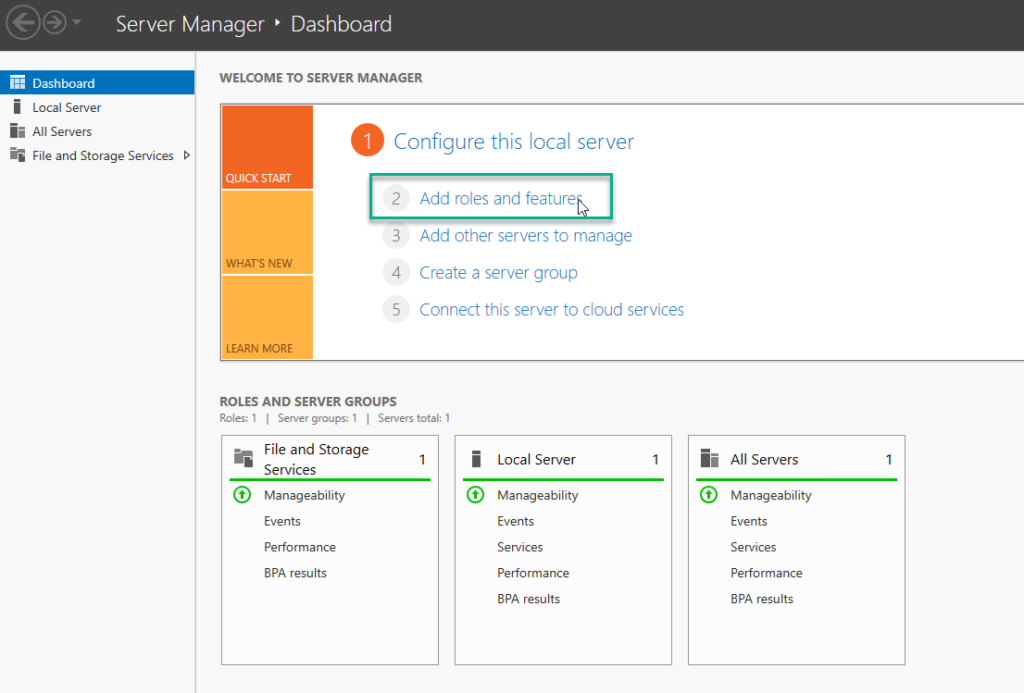
In Server Manager, once it has finished loading and refreshed everything, click the “Add roles and features” link/button.

A new window will appear, as shown above. Click the Next button.

Leave the default selection as shown above and click Next.

Again, leave the default selection here and click Next.
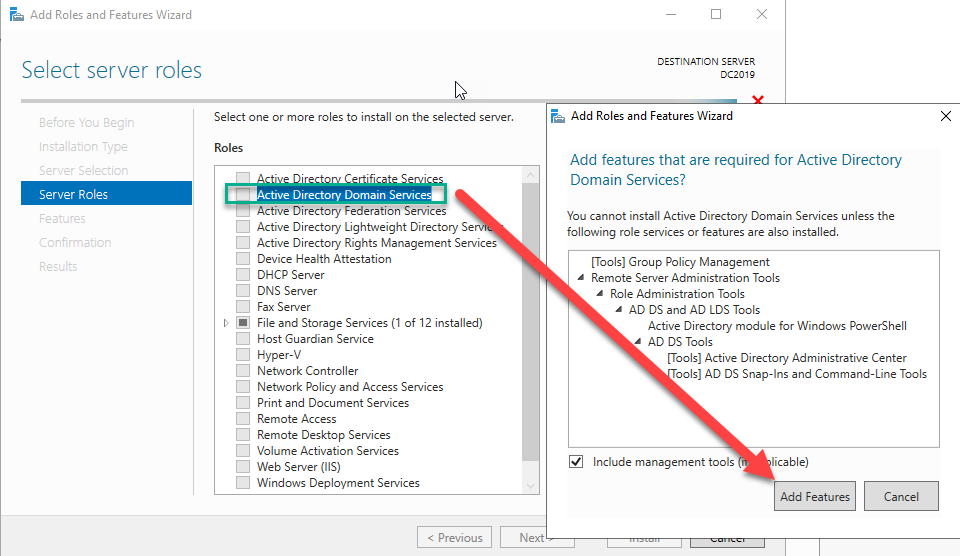
Select the checkbox next to “Active Directory Domain Services.” Once you do that, another window will pop up. Click on Add Features as shown above.
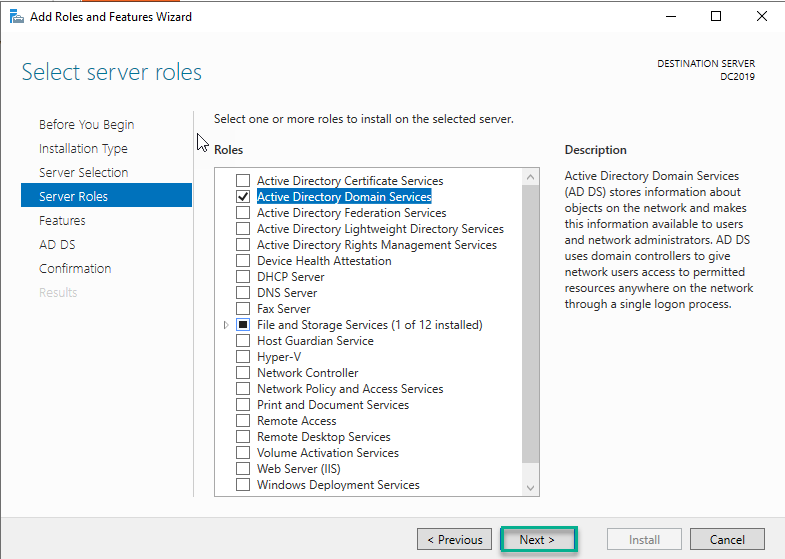
Once you have added the features, it will show as selected above. Click Next to continue.

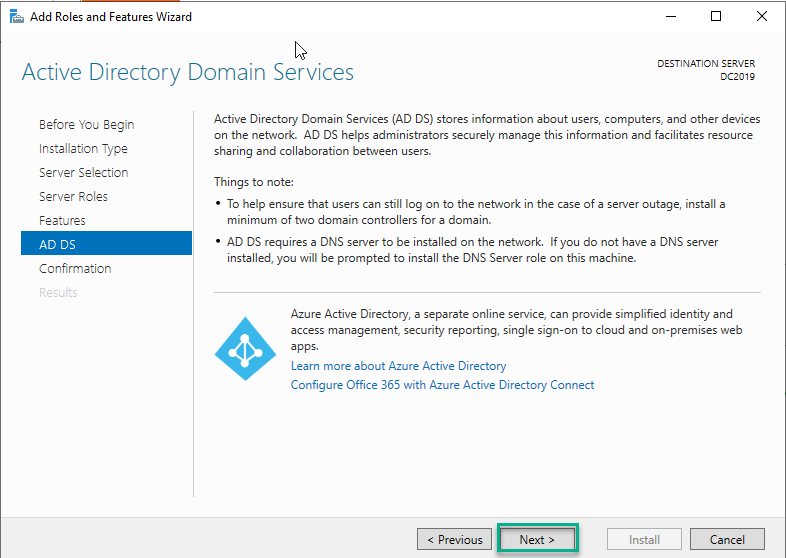
We are not adding any features on this install, but if you need to add anything, then make your selection and click Next.
Click Next to continue on the window above.

You can now review your selection and then click the Install button. Depending on how powerful your server is, this install can take a few minutes.

The window above is just a progress screen.
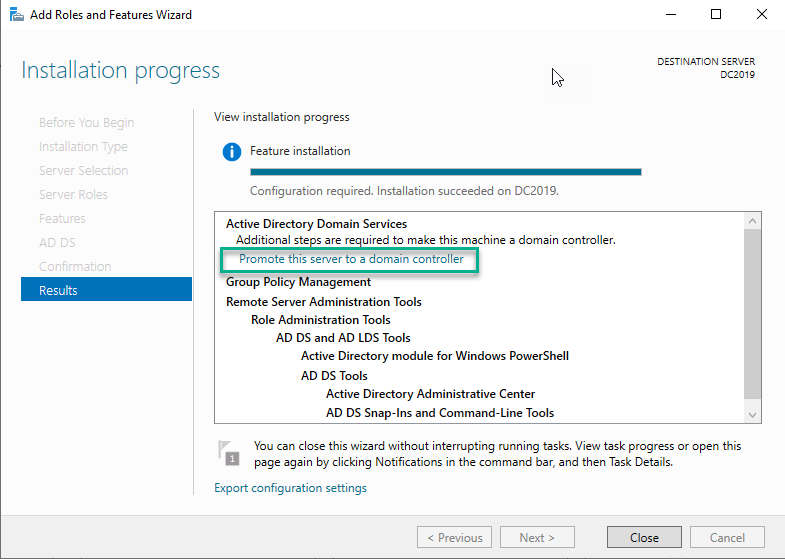
Once the installation completes, you will now have the option to “Promote this server to a domain controller.” Click the link to open the window below:

In this section, we will be adding a new forest as the other 2x options don’t apply. In the “Root domain name” box, enter your domain name. It can be tlab.local for example or thexchangelab.com. Once you have entered a name, the Next button will highlight, and then you can click it to continue as shown below:

Click Next.
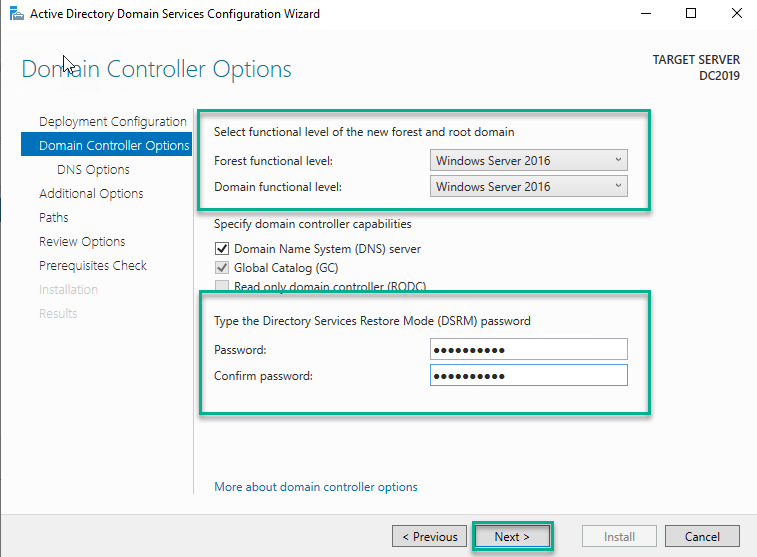
On this window above, you can select the forest and domain functional level. I left it as Windows Server 2016 as this is a new forest with no legacy domain controllers.
Once you have made your selection, you need to enter a Restore Mode password. Make sure it is strong and save it in case you need it later.
Click Next to continue.

You can click Next as the window above does not have anything to configure or select.

Once you have clicked Next on the previous window, the window above will give you the NetBIOS name for your domain. Click Next to continue.

On the window above, you can see that the database, log files, and SYSVOL folders are in the C:\ drive. Typically, you would move this to a dedicated drive. Once done, click Next.

You can now review your selections and then click Next. If you want to view the script and save it to automate your installs going forward, click the View Script button.

You will notice above that you got a warning because no static IP was assigned. I wanted to show you this because you need to go and assign an IP. Then you can click the “Rerun prerequisites check” link again, and it should be taken out of the list. Now click the Install button.

The windows above and below are progress screens of the installation.

Progress screen, installing the Group Policy management console.

Progress screen, now creating the directory partition.
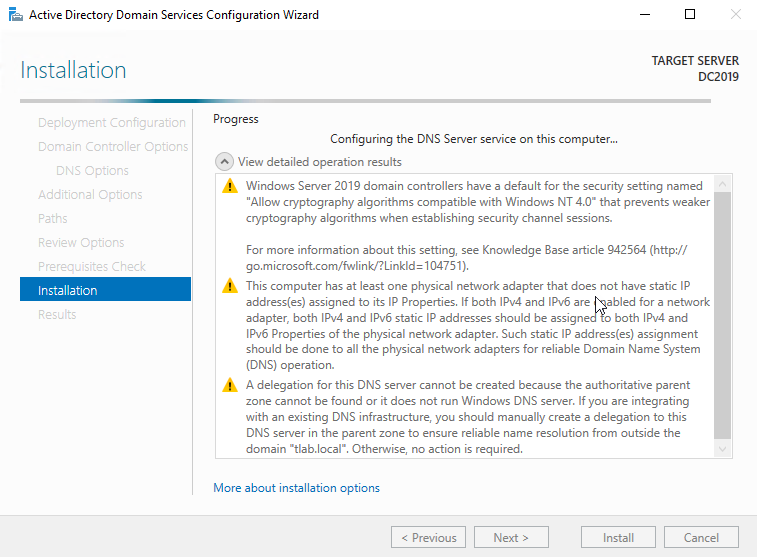
Progress screen, configuring the DNS server service.
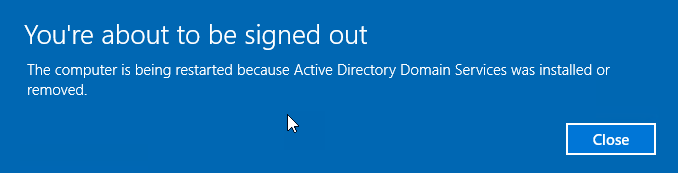
Once everything is done and the install completes, you will get the blue bar across your screen that your server will be rebooted.
After the server has rebooted, you can now log in to your domain using domain credentials and not the workgroup credentials. So, it will be domain\username and not workgroup\username or just username.
Now that you have logged in, you can open up administrative tools, and you should have all the different management consoles:
- Active Directory users and computers
- Active Directory domains and trusts
- Active Directory sites and services
- Group Policy management
Add another domain controller for redundancy
Now that you have your domain up and running, you might want to look at bringing in another Exchange 2019 domain controller so you have redundancy. But instead of adding a new forest, you will simply select the option to “Add a domain controller to an existing domain” as shown below, and then follow the steps we did above after that.

Once you have your second domain controller and you have given them time to sync and that they are in a healthy state, you can now prepare the next virtual machine, which will be the first Exchange 2019 Server. In the next part of this series, we will look at installing Exchange 2019 on Windows Server 2019 GUI as not many people are familiar with Windows Server 2019 core.
Featured image: Shutterstock


