In this second article on Azure AD and applications, we will improve the security of an application that we created in the first article of this series. We will introduce conditional access and self-service using approvals, but since we don’t want to give access to the application forever, we will implement reviews where we can check and keep only valid users accessing the application.
Azure AD and applications: Implementing conditional access
The first layer of protection introduced by Azure AD Premium that we can add in our Azure AD application is the conditional access feature. We can use this feature by clicking on Azure Active Directory, Security, and then selecting Conditional Access, which is the traditional way.
However, when managing applications under Enterprise Application, and selecting the desired application (in our article, we are going to use GitHub.com), the new blade contains all properties and features of the given application. We do have a conditional access item available, and it has a particular property: It will show only conditional access policies related to the current application.
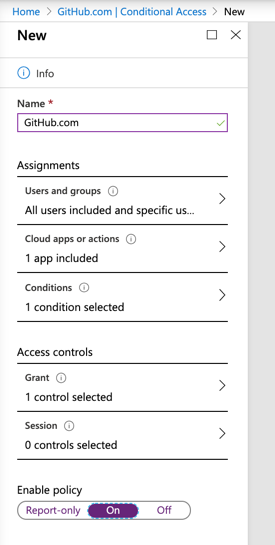
We can use the same interface to create a new conditional access, as depicted in the image below. The difference when starting from the properties of an application instead of the traditional way is that when using the former, the application is automatically added to the rule.
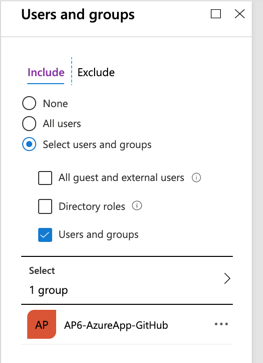
In the previous article, we introduced the use of a group to control who has access to the application, and the group was named AP6-AzureApp-GitHub, so we can take advantage of this design and use that group in the conditional access, as depicted in the image below. If you don’t want to worry, you can always leave All users, especially in cases that users are added directly into the application Users and Group permissions.
Note: You always have the option to exclude key users to make sure that you are not locked outside of an application. In critical applications, like Azure Portal, it is vital to exclude your break-glass accounts, for example. In an application scenario, you may want to add a test user during validation or troubleshooting.
We can force multifactor authentication when accessing this application from outside of the trusted networks. This way we enforce strong authentication for users outside of our organization. Still, in the wizard, make sure to select Grant Access and Require multi-factor authentication in the Access Control section.
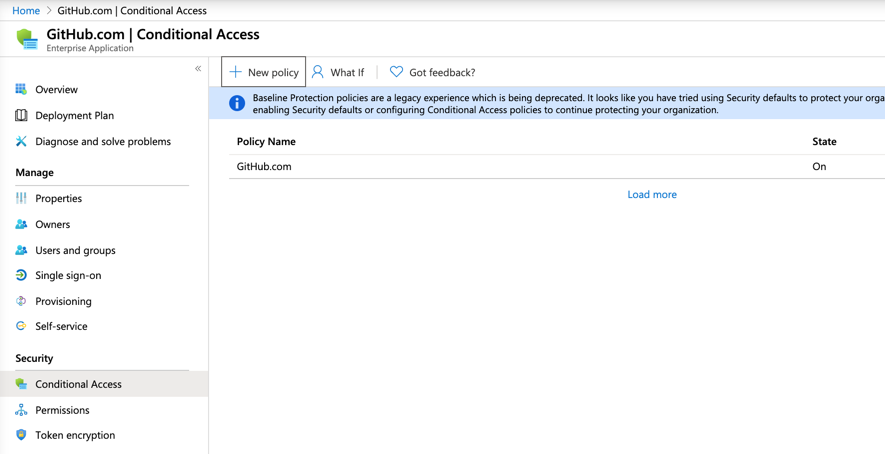
The result after creating the new policy will be listed on the right side. Keep in mind that only conditional access policies related to the application in focus will be listed on this blade. To see all conditional access policies, make sure to use Azure AD \ Security \ Conditional Access item.
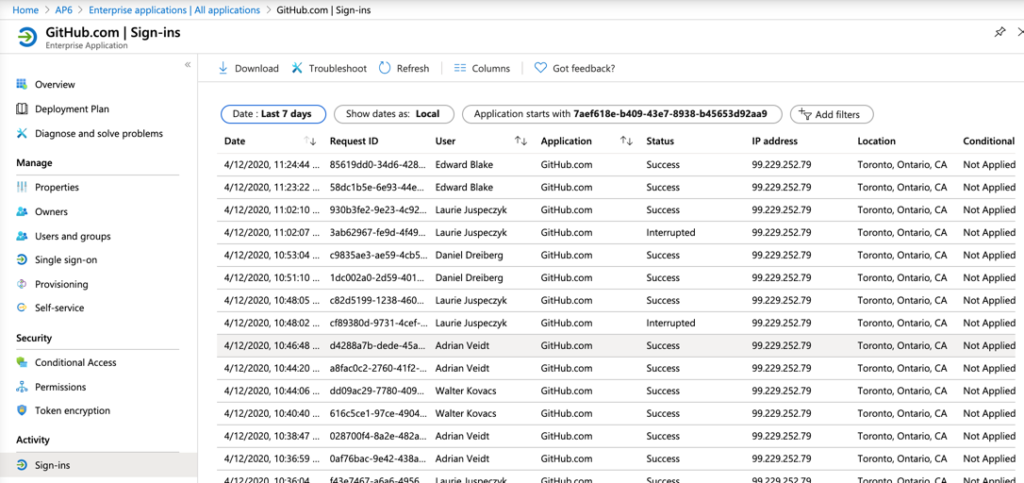
To validate if the conditional access policies are being applied or just to check the sign-in process, we can always click on Sign-ins, and all authentication requests pertinent to the application in focus will be listed.
Implementing self-service
We can implement self-service capabilities using Azure to alleviate pressure on your service desk. In the application’s property blade, click on the Self-service item.
In the new blade, we need first to allow users to request access to the application in question (Item 1). The second step is to define a group that the users will be assigned to. In our article it is going to be AP6-AzureApp-GitHub (Item 2).
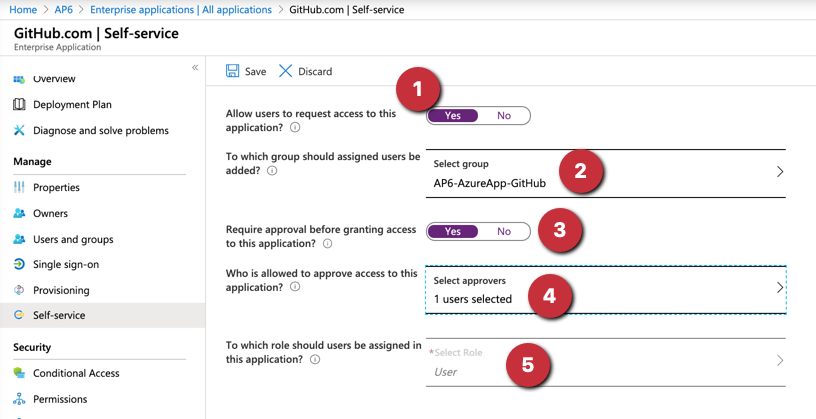
The cloud administrator can require approval before assigning an application. Click on Select approvers and select a user from the list (Item 4). The last step (Item 5) is to define which role the new user will receive.
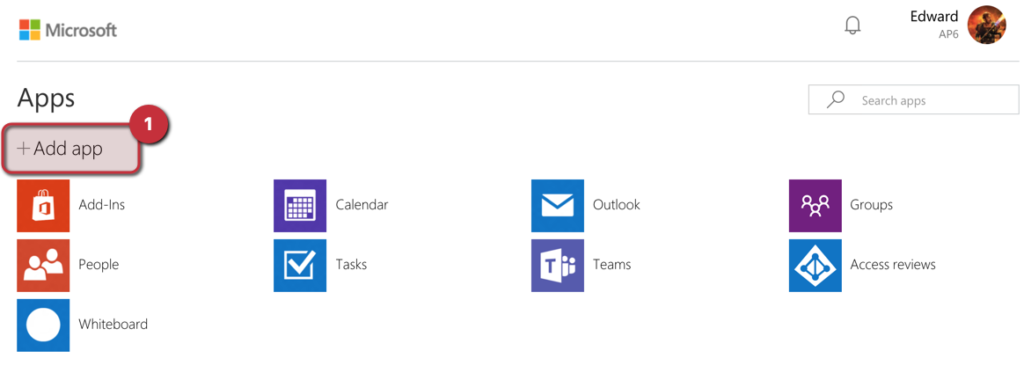
From the end-user perspective, the process of requesting access to an application is simple. Logged in to the myapps.microsoft.com portal, click on Add App
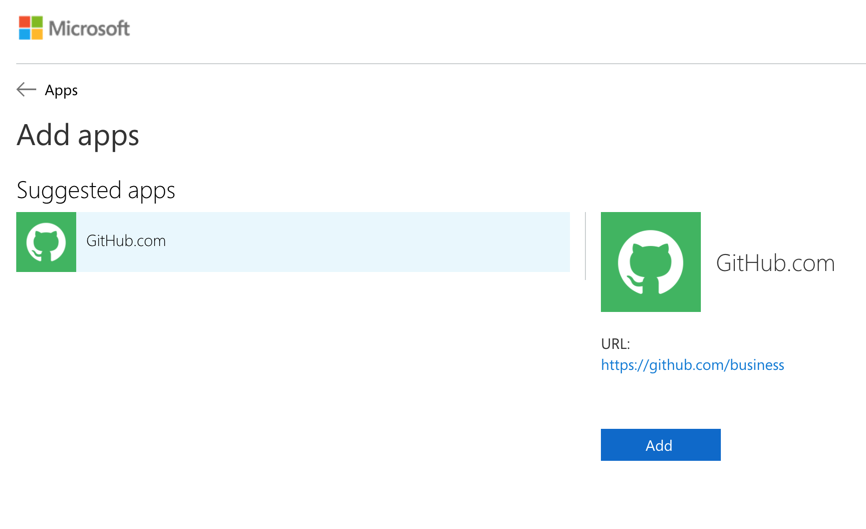
A list of suggested apps will be listed. Select the desired app, and click on Add. A new dialogue box asking Are you sure you want to add the application GitHub.com? will be displayed. Click on Add. If the application requires approval, you’ll see the following message: The request to add this application is pending approval. You can start to use the application once it gets approved. Click on OK, and wait for the approval process to be completed on the backend.
The approver will receive a message containing all information to decide if the application is allowed or not for the given user. There are two options available: Approve or Deny. If approved, the software will be displayed on the portal to the end-user.

Implementing review
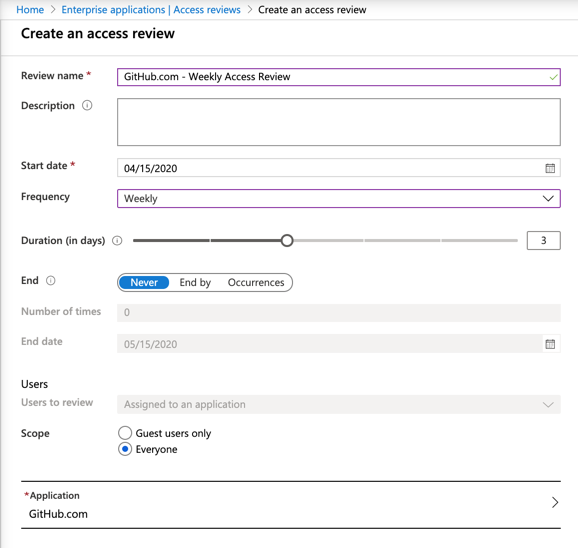
Using the review feature, we can review and take action on the given application. To create a new review, click on Access Review and then create New Access Review.
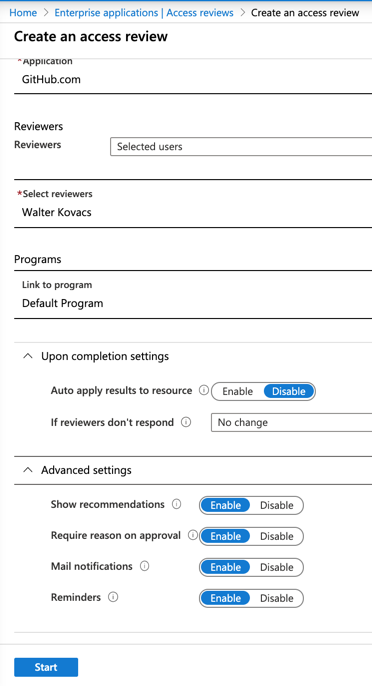
In the new blade, assign a name for the review, define the start date and frequency, and when the review process will end. Make sure to define the scope (guest users only or everyone), and select the application.
Select the reviewers (there is an option for it to be self-review), and the Access Review feature will provide suggestions. We can apply those suggestions automatically and take action if a reviewer does not take action.
We also have some additional settings that may be useful for your organization such as recommendations, require a reason for approval, mail notifications, and reminders.
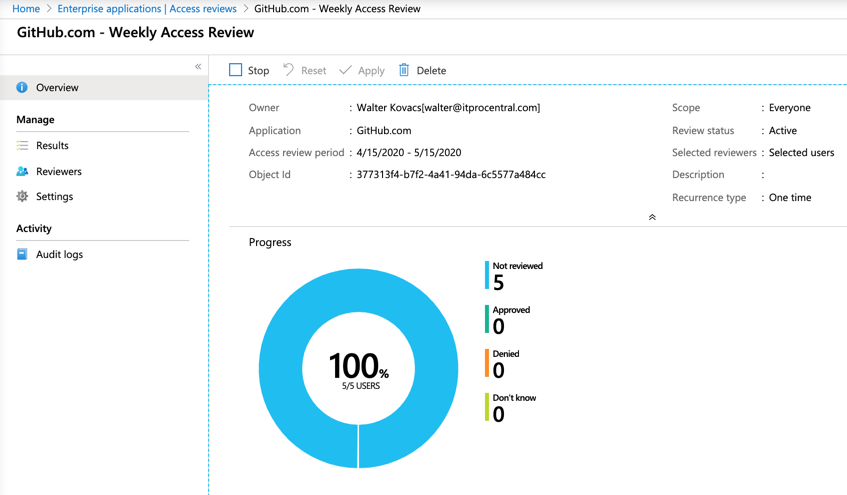
After the access review is created, we can click on it and in the Overview, we can have an overall status of the review. In the same blade, we can check the results (including recommendations), the reviewers and some settings that can be changed during the current review.
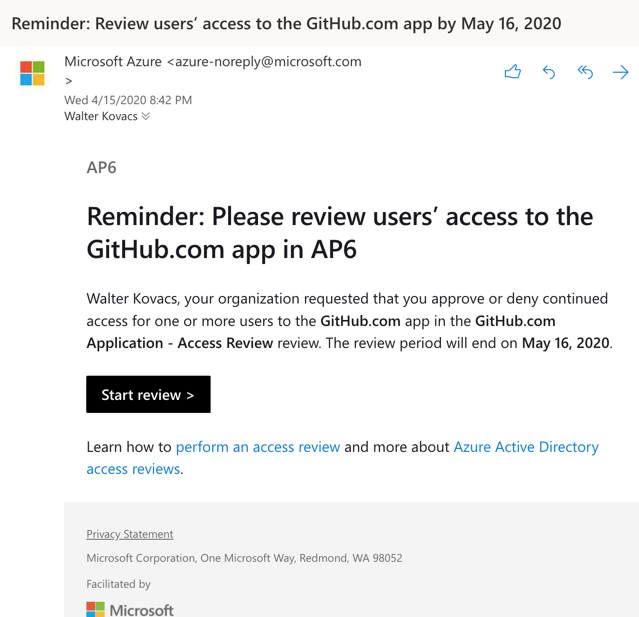
The reviewer will receive a message informing them to check the review process. To start the review, just click on Start Review.
The reviewer will be directed to the My Access page. Click on Access Reviews, and a list of all reviews that require attention will be listed. Click on the desired access review.
In the new page, all members will be listed with the recommendation, and we can select any given user and take action: approve, deny, or don’t know. Also, reset decisions previously made or accept the recommendations proposed by the feature (Item 1).
Note: This view is similar when using the Azure Portal. The benefit of the Azure Portal is that it creates a report of all sign-ins of each member being reviewed, and it helps the cloud administrator analyze how the user in question is authenticating to the application.

When the review period ends, the settings will be applied based on the decisions made during the review and settings defined at the Access Review level.
Azure AD and applications: Reducing complexity, adding security
By introducing these security features, we increased our security posture by having a person (an owner) validate who can access the application and keep the users with access to the application being reviewed regularly.
Using the techniques from this article, we can see several advantages from a traditional IT environment. First, we bring accountability to the owner of the application and we can reduce complexity by having the users accessing only the applications that they need access to perform their work. Second, we reduce complexity because now the users can add their applications that they need to access without service desk requests. Third, all of this is secure and using corporate standards that can be applied consistently among several other applications.
Featured image: Shutterstock


