A few months ago, I wrote an article explaining how to add a Windows file server to Microsoft’s System Center Virtual Machine Manager. In that article, I stepped through the process of creating storage classifications and bringing a Windows file server under management. What I didn’t cover, however, was how to make use of that file server once it has been added to System Center Virtual Machine Manager. Before I get started, I want to be sure and point out that even though I am going to be focusing this article around Windows file servers, System Center Virtual Machine Manager can actually accommodate a wide variety of storage device types. In my own organization, for example, I have a lab environment consisting of several Hyper-V hosts. Each of those Hyper-V servers has its own internal, solid storage array. When I create a new virtual machine, I almost always store the VM on the host’s direct-attached storage array, which is a scenario that is fully supported by both Hyper-V and VMM.
Of course, one of the most important factors for production environments is reliability, so using direct-attached storage tends not to be the best idea. A better option is to place virtual machines onto a cluster shared volume so that the virtual machine can be made highly available.
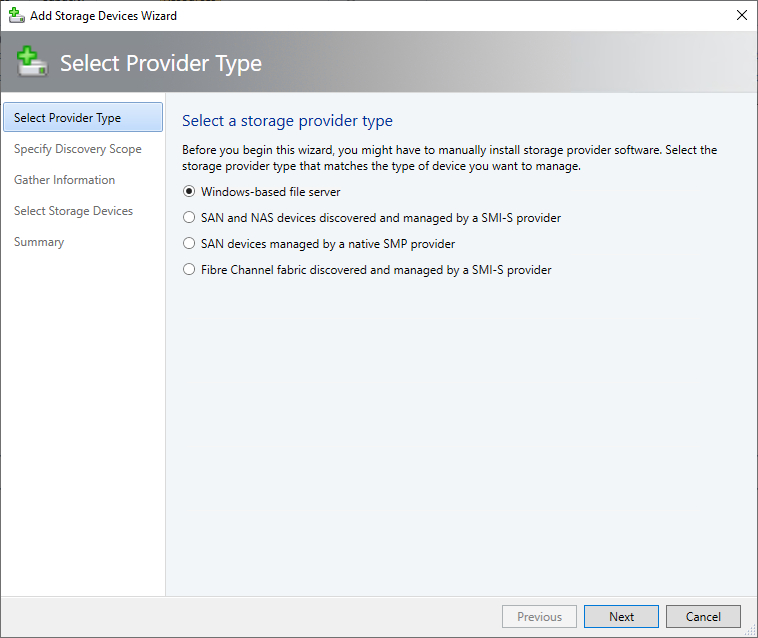
Even though I am using direct-attached storage and cluster shared volumes as examples, they are not the only types of storage that are supported. Using an SMB 3.0 file share is also an option, and Virtual Machine Manager’s Add Storage Devices wizard lays out additional options as shown below.
Leveraging external storage for Hyper-V virtual machines
I’m not going to rehash the process of bringing a file server (or other external storage types) under management or defining storage classifications because I covered the technique in my previously mentioned article. Even so, I want to show you how to actually use remote storage once you have linked it to System Center Virtual Machine Manager.
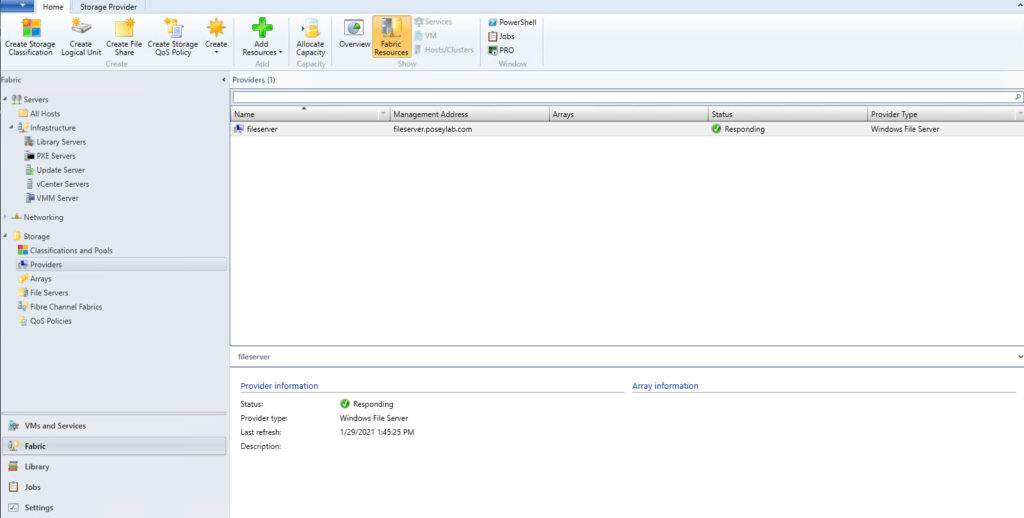
In this particular case, I am going to be using a Windows file server as my remote storage, as shown below. The general concepts that I am about to show you are similar for other remote storage types, but each storage type does have its own unique nuances.
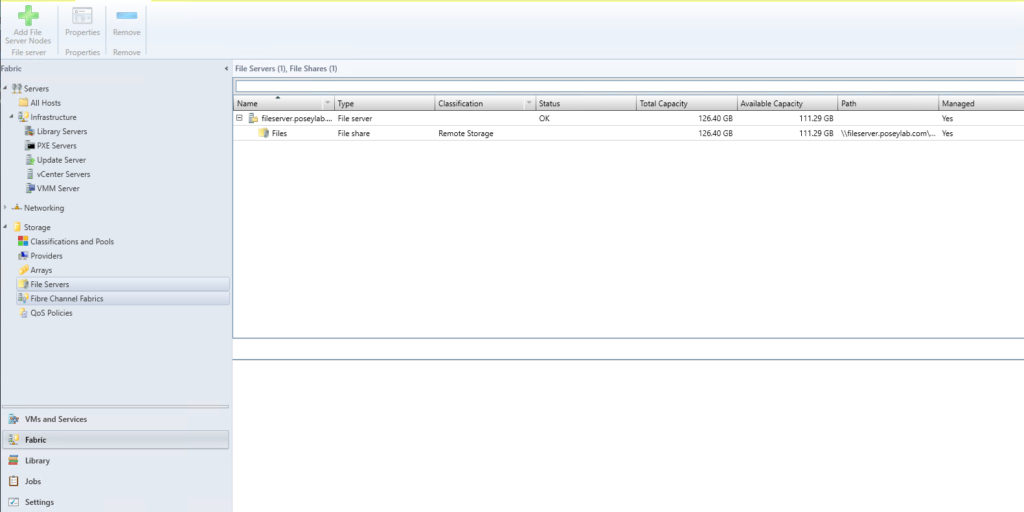
So as previously mentioned, I have linked a Windows file server to System Center Virtual Machine Manager, thereby making the file server available for use. The first thing that I need to point out about this is that when you store virtual machine components on a file server, you must place them within a file share on that file server. You can access the individual file shares on the file server by selecting the File Servers option in the console tree. As you can see in the figure below, my Windows file server currently has a single file share.
It’s a little bit off-topic, but I wanted to quickly mention that you can create additional file shares without having to leave the Virtual Machine Manager console. All you have to do is to go to the screen shown in the previous figure, right-click on the file server, and choose the Create File Share option from the resulting shortcut menu.
As you look at the figure above, you will notice that the file share is classified as Remote Storage (as indicated by the classification column). In the previously mentioned article, I showed you how to create custom classifications, and you can apply your own classifications to individual file shares. To do so, just right-click on a file share and select the Properties command from the shortcut menu. When the file share’s properties sheet appears, simply choose the storage classification that you wish to associate with the file share from the Classification dropdown. You can see what this looks like in the next figure.
 Using storage with a VM
So now let’s assume that you have added remote storage to System Center Virtual Machine Manager and you have applied a storage classification to the remote storage. How do you use that storage with a virtual machine?
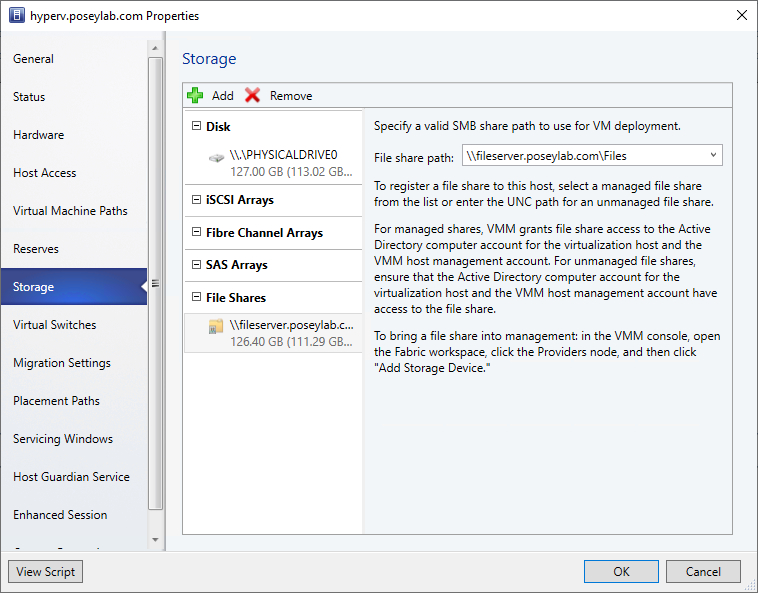
To do so, go to the VMs and Services workspace, and then right-click on a Hyper-V host and choose the Properties command from the shortcut menu. When the host’s properties sheet appears, select the Storage tab, shown in the screenshot below.

As you can see, you can use the Storage tab to make storage available to a Hyper-V host.
Now, click the Add button shown in the figure above, and choose the Add File Share option from the resulting menu. As you look at the next figure, you will notice that you can use the Add button to add a variety of storage types, but most are grayed out. You will only be able to add storage that has already been linked to Virtual Machine Manager through the Add Storage Device Wizard.

Upon choosing the Add File Server option, the window will prompt you to specify a valid SMB share path to use for VM deployment. Simply choose one of your file shares from the dropdown menu, as shown below.
Click OK, and the file share path will be made available to the Hyper-V host. Now when you attempt to create a new virtual machine on the host, Virtual Machine Manager will use the file share as the default location for storing both the virtual hard disk and the virtual machine itself. You can see what this looks like in the figure below. Incidentally, you can use a different location if you want to. You will just need to click the Browse button and then choose the path that you want to use.
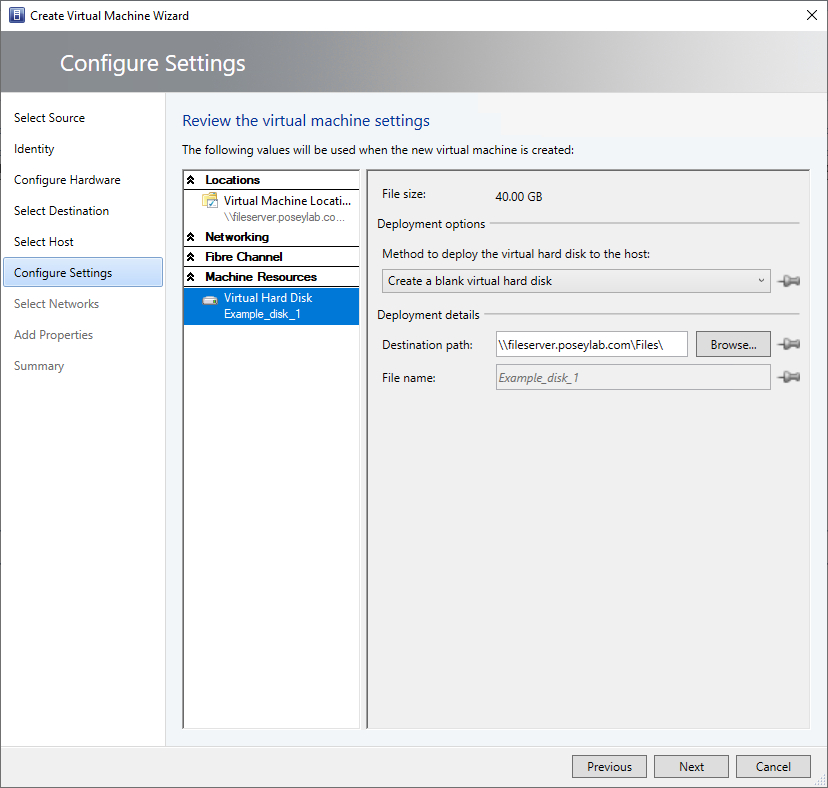
And now, your newly created virtual machines are placed on the file share by default.
Featured image: Shutterstock


