If you would like to read the next part in this article series please go to An Introduction to Oracle VirtualBox 4 (Part 2).
Introduction
In a recent blog post, I wrote about Oracle’s release of the newest version of VirtualBox 4.0, a worthy, free competitor to VMware Workstation. I’m not going to spend much time in this article attempting to compare/contrast the two products, but will instead provide you with a look at how VirtualBox does things. For the extremely cost-conscious, a free platform on which to test new products might be just what the doctor ordered.
I’ll start this article by admitting that I’m a huge fan of VMware Workstation. I’ve used it for a number of years and have always been impressed with each new version that the company releases. That said, the product does carry a hefty list price of $189.00 which makes it a pretty expensive buy for some. For those wanting an introduction to VMware with the “gateway product” that can take them to ESX/ESXi, Workstation fits the bill nicely. For those that want a platform on which they can install and test other technologies, the platform probably doesn’t matter nearly as much and a free alternative can do the job.
For Mac users, Fusion is an extremely capable product, as is Parallels, but those products carry a list price of $79.99 each. When compare to free, VirtualBox looks pretty good!
Available downloads
When you visit the VirtualBox download page, you’ll notice that there are a few download options available:
- VirtualBox platform downloads (all open source)
o Windows (32-bit and 64-bit)
– 32-bit host support. Windows XP, Server 2003, Windows Vista, Windows 7, Windows Server 2008
– 64-bit host support. Windows Vista, Windows 7, Windows Server 2008
o OS X (Intel only)
– OS X 10.5 (Leopard – 32-bit), OS X 10.6 (Snow Leopard)
o Linux
– A wide variety of Linux operating systems are supported. See VirtualBox documentation for specifics.
o Solaris (32-bit and 64-bit) - Oracle VM VirtualBox Extension Pack (closed source VirtualBox components)
o This component adds support to VMs for USB 2.0 devices, adds VirtualBox RDP-based remote connectivity and PXE boot capabilities - Software Developer Kit (SDK)
Prerequisites
VirtualBox can run on a variety of host operating systems. I outlined these in the previous section.
Virtualization platforms tend to be pretty RAM hungry; bear in mind that you’re going to be running multiple operating systems on one system. So, in addition to the host RAM needs, you need enough RAM to run VirtualBox as well as all of the virtual machines.
The same goes for processing power, but not to quite the extent of RAM. In most cases, virtual machines hit RAM limits long before they hit host processor limits. A quad-core processor – extremely common these days – will suffice just fine. Even a dual-core processor will be adequate for many that have light virtualization needs.
Installing VirtualBox 4.0 on Windows 7
As an example, I’m going to install VirtualBox 4.0 to a 64-bit Windows 7 host. This host has a quad-core Core i7 processor and 6 GB of RAM, so it more than meets the requirements for VirtualBox, although I won’t be able to run a ton of virtual machines side-by-side until I add more RAM.
When you initiate the installation, you’re first asked to choose the features that you’d like to install along with VirtualBox (Figure 1). You can choose to add USB support, networking and Python support. When you’re done with your selections click the Next button to continue.

Figure 1: Choose the installation options you want for VirtualBox
You have the option to install shortcuts to the desktop and to the Quick Launch bar. In Figure 2, you’ll see that you can simply deselect the checkbox next to a selection if you don’t want that particular shortcut.

Figure 2: Should any shortcuts be created?
During installation, network connections will be reset and you might temporarily lose network connectivity. The screen in Figure 3 provides you with ample warning.

Figure 3: A warning regarding network interfaces
Once you’ve made your selections, click the Install button to proceed.

Figure 4: Click the Install button to proceed
At various points during the installation, the installer will ask you if you want to install device driver software. In order for VirtualBox to be feature-complete, you should click the Install button each time one of these windows (Figure 5) pops up.

Figure 5: Install device drivers
Once the process is complete, you’ll be presented with a window indicating such (Figure 6).
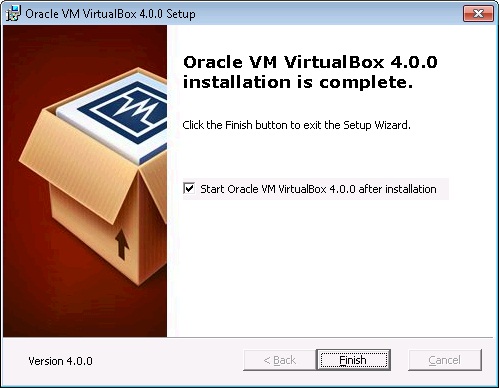
Figure 6: The VirtualBox installation is complete
Once the installation is complete move on to installing the VirtualBox Extension Pack. Once the file is downloaded, run it. You’ll get a screen like the one shown in Figure 7 in which you’re asked if you want to install the Extension Pack. Click the Install button to proceed. You’re also asked to agree to the extension license (not shown).

Figure 7: Install VirtualBox Extensions
Verify that the extensions have been successfully installed by going to File > Preferences > Extensions. You’ll get a list of the extensions that have been installed on your system.

Figure 8: The extension was successfully installed
Creating a virtual machine with VirtualBox 4.0
The first time you fire up VirtualBox 4.0, you get to see the new Manager screen in action, as shown in Figure 9. Although sparse at the beginning, the Manager screen will be populated as you add virtual machines.

Figure 9: VirtualBox Manager
To add a new virtual machine, simply click the New button. This starts a wizard-based process that gathers information necessary for VirtualBox to create the new virtual machine. On the first page of the wizard, you are asked to provide a name for the new virtual machine and to indicate the operating system and version that will comprise the guest virtual machine. VirtualBox supports a huge variety of guests, including:
- Windows guests. Windows versions from Windows 3.1 to Windows 7 64-bit are supported. Both desktop and server versions of Windows are supported guests.
- Linux. A ton of Linux systems are supported. Too many to list!
- Solaris.
- BSD.
- OS/2. Including OS/2 Warp 3, 4 & 4.5, among others.
- Mac OS X Server.
- DOS.
- Netware.
Figures 10 and 11 below show you this page of the wizard. Figure 10 is a look at the screen with Windows 7 64-bit selected and Figure 11 shows you some of the Linux guest options available. I’ll be installing a Windows 7 64-bit guest.

Figure 10: Windows 7 is the selected guest

Figure 11: VirtualBox supports a variety of Linux variants
Every machine, even virtual ones, need RAM. VirtualBox provides you with a minimum RAM recommendation that is based on the operating system that you selected. As you can see in Figure 12, VirtualBox recommends a base memory size of 512MB for Windows 7 64-bit. I’ve chosen instead to assign 1 GB of RAM to the virtual machine.

Figure 12: Add RAM to the virtual machine
Virtual machines also need storage space. This is the job of the virtual hard disk. A virtual hard disk in VirtualBox is stored as a file on the host. You can choose to create a new virtual disk or use an existing one. Since I have yet to create a virtual disk under VirtualBox, I’ll choose the Create option (Figure 13).

Figure 13: Choose your hard disk option
This starts the Create New Virtual Disk Wizard.

Figure 14: The new disk wizard starts
There are two kinds of storage available: Fixed-size and dynamically expanding storage. For desktop virtualization, I usually use the dynamic option since it uses less disk space; the virtual disk file simply grows as new data is added to the virtual machine. This does result in a slight performance hit, but I don’t need to allocate the entire amount of disk space up front. Figure 15 includes additional text explaining the difference between the storage types.

Figure 15: Select your storage type
The virtual disk file needs to be stored in a folder on the host. By default on my host, this location is C:\Users\Scott\VirtualBox VMs\Win7. To change the location, click the folder icon to the right of the Location field in Figure 16. Next, specify the size of the virtual disk. I’ve decided to create a 60 GB virtual disk for my Windows 7 virtual machine.

Figure 16: How large should the virtual disk be?
The Create new Virtual Disk Summary page – shown in Figure 17 – displays the storage related options you made.

Figure 17: The new virtual disk has been created
Finally, VirtualBox presents to you a summary page outlining the selections you made throughout the process. Click the Finish button once you’ve reviewed your selections.

Figure 18: The new virtual machine has been created
Once the virtual machine is created, another wizard – the First Run Wizard – starts automatically and asks you to provide installation media for the virtual machine. You can point the virtual machine to a physical DVD drive or you can point it to an ISO image of an operating system installation disc, which I have done in Figure 19.

Figure 19: Choose installation media
When done, the virtual machine enters a running state and boots from the installation media. In Figure 20, you can see my running Windows 7 virtual machine. The OS isn’t fully installed yet, but the virtual machine is operational.

Figure 20: The VM is running
Installing Windows 7 under VirtualBox for Mac OS X
Because VirtualBox supports a variety of host operating systems, I wanted to take an opportunity to demonstrate VirtualBox on a Mac OS X-based host.
I’ve decided to, for now at least, forgo use of VMware Fusion on my Mac and give VirtualBox 4.0 a whirl. I make heavy use of both Mac OS X and Windows 7 on my laptop and need both OSs to run simultaneously. I’ve enjoyed great success with Fusion and hope that I’ll be able to say the same about VirtualBox.
Before I installed Windows 7 x64 (or any 64-bit OS, for that matter), I had to enable IO APIC at the virtual machine properties > System tab > Extended Features. Select the checkbox next to Enable IO APIC. Failure to make this setting change will result in the new VM being unable to boot from the Windows 7 x64 installation media with error code c0000225. Once rectifying the situation by enabling IO APIC, the Windows 7 installer started up and the correct HAL (Hardware Abstraction Layer) was applied to my virtual machine.

Figure 21: Configure the virtual machine for IO APIC
On my Mac OS X laptop (dual core 2.66 GHz processor, 8 GB RAM, OS X 10.6.4) with 1 GB of RAM assigned to my Windows 7 x64 VirtualBox-based VM, it took less than 5 minutes for the Windows installation to complete and for me to be presented with a desktop. My laptop does have a solid state drive (SSD) and I was booting from a Windows 7 x64 ISO image, so it’s possible that the SSD really shined in this case. Either that, or VirtualBox is really, really fast.
After getting to the initial desktop, I installed the Oracle VirtualBox Guest Additions. This step is pretty common in the virtualization world and adds drivers that are optimized for the virtualization platform. In VirtualBox, the following elements are included in the Guest Additions:
- Mouse pointer integration with the host.
- Shared folders between the guest and the host.
- Improved video support including the ability to resize the VM window.
- “Seamless Windows” – this is sort of like VMware Fusion’s Unity mode in which applications running inside the VM can appear to be running as standalone applications on the host.
- Shared clipboard for copying and pasting between guests and the host.
Summary
My only gripe so far is that I don’t like the fact that I can’t even view virtual machine settings while the virtual machine is running – this is the case regardless of host. The Settings option is grayed out when the VM is operating. Other than that, this very cursory look at VirtualBox is very, very positive. I’ll continue to report back as I use the tool.
If you would like to read the next part in this article series please go to An Introduction to Oracle VirtualBox 4 (Part 2).


