If you are an IT professional and part of your activities is to manage Microsoft Azure, coding scripts, or Kubernetes, then JSON and YAML files should be part of your daily routine.
In this article, we are going to give a brief explanation of JSON and understand how useful it is in our daily activities. JSON (JavaScript Object Notation) is language-independent and it allows either humans and machines to use it (it is heavily used in communication between browser and client), understand and generate data using this open-standard format. When compared with similar data-exchange formats such as XML, JSON is much faster and requires less verbiage to transfer the same content of data.
JSON basics for IT professionals
We need to understand three essential components in the JSON universe, which are the concept of object, array (which is a collection of objects), and value pairs.
The first stop on our little JSON journey is going to be the value pair. It is comprised of a field name and a field value. The field name in double quotes, after that, we have a colon (:), and then the field value. The field value could be a string, number, object, array, boolean, or null. A simple representation of pair values is being listed below:
“Name”: “Anderson Patricio”,
“ID”: 666,
“isCrazy”: true,
“isDeceased”:null
The object is delimited by curly brackets {}, and inside we will see one or more value pair(s) and a comma will be separating each one of them. An example is:
{
"Country":  "Netherlands",
"Capital":  "Amsterdam"
}
The final piece of the puzzle is the array, which is comprised of square brackets []. All values inside of an array are separated by comma (,).
[
{
"Country":"Netherlands",
"Capital":"Amsterdam"
},
{
"Country":"Argentina",
"Capital":"Buenos Aires"
},
{
"Country";"Cambodia",
"Capital":"Phnom Penh"
}
]
Basic tools when working with JSON
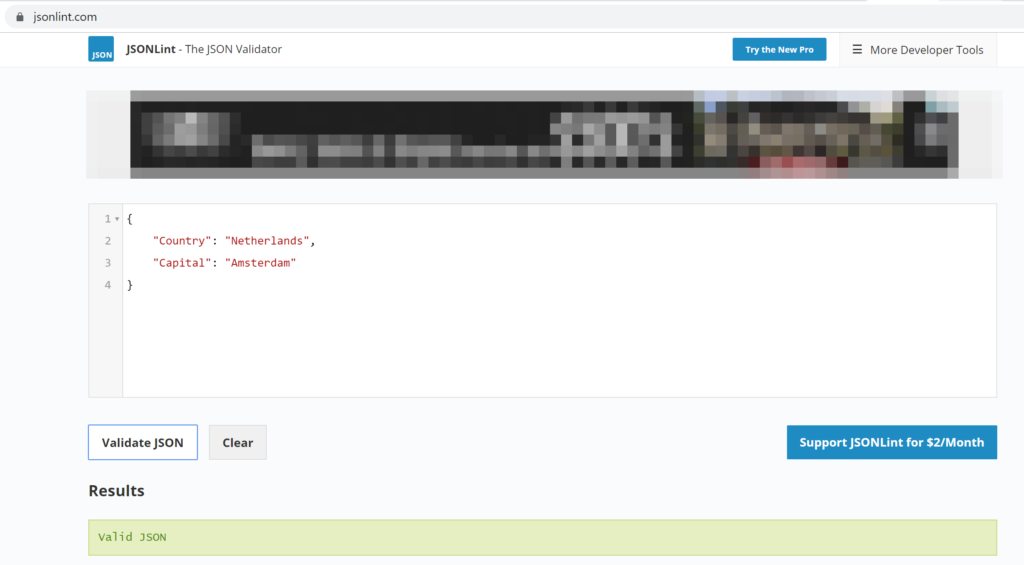
The first thing is to find a JSON validator website, and a good example is jsonlint.com. You can copy and paste your JSON files and click on Validate JSON , and your current JSON data will be analyzed. If any errors are found, the tool will provide some guidance to fix it.
You can use that to practice creating and formatting your initial JSON files, and when you start getting more Valid JSON messages, it is a sign that you are ready to manipulate your files without any additional help.
A great free tool to work with JSON files is our old friend Visual Studio Code. After saving the file as JSON, the formatting and style help a lot when writing your JSON files. After typing the first objects within the array, you will be able to take advantage of the auto-complete, as depicted in the image below.

If you make a mistake, the color will change to red. You can hoover on top of the error and then a message will be displayed. You can click on Peek a Problem, and more detailed information about the error and possible ways to fix it will be displayed.

PowerShell and JSON
To take advantage of JSON using PowerShell, we must be acquainted with two very important cmdlets: ConvertTo-JSON and ConvertFrom-JSON. (For those using PowerShell 7, be aware there have been changes and additions to the JSON cmdlets.)
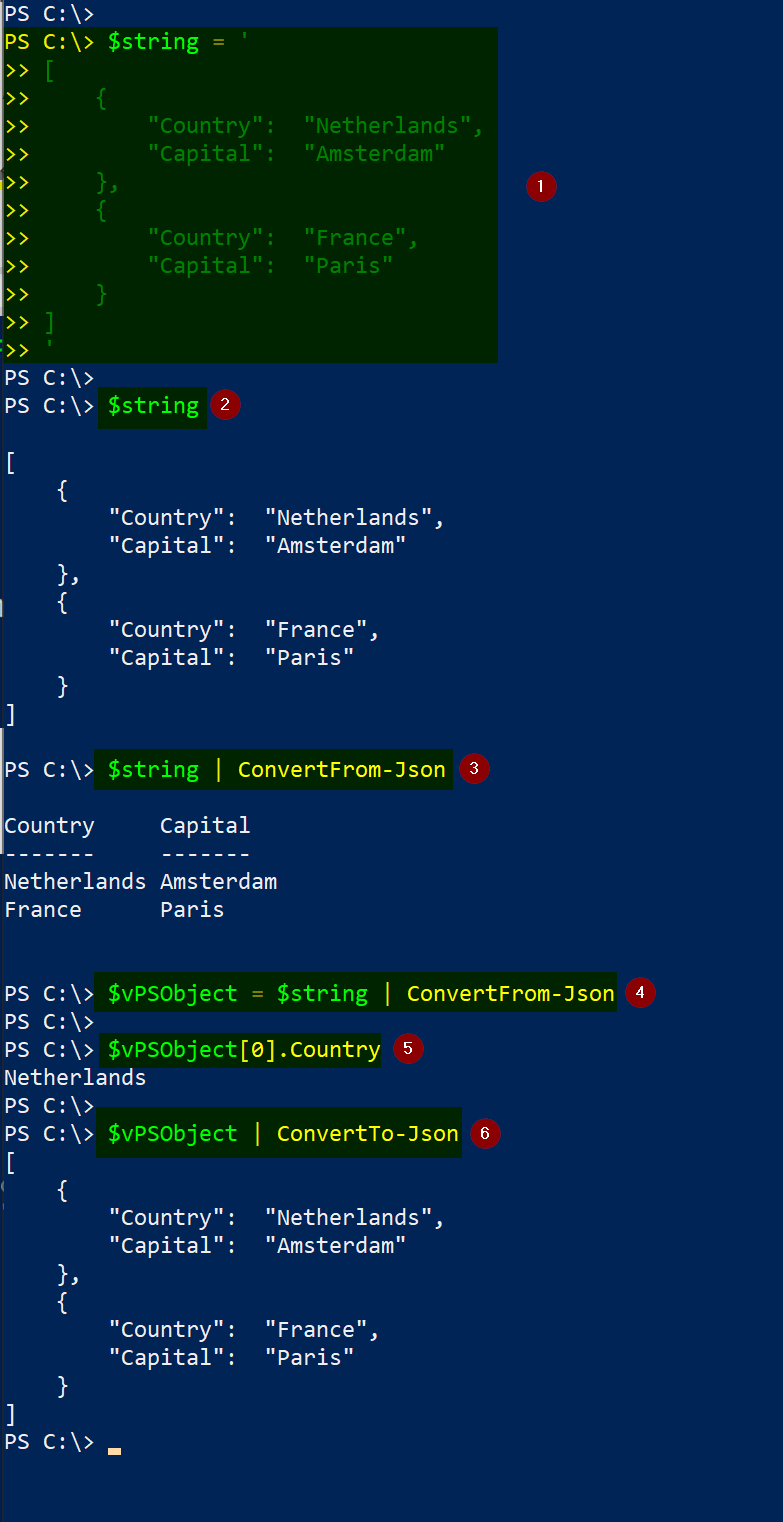
There are several ways to manipulate JSON files in PowerShell. A good start is performing a simple tour between JSON and PowerShell object realms performing the tasks that we are describing below. (A picture with the step-by-step was added to help the process.)
- Item 1. We add the JSON content to a $string variable.
- Item 2. We check the value of the $string variable.
- Item 3. We convert the $string from JSON to a PowerShell Object (just validating the output).
- Item 4. At this time, we add the output of the previous step in a variable called $vPSObject.
- Item 5. We can manipulate the data efficiently. For example, getting the Country value of the first position (in that case the Netherlands).
- Item 6. We convert the data from the variable $vPSObject to JSON format.
In the previous example, the flow of data was JSON, then PowerShell object, and then we went back to JSON, which is excellent for the understanding of all tasks involved in the process, but it is not practical.
In a real-life situation, we will most likely be working in a PowerShell object (array, for example), and if we want to save that information for later on, we could take advantage of JSON. In that scenario, the flow will be PowerShell Object to a JSON.
Let’s use a more realistic example:
- Item 1. We initialize a $json variable as an array type.
- Item 2. We create a $info variable, and we define Country and Capital as columns.
- Item 3. We added the Netherlands in the $info.country position.
- Item 4. We added Amsterdam in the $info.capital position.
- Item 5. We print the content of $info, and as expected in the first position we have what we have just added in Items 3 and 4.
- Item 6. We add the content of $info into the $json Think of $info like the current record that we are keeping tracking and adding information, and $json as the final report.
- Item 7. We print the content of $json (no surprises, same thing as $info in in this iteration).
- Item 8. We repeat the previous step to add our second record (France as country and Paris as capital).
- Item 9. We added the new information that we have in the $info variable into the $json.
- Item 10. We can see that the content of $json now contains both entries that we added throughout our code.

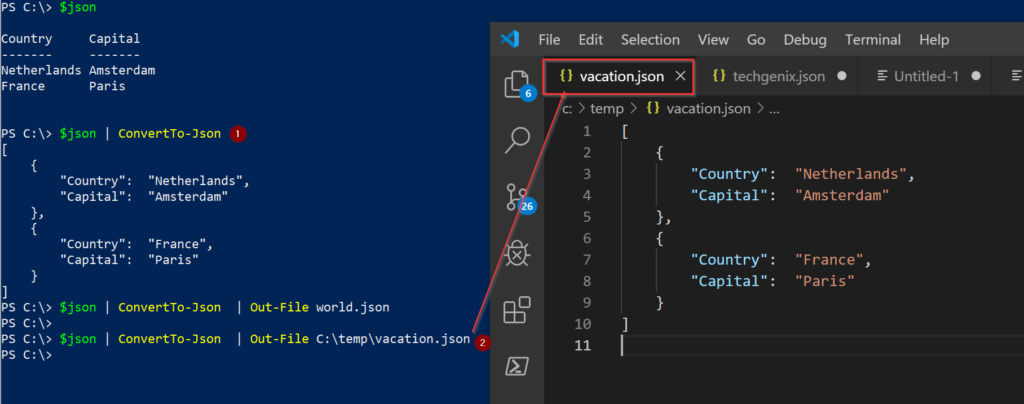
We can see the content of the $json variable in JSON format by running ConvertTo-Json (Item1). We can also send our information from a PowerShell Object straight to a JSON file, using the same cmdlet added by Out-File (Item 2).
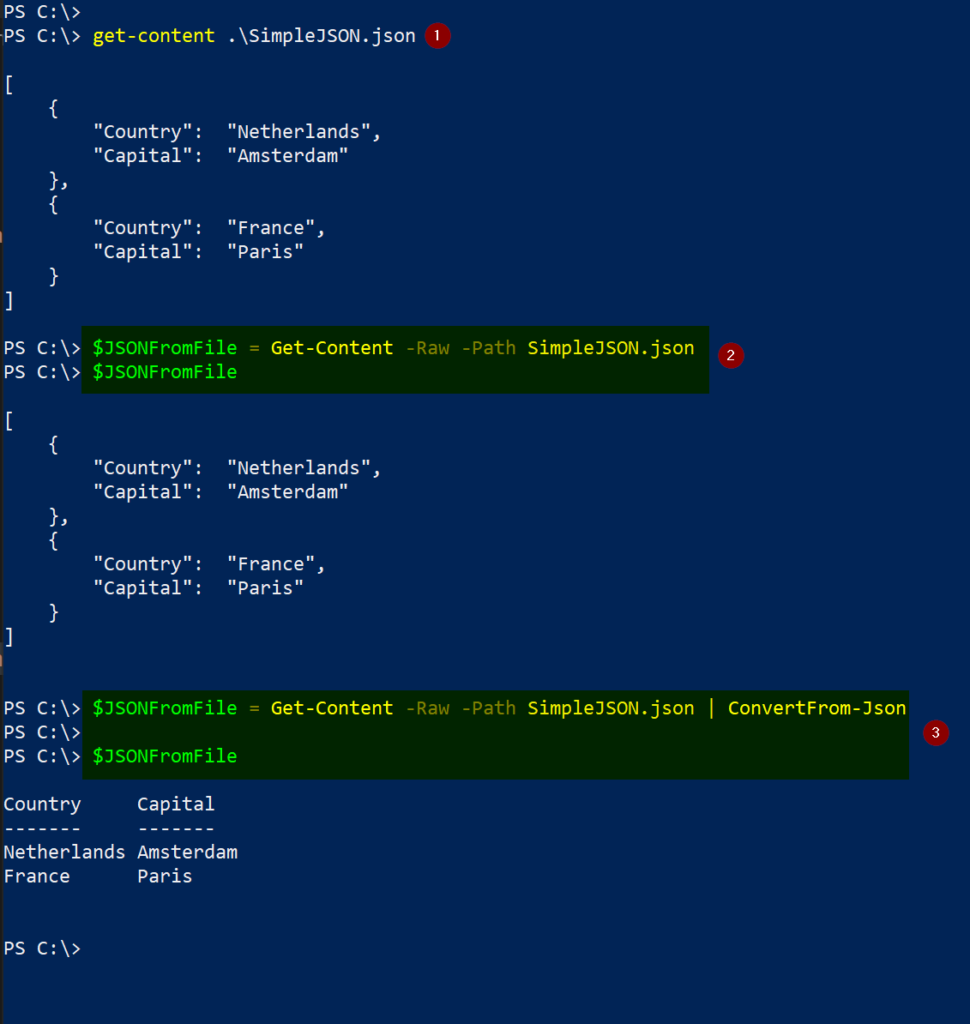
We can also do the same exercise in reverse. First, let’s check the content of an existing JSON file (Item 1 — in this case, the file was SimpleJSON.json). Next (Item 2), we will get the content from the file into a PowerShell variable $JSONFromFile and then print the content (as expected JSON content).
In normal conditions, we would load the content of the JSON file using Convert-From. This way the variable in PowerShell has the same content as a PowerShell object, thus manipulating becomes easier than ever (Item 3).
This article has been updated with new information.


the images are not showing
Hello John,
Do you mean the images in the article? If so, they are appearing fine on my screen.
Great resource! New to PowerShell and just throwing myself into the deep end – I learnt a lot here, and also accidentally learnt that arrays store variables as a reference, rather then there value by being lazy.
$info = “” | Select Country, Capital
$info.Country = “Netherlands”
$info.Capital = “Amsterdam”
$json += $info
$info.Coutnry = “France”
$info.Capital = “Paris”
$json += $info
$json
Produces the below.
Country Capital
——- ——-
France Paris
France Paris
No images for me either
This is really great.
Quite fun. Thanks
[
{
“Country”:”Netherlands”,
“Capital”:”Amsterdam”
},
{
“Country”:”Argentina”,
“Capital”:”Buenos Aires”
},
{
“Country”:”Cambodia”,
“Capital”:”Phnom Penh”
}
]
How to iterate through above data using for loop in powershell
$Data = @”
[
{
“Country”:”Netherlands”,
“Capital”:”Amsterdam”
},
{
“Country”:”Argentina”,
“Capital”:”Buenos Aires”
},
{
“Country”:”Cambodia”,
“Capital”:”Phnom Penh”
}
]
“@
$Json = $Data | ConvertFrom-Json
Foreach($Entry in $Json) {
“Capital of $($Entry.Country) is $($Entry.Capital)”
}
Capital of Netherlands is Amsterdam
Capital of Argentina is Buenos Aires
Capital of Cambodia is Phnom Penh
Unfortunalty it doesn’t work anymore.
ConvertFrom-Json: Conversion from JSON failed with error: Invalid character after parsing property name. Expected ‘:’ but got: ;. Path ‘[2]’, line 11, position 9.