One of the new features found in Microsoft’s Windows 10 April 2018 update is power throttling. The power throttling feature is designed to help increase the battery life on mobile devices by scaling back the amount of CPU resources consumed by certain background tasks.
It isn’t exactly surprising that Microsoft would include a CPU throttling feature with Windows. Windows has included a variety of power management features for many years now. CPU throttling is simply the latest feature geared at helping to reduce power consumption.
While stretching battery life and maybe even helping the environment in the process is typically good things, there are those of us who prefer performance over power savings. After all, nobody pays a premium price for the fastest CPU available because they want to throttle down their computer’s performance. Fortunately, like so many other Windows power management features, CPU throttling is customizable. If you want to configure your PC to use the least amount of power possible, you can certainly do that. If, on the other hand, you would prefer to completely disable any power saving features, you can do that too. Of course, you can also take a more balanced approach that falls somewhere in the middle.
How to disable power throttling
Power throttling is typically enabled by default, but there are a couple of ways to disable it. One option is to simply click on the power icon in the system tray and then drag the Power Mode slide bar to the Best Performance position.
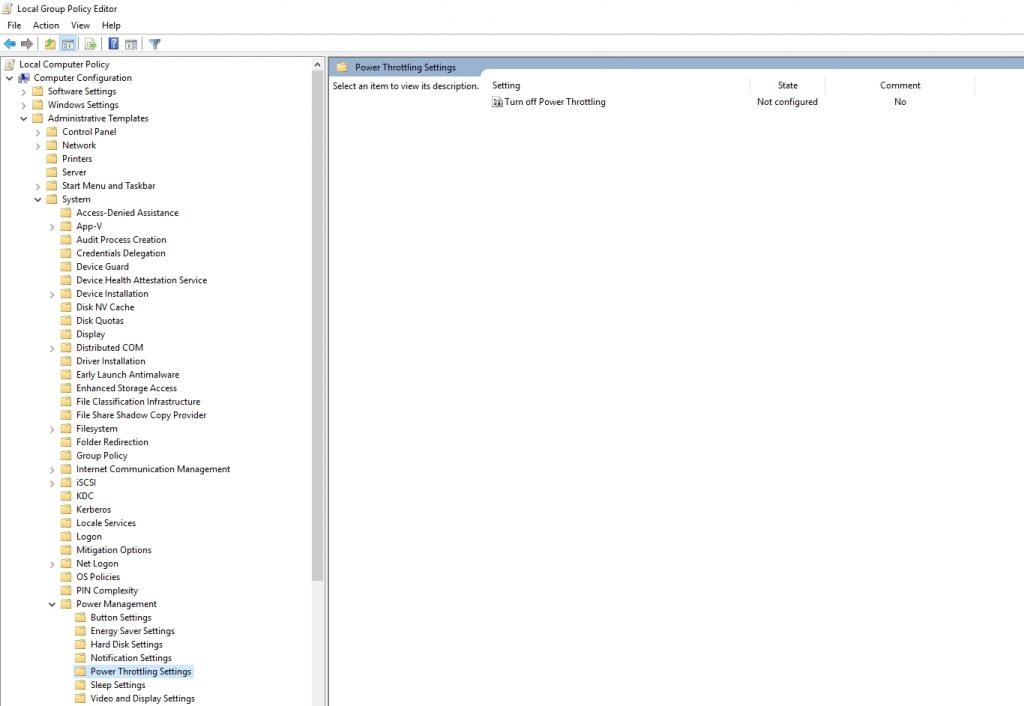
Of course, if you need to control power throttling for multiple PCs, then you are going to be better off using group policy. You can find the power throttling settings within the group policy editor at Computer Configuration | Administrative Templates | System | Power Management | Power Throttling Settings. As you can see in the figure below, group policy gives you the ability to enable or to disable power throttling, but it does not allow for granular configuration. Even so, Microsoft seems to have laid the groundwork for more settings to be added in the future.
Establishing granular control
So far, I have explained that power throttling is enabled by default, and I have shown you how you can disable it if necessary. More often, though, it will probably be beneficial to manage power throttling at a granular level. To understand why this is beneficial (beyond just helping to improve battery life) you need to know a little bit about what power throttling is actually doing.
As previously mentioned, power throttling works by decreasing the CPU resources used in servicing applications that are running in the background. The power throttling feature does not completely deprive background apps of CPU resources but instead runs background apps in a way that reduces power consumption. Of course, just because an application is in the background does not mean that it isn’t doing anything. Windows is able to examine application resource consumption to determine which applications are actively performing tasks and therefore it avoids throttling those applications in a disruptive way.
This brings up a really important point. Power throttling works on a per-application basis. You don’t necessarily have to let the power throttling feature treat every application on your system the same way. You can choose to allow some applications to be throttled while disabling throttling for other applications. For example, I have been doing a lot of work this week stitching together 360-degree videos. The stitching process runs in the background, but because this process is so time-consuming as it is, having Windows throttle the CPU resources used by the stitching process would be a bad thing. Hence, it is possible to disable CPU throttling for my video stitching software.
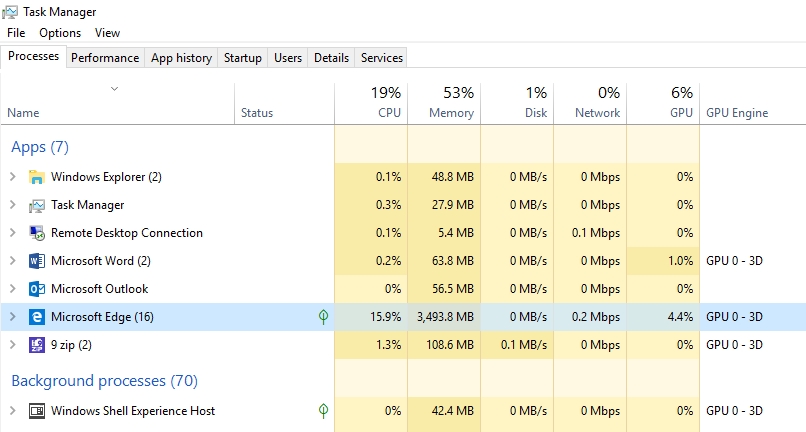
If you would like to see power throttling in action, open the Windows Task Manager. The Task Manager actually shows you which applications are currently running in battery saver mode. If you look at the figure below, you can see the leaf icon in the Status column, indicating battery savings.
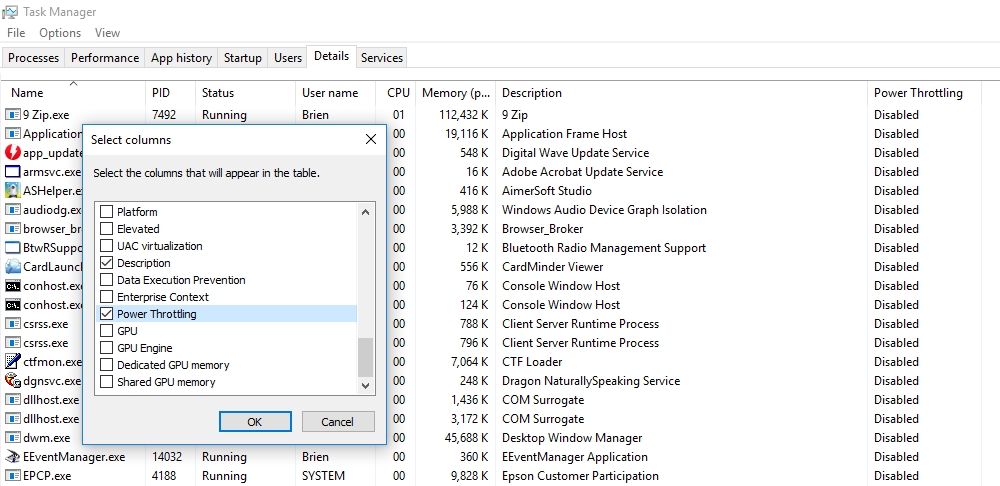
If you want a bit more information, then go to the Details tab, right-click on a column header, and choose the Select Columns option from the shortcut menu. This presents you with a list of columns that you can view. As you can see in the next figure, one of these columns is power throttling. Displaying the power throttling column will allow you to see the power throttling status for each individual process. In the figure, for example, I have disabled power throttling for all processes.
OK, so what if you want to control power throttling for an individual application? To do so, click the battery icon on the taskbar, and then click Battery Settings. This takes you to the Battery screen within the Windows Settings page. Now, click on the link labeled See Which Apps Are Affecting Your Battery Life.
As you can see in the figure below, clicking on an app within the resulting list reveals two checkboxes. One checkbox controls whether or not Windows is allowed to decide whether the app can run in the background. The other checkbox is to allow the app to run background tasks.
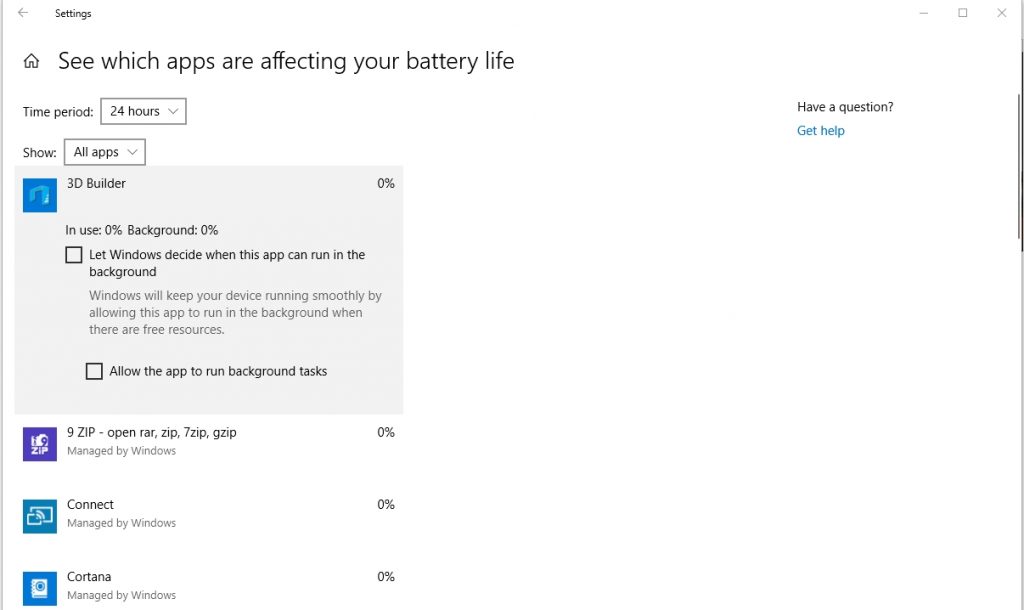
Normally when you click on an application, the first checkbox is selected by default, and the second checkbox is hidden from view. This means that the operating system has control of the application and is making the decision as to whether or not the application should be able to run tasks in the background. If you would prefer to make that decision yourself, then deselect this checkbox. That will expose the second checkbox, which you should select if you want the application to be able to run background tasks.
Increase performance? Maybe, maybe not
Personally, I have never been a big fan of power saving features because they can get in the way of performance. Even so, it may be possible to use power throttling to increase performance. If you disallow background processing for unimportant processes, you may be able to free up CPU resources for the apps that need them most.
Photo credit: Shutterstock


thanks man this was very helpful, solved the problem here
I am really glad that you found it to be helpful.
I have the weirdest problem on my Dell Latitude running Windows 10. When resuming from Sleep (standby) the processes (they are not really processes but listed as such in Task Manager) “System” and “System Interrupts” goes from 0-2% usage to 11-15% each. I believe hardware interrupts has something to do with this extremely annoying behaviour and after disabling Power Throttling completely it STILL shows Enabled (!!!) in the Power Throttling column for System Interrupts in Task Manager. Any idea what is causing this and how to fix this problem?
Thanks a lot in advance – any hint is appreciated.
Cheers,
Robert
I have seen a problem somewhat similar to that, but it’s been a while and I cannot remember all of the specifics. What I do remember was that the solution was to install a system board driver that was specific to the make and model of the machine. I hope that helps.