Recently, I had to set up a few virtual machines for use with one of the other articles that I was working on. Although I got the job done, one of the virtual machines’ performance could be best described as painfully slow. Of course, I can’t say that I was surprised. The VMs were running on aging lab hardware, which was a little bit slow to begin with. When you throw in the fact that this particular VM was running a really I/O intensive workload, it quickly becomes apparent why the VM performed so slowly.
A boost for temporary VMs
But what if there was an easy way to make the VM perform far better, on the same hardware? Believe it or not, it is possible to give a poorly performing VM really good performance without upgrading the hardware. Like all miracle solutions, however, there are a few caveats. The biggest caveat, in this case, is that the technique that I am about to show you is ideally suited to lab VMs, but this probably isn’t the sort of thing that you would want to do in production.
The basic concept behind this technique has been around for decades, and yet it is something that I almost never hear anyone mention. In fact, I had forgotten all about it myself until YouTube recommended a video demonstrating a playthrough of a 1980s video game.
Back in the 1980s, I had a friend who was really into PC gaming. Because his PC did not have a hard drive, he had to run games off of floppy disks, which was the dominant type of removable media at the time. To make a long story short, floppy drives weren’t exactly known for being fast, and there was one particular game (the same game shown in the YouTube video), that was borderline unplayable because my friend’s PC’s disk performance was so slow. Collectively, my friend and I solved the problem by setting up a RAM disk.
A RAM disk works by using a portion of a computer’s physical memory for storage. The operating system treats the RAM disk as if it were another hard disk attached to the computer.
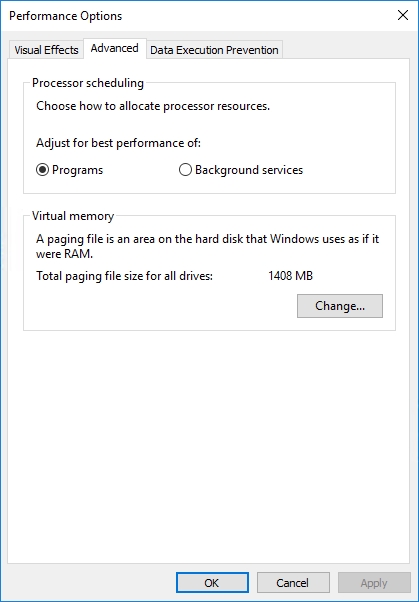
In a way, this is the exact opposite of the way that Windows normally works. Years ago, memory was really expensive, so Microsoft implemented a virtual memory feature so that Windows could use physical storage to make up for shortages in RAM. Even today, Windows 10 still uses virtual memory, as shown below. Rather than using physical storage to make up for shortages in RAM, however, a RAM disk uses system RAM as an alternative to using physical storage.
RAM disk: Advantages and disadvantages
The advantage of using a RAM disk, of course, is that RAM is much faster than physical storage, especially HDD storage.
There are two main disadvantages to using a RAM disk. First, RAM disk storage is non-persistent. As soon as you turn off the computer, the RAM disk (and everything stored on it) goes away.
The other big disadvantage is that RAM disks consume some of your physical memory. In the case of a Hyper-V host, that means that memory that could ordinarily be to host additional virtual machines. Oh, and there is one more thing… I am honestly not sure what would happen if you tried to live-migrate a VM that was running on a RAM disk. I suspect that the live migration would probably work, so long as the RAM disk used a drive letter that was the same as the drive letter being used for VM storage on the destination host.
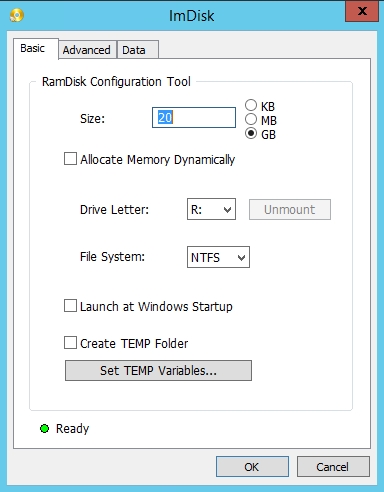
Creating a RAM disk is really easy to do. There are a number of free utilities that you can download that will allow you to create a RAM disk with minimal effort. For the purposes of this article, I am using a free tool called ImDisk. As you can see in the figure below, this utility simply requires you to specify the size of the RAM disk that you want to create, and then choose a file system and a drive letter, and click OK. The process couldn’t be easier.
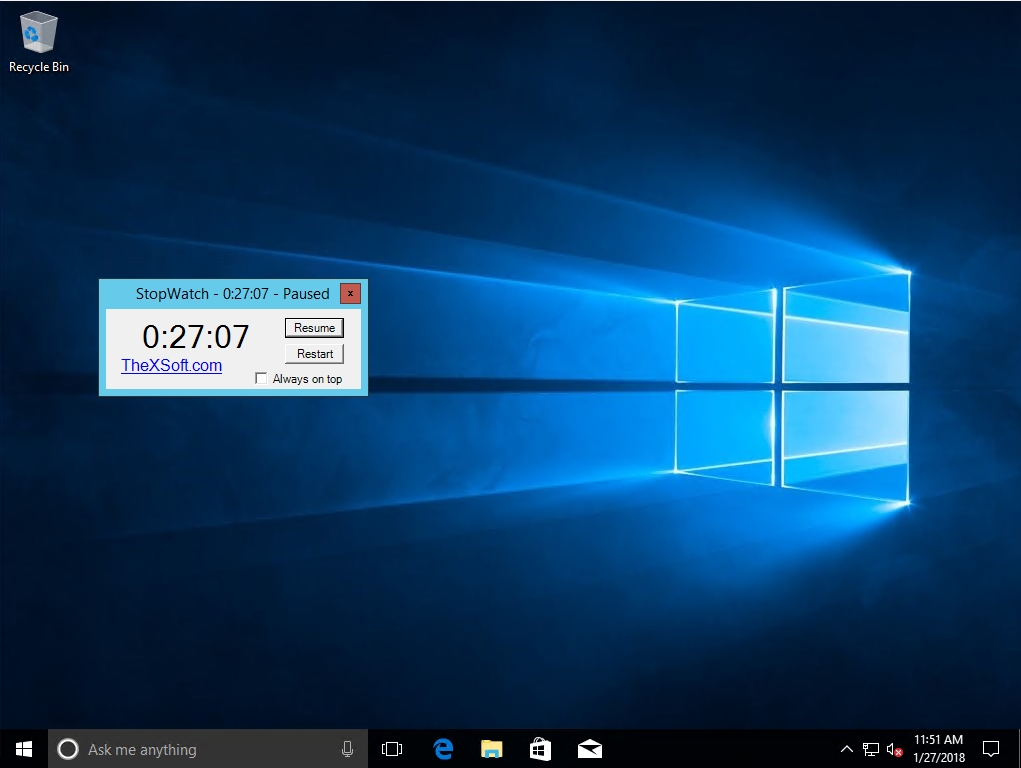
So how much of a performance gain can a RAM disk really give you? Well, for the purposes of this article, I decided to do a simple, albeit unscientific test. I created a Hyper-V virtual machine, started a stopwatch, and then watched how long it took to install Windows 10. I stopped the clock as soon as the VM displayed the Windows desktop. As you can see in the figure below, it took 27:07 to reach this point.
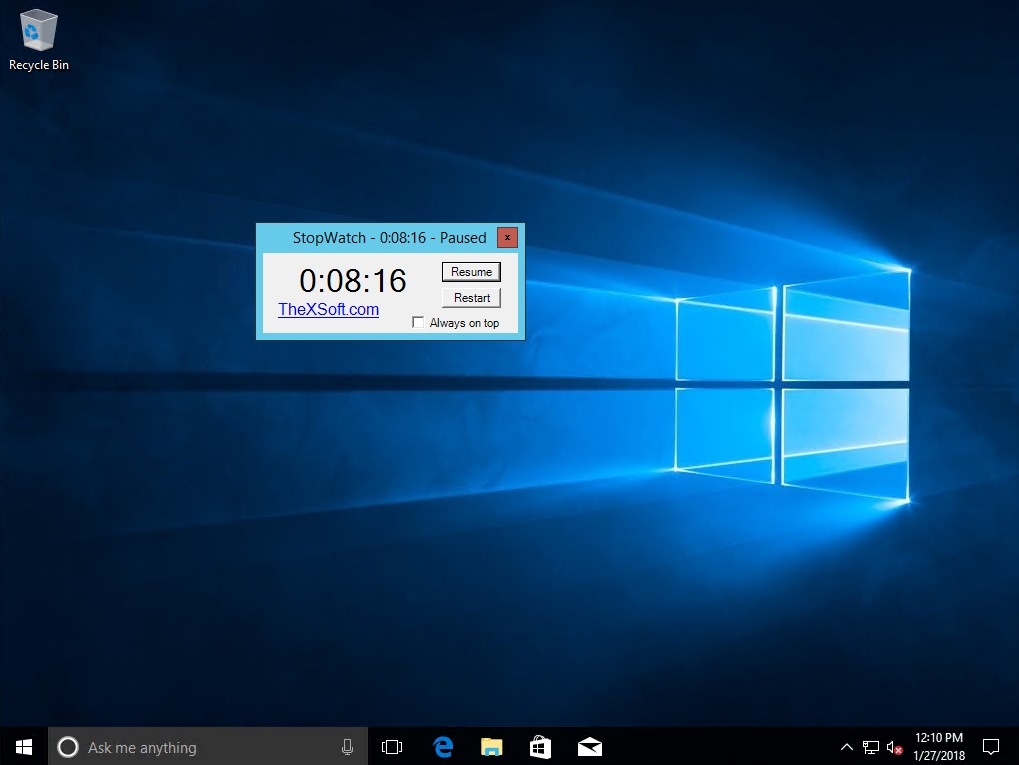
With my baseline test complete, I deleted the VM and then created an identical virtual machine, using a RAM disk instead of hard disk storage. Once again, I used a stopwatch to time how long it took to install Windows 10. This time, the installation only took eight minutes and 16 seconds to complete. In other words, I reduced the installation time by almost 19 minutes!
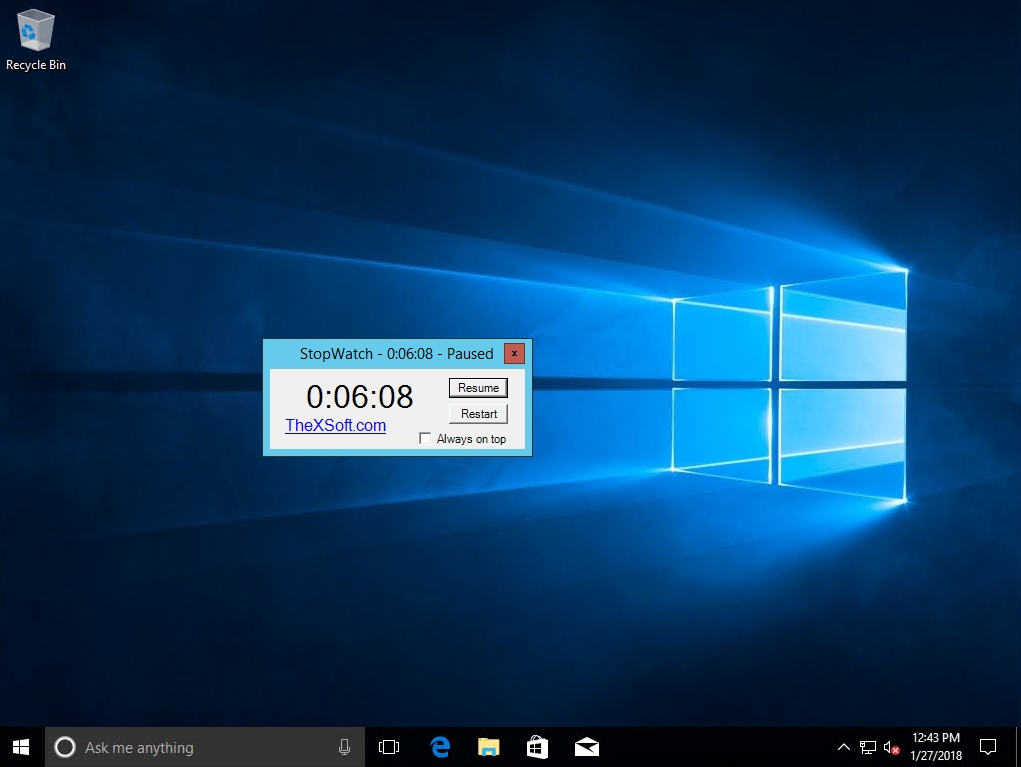
As I installed Windows onto a RAM disk, it occurred to me that the performance still wasn’t as good as it could be because Windows was being installed from an ISO file, which resided on a hard disk. That being the case, I created a second RAM disk and copied my Windows 10 ISO file to it. Next, I reformatted my original RAM disk and attempted the installation again. The figure below shows an install time of six minutes and eight seconds. In reality, the install time was several seconds less, because I had a bit of trouble getting the timer to stop, but let’s assume that 6:08 is accurate. That means that I reduced the install time by another two minutes and that overall I reduced the amount of time required to install Windows from about 27 minutes to about six minutes!
No money spent
I will concede that there are other, arguably more practical ways of improving virtual machine performance. The thing that is noteworthy about this particular solution, however, is that I achieved a very significant performance gain without spending any money. As I stated earlier, the temporary nature of RAM drives means that this solution is probably best suited for use with temporary virtual machines, such as those used in lab environments. Even so, the performance gains are undeniable.
Photo credit: Pixabay


You should do an article on this using docker.
Hyper-V with a Docker VM with TONS of ram, then create a RAM disk in the Linux docker VM and then create the docker containers to reside on RAM the disk
That’s a great idea. The transient nature of containers would make them a good fit for use with a RAM drive. The trick would be to prevent a situation in which too many containers were spun up at the same time, depleting the RAM disk.
I was shocked how much faster the OS install was with a RAM drive. So, How is this different than using Microsofts ReadyBoost? Besides, that ReadyBoost uses a USB & ImDisk sets aside free space to put into a drive letter, to be used.
ReadyBoost is a cache that speeds up certain disk operations. My technique uses RAM only. Because RAM is a lot faster than flash storage, my technique should deliver far better performance.
How much RAM was used for this?
Will webcam and networking apps still run in RAM when I put my PC into Sleep Mode?
Hi Zeb, that isn’t really what this article is about. Sleep mode (on a Windows machine) is kind of like putting the operating system on pause. I wouldn’t expect the Webcam and networking applications to function while the computer is asleep. However, these applications should resume when the computer wakes up.
@OriginalTech, the RAM disk that I installed Windows onto was 20 GB. I can’t remember for sure, but I think that the RAM disk that I created for the ISO file was 5 GB in size.
I “inproved” this scenario a bit by creating a Dynamic RamDisk (ImDisk), then create the VM, then run a script I wrote that creates a Checkpoint of the VM and puts the resulting *.avhdx on the RamDisk. Try installing again. Main advantage is, when you delete the checkpoint it merges the difference with the *.vhdx you started with. Instead of a multitude of random small I/Os which occur during install (or just running your VM afterwards), this way all write I/O is done on the RamDisk, no disk write I/O. The merge will be done using sequential writes, like a, much, shorter write “burst”. Ofcourse, if you reboot the host, this way, you’re not losing anything either. A 2012R2 server installs like this within 2 minutes. Do this with 10 VMs simultaneously and they install within 5 minutes. When deleting the Checkpoint, your RAM gets freed up again also (for a new Checkpoint for example). Not suitable for production ofcourse, but gets the job done quick!
Hey Bart, That is an awesome idea!!! I might even write about it in a follow up article (giving proper credit to you of course).
How exactly do you separate the checkpoint file from the vhdx?
It seems that Hyper-v don’t allow separation of the two – the only thing i can move is the checkpoint configuration file.
What am i missing?
A nice creative solution, but remember RAMdisks are useful tool for a small range of specific situations, where you’re able to control memory cacheing better than the OS’ algorithm, it’s not a universal panacea.
You need to begin with some underutilised memory, since the remaining memory works harder to compensate memory allocated to the Ram Disk which is no longer available. (In your case, memory was underutilised while the cpu waited for disk access). When memory is already fully used it may just result in more paging and be counterproductive.
-Remember that those original RamDisks were put into ‘High Memory’ – empty memory that Windows could not access, so they were making use of what was essentially ‘wasted memory’.
How can I tell whether I am actually benefiting from a Ram Disk? Does my Windows 10 Pro provide any monitoring reports I can review while it’s running?
You can use the Windows Performance Monitor.