If you would like to read the next part in this article series please go to Re-installing the Cluster nodes in an Exchange 2007 CCR-based Mailbox Server Setup (Part 2).
Introduction
Recently I was faced with the task of re-installing the Exchange 2007 Mailbox server role as well as the operating system on each node in a CCR-based Mailbox server setup. Since there’s no documentation available on how this is done in a step by step fashion, I thought you would like it covered here on MSExchange.org as chances are you’ll find yourself in a similar situation one day. To be honest the process is relatively straightforward, but things can become messy if you don’t follow the right steps as well as perform them in a specific order.
Note:
The steps provided in this article will make sure the clustered mailbox server (CMS) is 100% available to your Outlook users during the whole process.
In the first article, we’ll uninstall the passive clustered mailbox role from the first CCR node, evict the node form the Windows cluster and the re-add the node to the Windows cluster after the operating system has been re-installed and configured accordingly.
Re-Installing the first CCR Node
The very first thing you’ll want to do is to logon to one of the CCR nodes. Then ensure the Windows cluster resources and the clustered mailbox server is owned by the opposite node than the one you’re going to reinstall first. To see which node owns the Windows Cluster resources, open the Windows Cluster Administrator console, then select the Groups node as shown in Figure 1 below. As you can see in the right pane the owner for both the Windows Cluster Group and the CMS is revealed.

Figure 1: Cluster Administrator Console
Note:
You can also see which node owns the CMS by typing Get-ClusteredMailboxServer | FL in the Exchange Management Shell (EMS). If you’re running Exchange 2007 SP1, you can even use the Exchange Management Console (EMC) to check this. This is done under the Server Configuration work center, where you open the Property page for the CMS and then click the Clustered Mailbox Server tab).
If the resources are owned by the node you planned on reinstalling first, you must move them to the other node. As you probably had the CMS running in production for quite some time, I shouldn’t need to tell you this but remember that it’s only supported to move the Windows Cluster Group using the Windows Cluster Administrator. The CMS must be moved using either the Move-ClusteredMailboxServer cmdlet (Figure 2) or if you’re using Exchange Server 2007 SP1 by using the Manage Clustered Mailbox Server wizard in the EMC (Figure 3).

Figure 2: Moving the clustered mailbox server using the Exchange Management Shell

Figure 3: Moving the clustered mailbox server using the Exchange 2007 SP1 Management Console
When the Windows Cluster Group and CMS have been moved to the other node, we can begin uninstalling the Mailbox server role. To do so, open the Control Panel and then Add/Remove Programs. Select Microsoft Exchange and click Remove (Figure 4). This will launch the Exchange 2007 Setup wizard.

Figure 4: Clicking Remove in Add or Remove Programs
On the Exchange 2007 Setup wizard maintenance mode page, click Next then untick Passive Clustered Mailbox Role and Management Tools. Click Next again.

Figure 5: Removing the Passive Clustered Mailbox Role
Let the readiness checks complete then click Uninstall (Figure 6).

Figure 6: Readiness Checks completed successfully
When the passive clustered mailbox role have been uninstalled, click Finish (Figure 7).

Figure 7: Exchange 2007 Passive Mailbox role and Management Tools removed successfully
With the passive clustered mailbox server role uninstalled, we can evict the node from the Windows cluster. To do so, open the Cluster Administrator console, then right-click on the respective node and select Stop Cluster Service in the context menu as shown in Figure 8.

Figure 8: Stopping the cluster service
When the cluster service has been stopped, we are able to evict the node. Do so by right-clicking on the node that’s now offline then select Evict Node (Figure 9).

Figure 9: Evicting the cluster node
We’ll get a warning message like the one shown in Figure 10, click Yes.

Figure 10: Warning message
We have now removed the node from the Windows cluster (Figure 11).

Figure 11: Cluster Administrator with one node
We can begin to re-install the operating system, but before you do so please make sure you have the NetBIOS name, IP addresses, LUNs etc. documented, so you know how to configure these things when Windows Server 2003 has been reinstalled. Before we re-add the node to the Active Directory domain, we must also make sure the computer account is reset. To do so open the Active Directory Users & Computer MMC snap-in, then select the respective computer account object, right-click on it and select Reset Account on the context menu (Figure 12).

Figure 12: Resetting the Active Directory Computer account
When the cluster node has been reinstalled and you have configured the NetBIOS name, IP addresses, and LUNs as well as added the node to the Active Directory domain, the next task is to re-add the node to the Windows Server cluster. To do so, open the Cluster Administrator console and then right-click somewhere in the left pane. In the context menu, select New > Node as shown in Figure 13 below.

Figure 13: Adding a new node to the Windows Server 2003 cluster
On the Add Notes Wizard welcome page, click Next, then enter the NetBIOS name of the node you’re re-adding to the cluster and click Add (Figure 14). Click Next.

Figure 14: Entering the NetBIOS name of the node to be re-added to the cluster
The cluster wizard will now analyze the cluster configuration (Figure 15). When finished click Next.

Figure 15: Cluster configuration wizard analyzes the cluster configuration
We now need to enter the password for the cluster service account (Figure 16). When you have done so, click Next.
Note:
Although I use the Administrator account as the cluster service account in my lab, you should always create a dedicated cluster service account for the cluster when dealing with production environments.
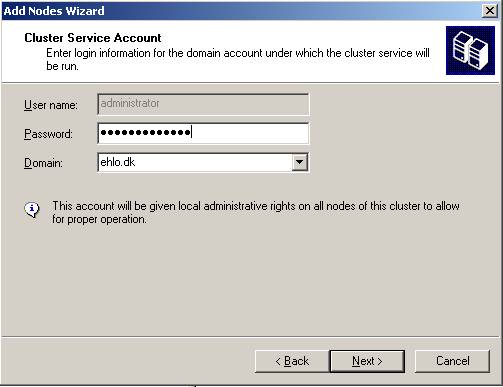
Figure 16: Specifying the password for the Cluster Service Account
Now verify you want to add the node to the proposed cluster configuration and click Next (Figure 17).

Figure 17: Proposed Cluster Configuration
Wait for the cluster to be configured and when possible click Next and finally Finish to exit the Cluster setup wizard (Figure 18).

Figure 18: Cluster is configured
Summary
In this part 1 of this 2 part article series, we uninstalled the passive clustered mailbox role from the first CCR node, evicted the node from the Windows cluster and then re-added the node to the Windows cluster after the operating system had been re-installed and configured accordingly.
In the next part, we will install the passive mailbox role and configure it accordingly.
If you would like to read the next part in this article series please go to Re-installing the Cluster nodes in an Exchange 2007 CCR-based Mailbox Server Setup (Part 2).


