When using IaaS (infrastructure-as-a-service) in Microsoft Azure, the cloud administrator can create snapshots of a disk, which could be either an OS or a data disk. A snapshot is a read-only copy of a virtual hard drive (also known as VHD). When performing a snapshot, the recommendation is to stop the VM first. Since there would be no activity on the disks, the snapshot process will keep the data intact without risks of open files.
If you are running that process for a single VM or a couple of disks, it is simple and faster using the Azure Portal. However, you may have to do that to an entire farm of VMs. In this kind of scenario, it is recommended to use a consistent process, such as a script, especially when we have VMs with several disks attached to it.
I created a script to address the process to protect and restore a VM. The idea behind this is to keep it simple and save time to protect and restore any given VM by not asking too much input before running the script.
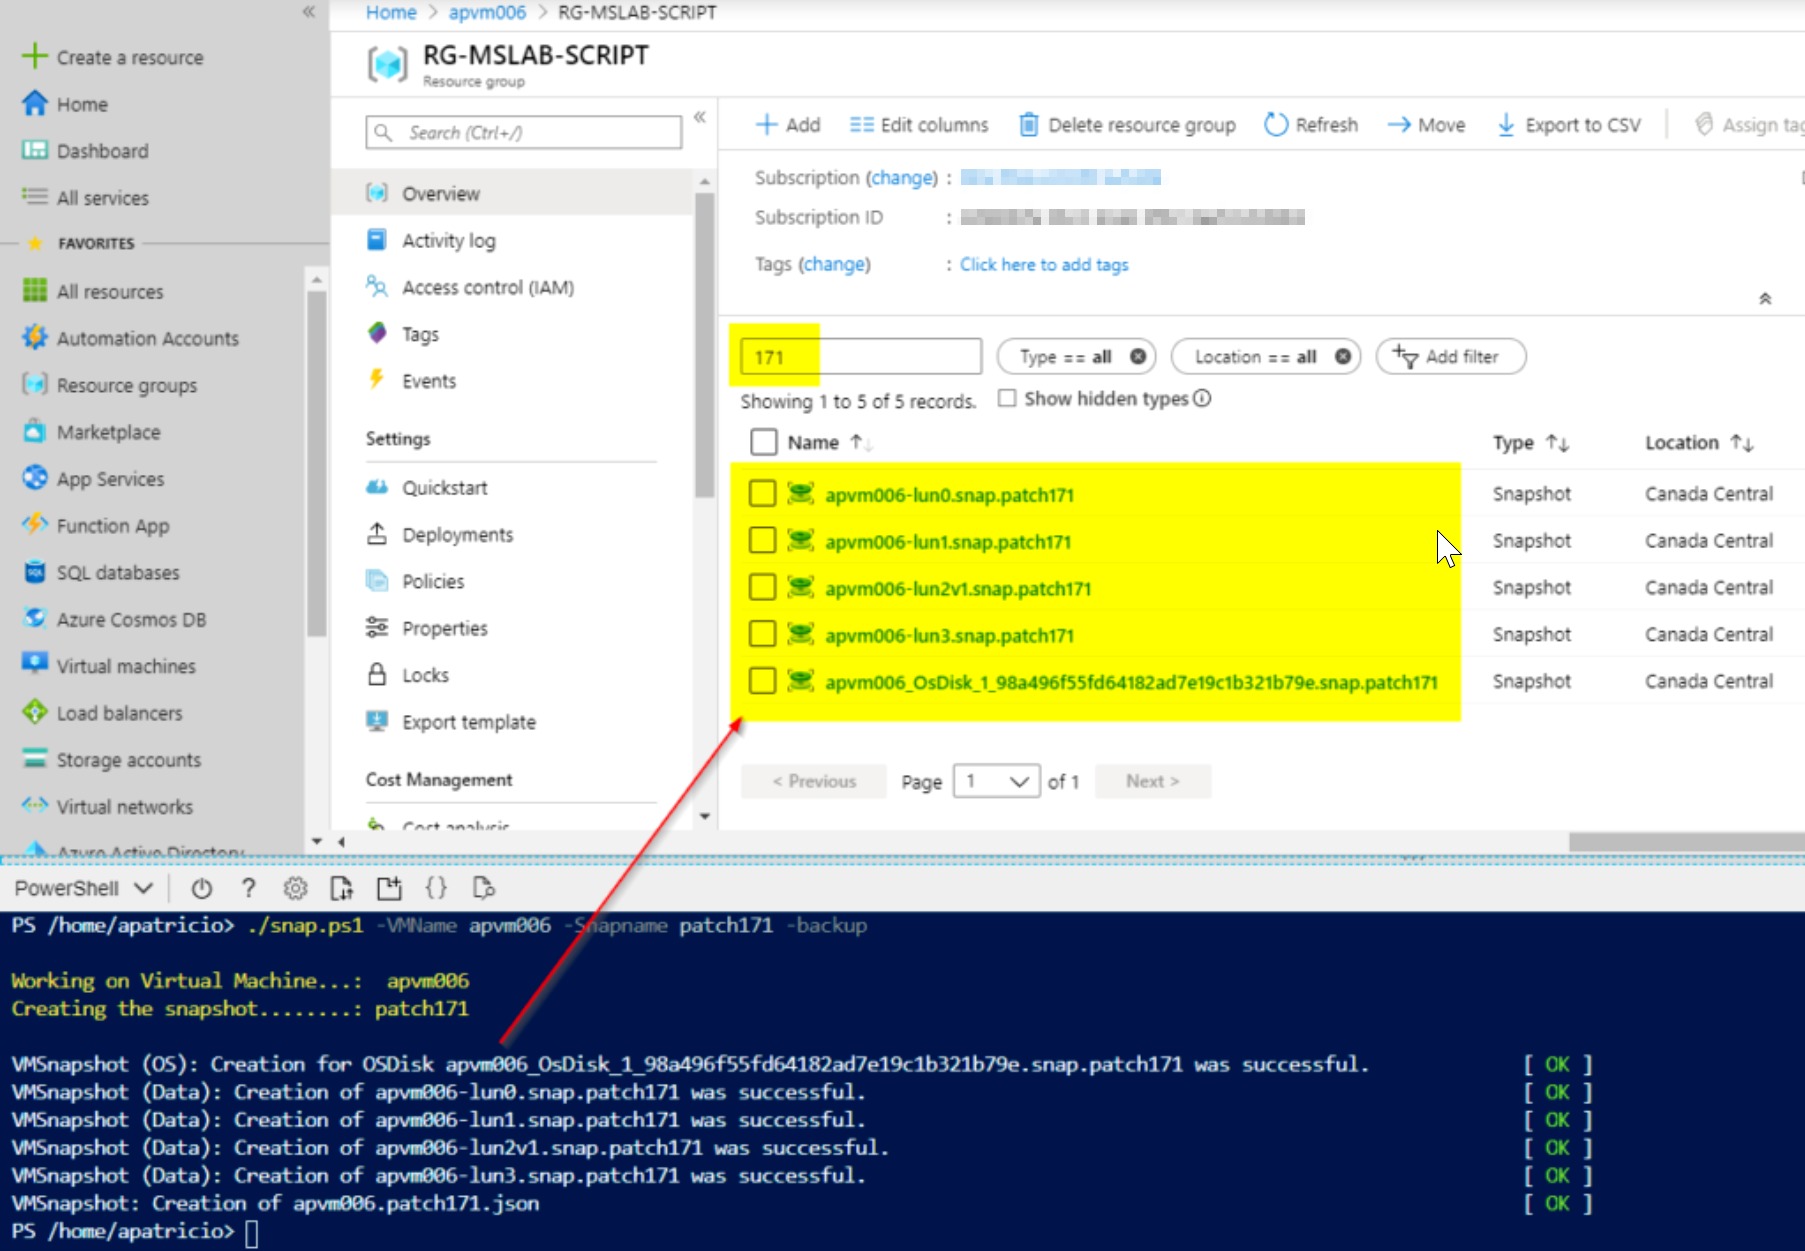
We are going to start by creating a snapshot of the current VM and save for the future using the following command.
snap.ps1 -VMName apvm006 -Snapname patch171 -backup

Let’s imagine that our operation went wrong and we need to restore the snapshot. We could use the same script to restore a previous snapshot by using this command:
snap.ps1 -VMName apvm006 -Snapname patch77 -restore
Script input and validation
The first goal is to make sure that we have a solid input process to save code validation down the road. These following parameters will be available to the end-user when running the script.
- VMName (string: We will make it mandatory and check if the VM exists in the Param() section of the script.
- Snapname (string): It is a mandatory parameter, and it is a simple string to identify the snapshot name.
- Backup (switch): If enabled, we will trigger the process to create a snapshot of the current VM.
- Restore (switch): If enabled, we will trigger the process to create the managed disks from a previous snapshot, and swap the newly created disks in the existent VM.
In the script body, we perform validation to make sure that the user is not entering -backup and -restore at the same time.
Protecting Azure VMs
The script uses a lot of functions to avoid repetitive tasks. When the script is being used to protect a VM, the following command line can be used.
VMSnap.ps1 -VMName <VMName> -Backup
In the image depicted below, the entire body of the script is being listed. When the -backup is used, we will use two functions: VMInventory and VMSnapshot.
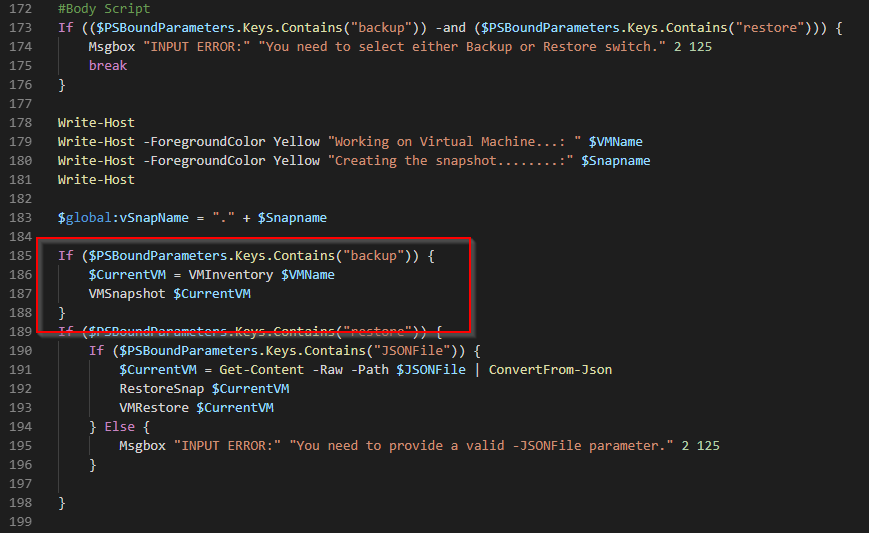
The VMInventory is the essential function of the entire script. It creates an array and adds all the required information of the VM, including name, resource group, location, VM size, OS and data disk information, total number of disks and the snapshot name that was passed by the end-user.
We are renaming all the disks by adding a “.<SnapshotName>” suffix to it. So, before moving forward, we make sure that all disks are using the same “version,” meaning the same snapshot.
Last but not least, we save a JSON file with the VM name in the current location using the following format <VMName>.<snapshot>.json.
The VMSnapshot function will get the name of the current disks (if they already have a .<snapshot> on their names, we will strip that out) and add .snap.<SnapshotName> and provide the output of every single disk processed.
The entire backup process takes just a few minutes to complete.
Restoring Azure VMs
The process of restoring a VM is as simple as protection. The entire process requires two functions: RestoreSnap and VMRestore.
The RestoreSnap function will look for existing snaps within the resource group that match the -Snapshot parameter provided. For each snapshot, a managed disk will be created using the format <diskname>.<snapshot>.
After having all disks available, the VMRestore function will replace the existing disks in the existing VM to the disks created in the previous step.
Until this point, all the operations were happening besides the existing VM, per se. Only in the last function, we replaced the disks at the VM level.
Because we are capturing all the disk configuration as part of our inventory, we can replace the disks with the same cache, storage type, and so forth.
The script does not delete managed disks. The recommendation is to make sure that there are no managed disks present for the version that you are planning to restore. Make sure to delete them before running the script.
Get the script — but consider this limitation
The script was created to address some issues of my customer. However, it is not a one-size-fits-all. You may have different requirements.
The script that we went over in this article can be found at my GitHub.
One limitation is that the JSON file is only for documentation purposes at this time. An improvement that I’m thinking about is to use that same JSON file to restore the VM instead of using the current state of the VM. The main reason is that throughout the lifetime of a VM, we may have disks being added or removed. In our current script, we will use the existing disks to replace the old ones and sometimes that may not be ideal.
Using the JSON file as a source, the limitation above can be easily overcome because we do have the original snaps of the original disks. The script could read the JSON file, figure out the current version to read the existent disks (even if they are not currently configured on the existing VM) and add all the original disks back into place. I would probably detach the current disks to make my life easier.
Every improvement may create some challenges. One of them is that the Azure VM itself may have changed (a resize may have occurred since the previous snapshot). Keep that in mind when working on the process to restore a previous version of a VM.
Featured image: Pixabay


