In another TechGenix article, I discuss how you can replace lists your team creates in Excel with SharePoint lists. The problem with SharePoint lists is they are difficult to find. For example, you might have a SharePoint team site for a new product launch, but there might be one for Product Marketing, another for Communications, and yet another for Sales. So what happens when someone needs quick access to an important list and doesn’t know which site to visit? Enter PowerApps.
[tg_youtube video_id=”TCW7O6sl_o0″]
What is PowerApps?
PowerApps is a new solution from Microsoft that allows you to convert data and display it as an app on phones, tablets, and browsers. The idea behind PowerApps is that you can create an app that looks great on mobile devices from data in SharePoint lists, databases, and other sources.
But I’m not a developer
PowerApps is more of a power user tool. If you are comfortable working with tools like Microsoft Access or creating forms in Excel or Word, then you will find PowerApps pretty straightforward. Microsoft wants as many people as possible to create PowerApps without the need for a developer to create the app, so you will find the user interface to be easy to understand.
How to create a PowerApp
As I mention earlier in this article, PowerApp works with multiple data sources, and SharePoint lists are one of them. To create a PowerApp, follow these steps:
- Go to the SharePoint list you want to work with.
- Click the PowerApps item at the top of the page.
- A menu appears. Select the Create an app item.
- The Create an app panel appears. Type a Name for your app. I recommend you keep it short and descriptive because this name could appear on small phones and you want people to read it.
- Click the Create button.
In a few seconds (or minutes), the PowerApps builder will display. You have the choice to download an app for Microsoft Windows, or you can use the browser version. As I write this article, the browser version is still in beta, so it has some odd quirks, but overall I like using my browser.
Once you create the PowerApp, it is ready for use. Technically, you do not have to do anything else, but chances are you will want to modify the look and feel. For example, some screens seem to display SharePoint columns in alphabetical order instead of their display order, and sometimes the text is cut off the screen, so you need to change font sizes.
Edit your app
 The video in this article provides a lot more information than I will provide in this article, so I provide you with the basics here.
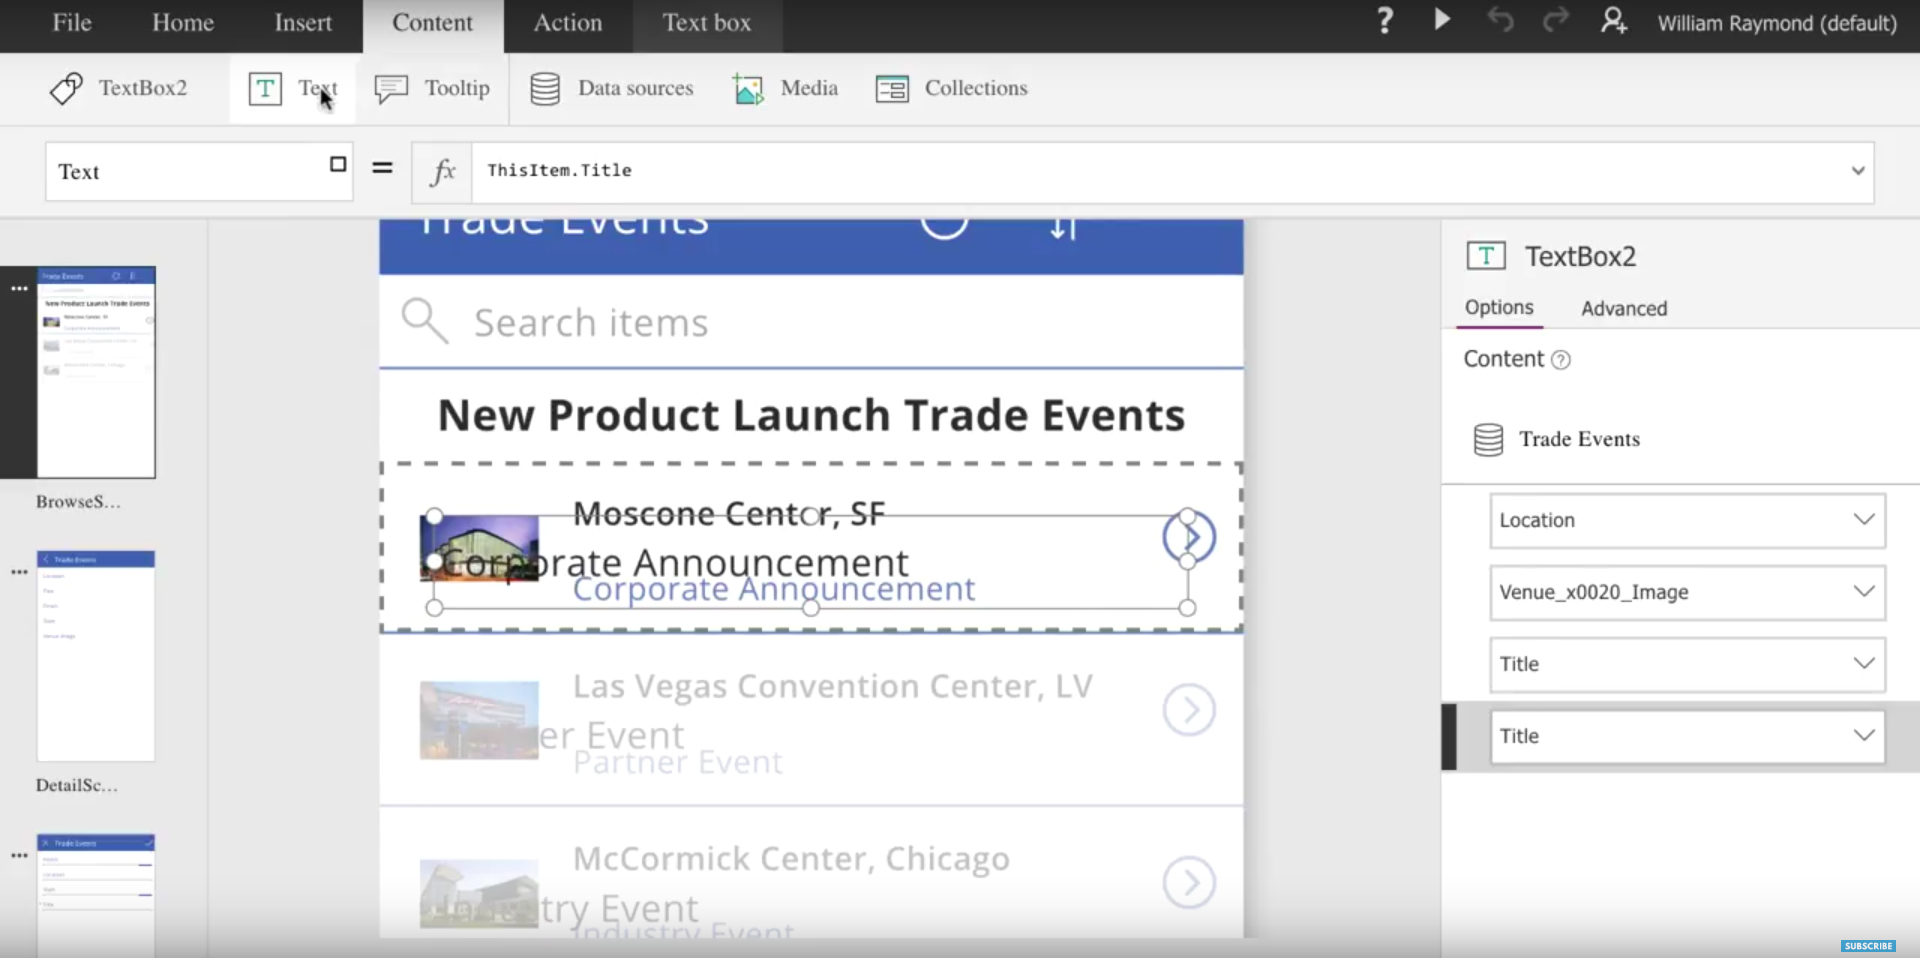
On the left-side of the screen is a list of the screens PowerApps creates for you. There is always a Browse Screen (the home page of the app, if you will), a Detail Screen (to see more details of the item the user selects), and an Edit Screen (to modify the item). You can click any of those screens to change the way they look. You can also create more screens or even delete screens.
On the right side of the screen is a panel that changes based on the items you select. When you create your PowerApp for the very first time, the panel shows the layout for the Browse Screen (the home page for the app).
At the top of the page are tabs that let you create or modify items you select on the screen. For example, you can insert text, change font sizes, change the sort criteria for your list, and much more.
In the center of the page is a preview of your app displaying the current screen you are editing.
Understanding the screens
If you ever used an app like Yelp or AirBnB, you are familiar with the concept of seeing a pre-populated list with locations, ratings, and a picture. That is the Browse Screen in PowerApps. If you want more information you tap it and a new page opens showing you more details. That is the Detail Screen in PowerApps. Want to leave your rating or add your own listing? That is the Edit Screen in PowerApps.
Editing the BrowseScreen
You will probably spend most of your time modifying the Browse Screen because this is the entry point to your app and you want to make sure your app is easy to view and understand.
By default, the browse screen has a Browse Gallery, which is a fancy name for a list. I do not quite know why Microsoft calls it a browse gallery, but the idea is this gallery displays all the items in your list, based on the layout you choose. Reading these words may make it all sound a little confusing, but after you watch the video in this article, you will see it is very easy to understand.
The important thing to know is the browse gallery will display fields from your list so you can preview how the app will look. If you did not add data to your SharePoint list, I recommend you do so. Adding data to your SharePoint list will let you see how it will display in the PowerApp.
When you modify a single row in the browse gallery, you modify all rows. This way, you do not have one row that shows the title of your list item and another row that just shows a date.
Disabling features
By default, PowerApps lets people add new items, and delete or modify existing items. If you want to prevent this, I found it is easiest to just click the icon (like the trash icon), and then set the Visible property from true to false. If someone taps (or clicks) where the icon is located, nothing will happen. If you want to let people to use this feature later, just change the Visible property again.
Testing your app
PowerApps has a player built in. In the browser editor, simply click the Play icon at the top-right of the screen. The browser will go full-screen and let you interact with the app as if it were on a phone or tablet.
Deploying your app
All you need to do is go to the File menu and choose Save. Once you have done this, go to the app store of your choice (there are versions for iOS, Android and Windows phones), and download the PowerApps app. Run the app and type your Office 365 (corporate) username and password. You will see your app on the screen. (There may also be a list of sample apps.)
If you want to share your app with others, run PowerApps and open your app. Click the File tab and then click the Share item. Follow the instructions to share your app with others. Note: Since this is an Office 365 app, you may not be able to share your app with people outside your organization.
In the video I include with this article, I show you how to create a marketing events app that lists all the trade events a company is running for their new product launch. Imagine your sales team wanting to share this date with a customer. Rather than opening their computer, finding your SharePoint site, and going to the SharePoint list, they just open their phone and run your app. As you will see from the video, PowerApps is relatively easy to use and opens the door to people who need information at their fingertips.


