If you would like to read the other parts in this article series please go to:
- Test Lab Guide: Demonstrate Site to Site VPN with Threat Management Gateway 2010 (Part 1)
- Test Lab Guide: Demonstrate Site to Site VPN with Threat Management Gateway 2010 (Part 3)
- Test Lab Guide: Demonstrate Site to Site VPN with Threat Management Gateway 2010 (Part 4)
Install the Operating System and Configure Networking on TMGBRANCH
The next step in configuring the TMG firewall site to site VPN Test Lab Guide is to create a new virtual machine that will act as the branch office VPN gateway. I won’t go through all the instructions on how to install the Windows Server 2008 R2 operating system, since you know how to do that. The following are the key characteristics and configuration settings you need to support the TMGBRANCH VPN gateway:
- Before creating the TMGBRANCH VM, create a new virtual network named BRANCHNET and if you’re using Hyper-V, make that a Private Virtual Network
- When creating the BRANCHNET virtual machine, install two virtual NICs. Connect one of the virtual NICs to the Internet subnet that you already created as part of the Base Configuration and configure the second virtual NIC to the BRANCHNET subnet.
- Rename the NICs virtual NICs on the TMGBRANCH virtual machine so that the one connected to the Internet subnet is named Internet and the one connected to the BRANCHNET subnet is name BRANCHNET.
- Rename the virtual machine to TMGBRANCH
- Assign the Administrator account on TMGBRANCH the password p@ssword1
Assign the following IP addressing information to the NIC connected to the Internet subnet:
IP Address: 131.107.0.4
Subnet Mask: 255.255.255.0
Default Gateway: 131.107.0.1
DNS Server: (none)
Assign the following IP addressing information to the NIC connected to the BRANCHNET subnet:
IP Address: 10.0.0.1
Subnet Mask: 255.255.255.0
Default Gateway: (none)
DNS Server: (none)
After getting the operating system installed and the name of the machine and IP addressing information changed, we’re now ready to install the TMG firewall software on TMGBRANCH.
Install the TMG Firewall Software on TMGBRANCH
Now we’re ready to install the TMG firewall software on the TMGBRANCH virtual machine. We could install either the Standard or the Enterprise Edition at the branch office. In a production environment its most likely that you’re going to use the Enterprise Edition, so we’ll we use the Enterprise Edition of the TMG firewall in this test lab.
Mount the .iso file for the TMG Enterprise Edition software and click splash.hta in the autoplay dialog box. When the splash screen starts up, click the Run Preparation Tools link on the page, shown in Figure 1.

Figure 1
On the Welcome to the Preparation Tool for Microsoft Forefront Threat Management Gateway (TMG) page shown in Figure 2, click Next.

Figure 2
On the License Agreement page shown in Figure 3, put a checkmark in the I accept the terms of the License Agreements checkbox and then click Next.

Figure 3
On the Installation Type page shown in Figure 4, select the Forefront TMG services and Management option. We select this option because we want the TMG firewall at the branch location to host both the firewall services and the management services (configuration storage server, which will be located on the branch office TMG firewall and not on a dedicated configuration storage server). Click Next.

Figure 4
The preparation wizard will install the required server roles and features, as shown in Figure 5. This will take a few minutes, so be patient.

Figure 5
When the preparation wizard finishes configuring the server roles and features to support the TMG firewall, the Preparation Complete page that’s shown in Figure 6 appears. Make sure there is a checkmark in the Launch Forefront TMG Installation Wizard checkbox and then click Finish.

Figure 6
This brings up the Welcome to the Installation Wizard for Forefront TMG Enterprise page that you see in Figure 7. Click Next.

Figure 7
On the License Agreement page that you see in Figure 8, select the I accept the terms in the license agreement page and then click Next.

Figure 8
On the Customer Information page shown in Figure 9, enter a user name of your choice and an organization name of your choice and then click Next.

Figure 9
On the Installation Path page that you see in Figure 10, accept the default setting and then click Next.

Figure 10
On the Define Internal Network page shown in Figure 11, you will specify the IP addresses that will be part of the default Internal network. Click the Add button to start the selection process.

Figure 11
In the Addresses dialog box you see in Figure 12, you have three options: Add Adapter, Add Private and Add Range. In almost all cases, the best option is the Add Adapter option, as this will automatically include all addresses that belong to the default Internal Network as defined by the routing table entries included on the TMG firewall. Remember that when configuring a new TMG firewall for production, you should always configure the routing table entries on the firewall before installing the TMG firewall. While the TMG firewall does allow you to configure these routing table entries later in the installation process as a convenience to you, it’s better that you do it before you install the TMG firewall software so that you can take advantage of the Add Adapter option.
Click Add Adapter.

Figure 12
On the Select Network Adapters page shown in Figure 13, put a checkmark in the BRANCHNET checkbox. It’s important that you make sure that there is a checkmark in the checkbox, because if you just click on BRANCHNET and highlight the entry, it will not automatically put a checkmark in the checkbox! Yes, it’s been this way since ISA 2004, and they’ve never fixed it :). This also illustrates why it’s useful to rename your NICs so that you know to which networks they’re connected. If you just saw “Local Network Connection #1” and “Local Network Connection #2” in this dialog box, you’d be hard pressed to remember which is which, and it gets even more confusing when you have eight or ten NICs on your TMG firewall.
Notice that after you make the selection, you get some IP addressing information in the Network adapter details section. The Route Information line shows the IP addresses that will define the default Internal Network based on the routing table information on this TMG firewall. Also note that in this Test Lab Guide module, we didn’t add any special routing table entries, so all we see here are the IP addresses that are on-subnet to the internal interface on the TMGBRANCH firewall.
Click OK.

Figure 13
In the Addresses dialog box that’s shown in Figure 14, click OK.

Figure 14
On the Define Internal Network page that’s shown in Figure 15, click Next.

Figure 15
On the Services Warning page that you see in Figure 16, click Next.

Figure 16
On the Ready to Install the Program page shown in Figure 17, click Install.

Figure 17
It will take a while to install, as you can see in Figure 18, so again, be patient.

Figure 18
When the installation completes, you will see the Installation Wizard Completed page that’s shown in Figure 19. Make sure there is a checkmark in the Launch Forefront TMG Management when the wizard closes checkbox and then click Finish.

Figure 19
You’re not finished yet! On the Getting Start Wizard page that you see in Figure 20, click the Configure network settings link.

Figure 20
On the Welcome to the Network Setup Wizard page shown in Figure 21, click Next.

Figure 21
On the Network Template Selection page that you can see in Figure 22, select Edge Firewall and then click Next.

Figure 22
On the Local Area Network (LAN) Settings page that you see in Figure 23, in the Network adapter connected to the LAN drop down list, select BRANCHNET and then click Next.

Figure 23
On the Internet Settings page shown in Figure 24, in the Network adapter connect to the Internet drop down list, select Internet and then click Next.

Figure 24
On the Completing the Network Setup Wizard page that you see in Figure 25, click Finish.

Figure 25
No, we’re still not done. Back on the Getting Started Wizard page that you see in Figure 26, click the Configure System Settings link.

Figure 26
On the Welcome to the System Configuration page shown in Figure 27, click Next.

Figure 27
For purposes of this Test Lab Guide, the TMGBRANCH firewall will belong to a workgroup, so we don’t need to make any changes on the Host Identification page that you see in Figure 28. Click Next.

Figure 28
On the Completing the System Configuration Wizard page that’s shown in Figure 29, click Finish.

Figure 29
Back to the Getting Started Wizard page one more time; now click the Define Deployment Options link.

Figure 30
On the Welcome to the Deployment Wizard page that’s shown in Figure 31, click Next.
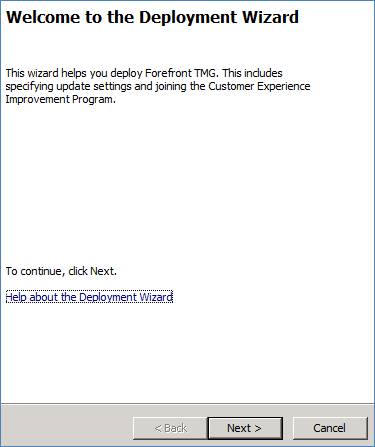
Figure 31
On the Microsoft Update Setup page that you see in Figure 32, select the I do not want to use the Microsoft Update service option. We do this in the test lab to speed up the installation. In a production environment, you would select the Use the Microsoft Update service to check for updates (recommended). Note that this is the preferred selection even if you’re using WSUS or some other managed deployment option. Click Next.

Figure 32
In the Microsoft Update Setup dialog box that you see in Figure 33, it warns you that you won’t be able to get NIS signature updates and anti-malware updates since you disabled Microsoft Update. That’s OK, since we’re not testing that feature for this site to site VPN Test Lab Guide. Click Yes.

Figure 33
Click Next on the Forefront TMG Protection Features Settings page that you see in Figure 34.

Figure 34
On the Customer Feedback page shown in Figure 35, select the No, I don’t want to participate option. Since this TMG firewall isn’t connected to the Internet, there’s no reason to have this option enabled. However, in a production environment, I would recommend that you select the Yes, I am willing to participate anonymously in the Customer Experience Improvement Program (recommended) option, since your participation can help to make the product better. Click Next.

Figure 35
On the Microsoft Telemetry Reporting Service page that’s shown in Figure 36, select the None. No information is sent to Microsoft option, since this machine isn’t connected to the Internet. In a production environment, I typically recommend selecting the Advanced option. Click Next.

Figure 36
Click Finish on the Completing the Deployment Wizard page that you see in Figure 37.

Figure 37
Okay, we’re in the home stretch now. On the Getting Started Wizard page again, shown in Figure 38, remove the checkmark from the Run the Web Access wizard checkbox, since we don’t want to create a web policy for the site to site VPN connection example that we’re putting together in this Test Lab Guide. Click Close to complete the wizard.

Figure 38
That’s it! We’re finished!
Summary
In this, part two in our four part Test Lab Guide series on how to configure the TMG firewall as a site to site VPN server, we installed a new server at the branch office and named it TMGBRANCH. This machine is connected to the Internet subnet and a new virtual network named BRANCHNET. We then installed the TMG firewall software on TMGBRANCH and did the initial configuration of that software. In the next article in this series, we will install another server on the branch office network to support DHCP services. Why are we going to do this? Well, you’ll have to make sure to read that article to find out! See you then! –Deb.
If you would like to read the other parts in this article series please go to:


