One of my single biggest pet peeves about the Windows 10 operating system has always been how Windows installations are “enhanced” with additional software — a nice way of saying “bloatware.” At one time, you only had to deal with this problem if you purchased a new computer that came preloaded with Windows, and the solution was to perform a clean install. Today, though, this is no longer the case.
To see what I mean, take a look at the figure below. This is a clean installation of Windows 10 Enterprise Edition. Even though this edition is specifically geared toward business environments, the operating system is preloaded with an app for the Xbox console and other potentially unwanted software.

The good news is that you don’t have to worry about manually cleaning up all of the bloatware. There is a free utility on GitHub that can do it for you. You can find this utility, which is appropriately named Windows 10 Debloater, at this link.
Before I begin
Before I show you how the Windows 10 Debloater works, I need to mention that this utility should only be used on clean Windows 10 installations (to avoid accidentally removing anything important). The utility also comes with a “use it at your own risk” warning, but I haven’t personally had any bad experiences with it.
Installing the Windows 10 Debloater
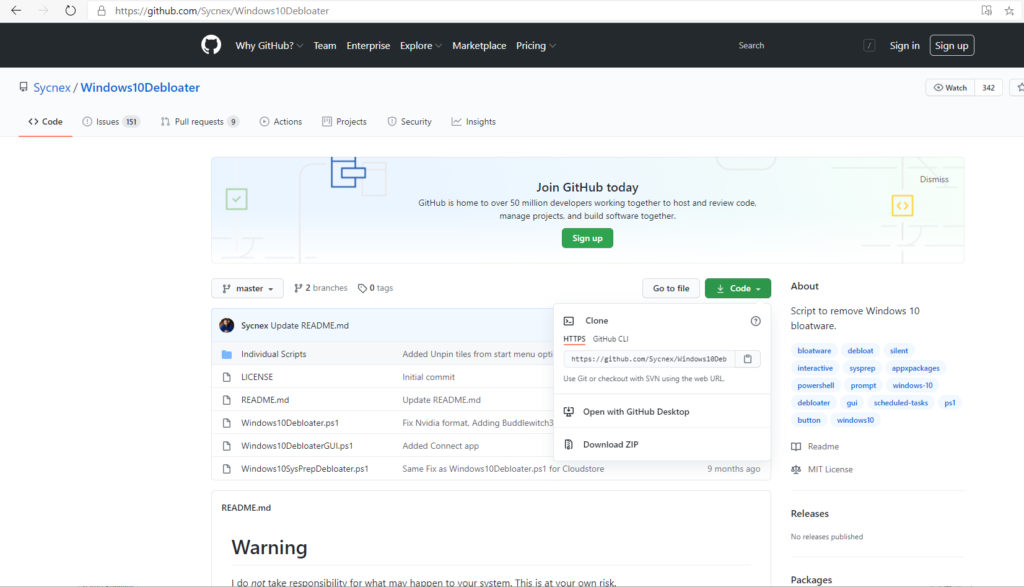
To use Windows 10 Debloater, go to the GitHub link provided earlier, click the Download Code button, and choose the option to download the code as a ZIP file, as shown in the next figure. Once the download completes, extract the ZIP file’s contents and save them to the system’s hard disk.
The Windows 10 Debloater is actually a collection of PowerShell scripts, so to use it, you will need to open an elevated PowerShell session. Keep in mind that before you can execute the script, you will need to use the Set-ExecutionPolicy cmdlet to allow PowerShell to run scripts.
Removing the bloatware from Windows 10
There are actually several different PowerShell scripts that are included with the Windows 10 Debloater. The script that you need to execute is called Windows10DebloaterGUI.ps1. Even though PowerShell almost always functions as a text-based environment, it is possible to build PowerShell scripts equipped with GUI interfaces. The Windows10DebloaterGUI.ps1 file is just such a script. The figure below shows what happens when you run this script.
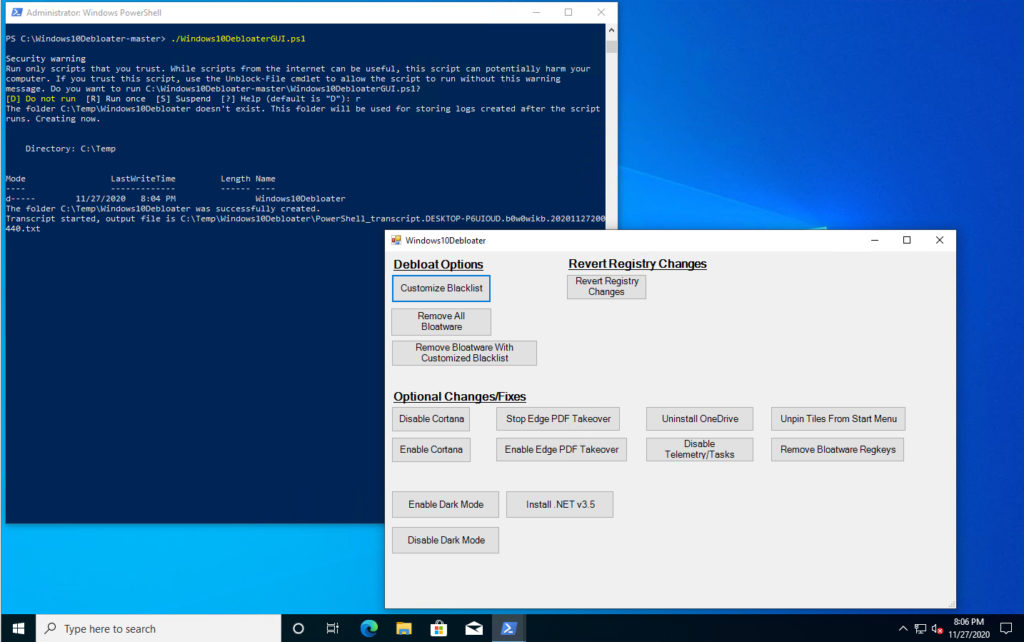
The primary options for dealing with a system’s bloatware reside in the Debloat Options section shown in the figure above. If you want to use the quick and dirty approach to getting rid of bloatware, just click the Remove All Bloatware button.
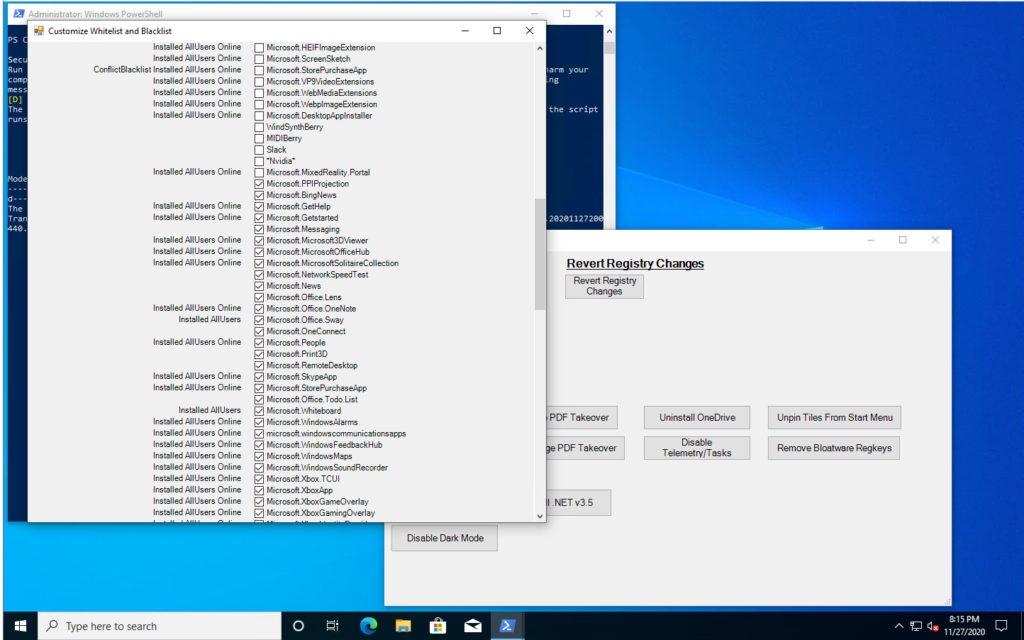
Of course, in some cases, you might want to keep some of the items that the tool considers to be bloatware. For example, I personally find the Microsoft Whiteboard app to be handy, but the Windows 10 Debloater considers it to be bloatware.
Rather than giving the tool free reign over the system, you might consider using a customized blacklist. As you can see in the next figure, clicking on the Customize Blacklist button brings up a screen displaying everything installed in the Windows operating system. You can choose what is removed and what is kept by selecting and deselecting the various checkboxes.
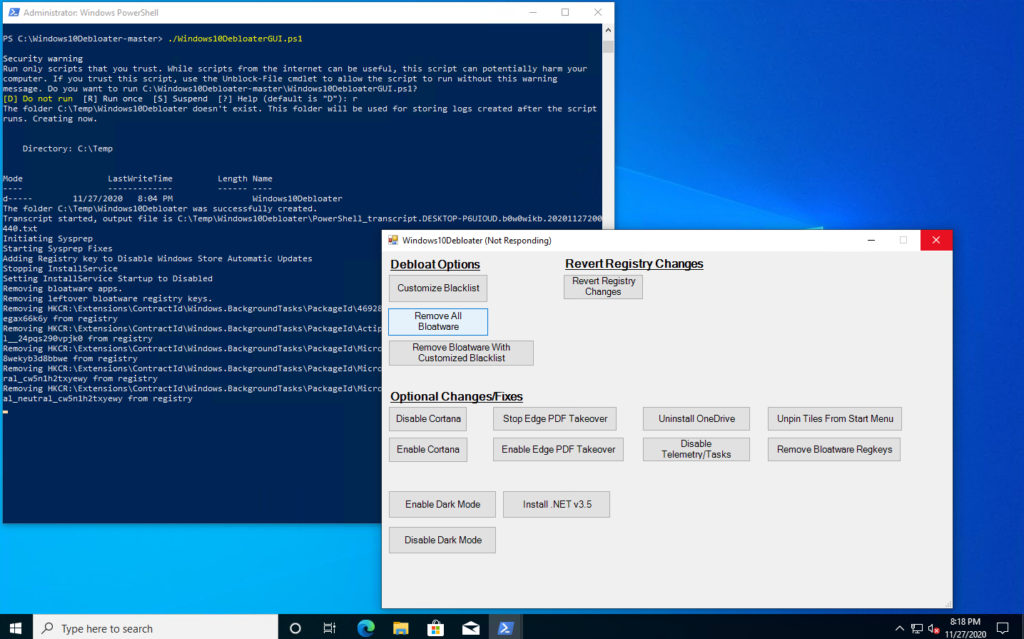
Once you have selected the applications that need to be removed, you can click on the Remove Bloatware with Customized Blacklist button. Incidentally, the Revert Registry Changes button can help you to put things back in order if you make a mistake. Still, if you find that the Windows 10 Debloater tool does something that you don’t like, it is probably going to be better to simply reinstall Windows than to undo a registry change.
When you click the button to begin removing bloatware, the begins stopping services and removing applications right away. There is no “are you sure” prompt, so be careful not to accidentally click one of the Remove buttons.
In case you are wondering, the image below shows what Windows looks like after running the Windows 10 Debloater tool, using the default options. It is worth noting that when the debloating process completed, Windows looked the same as it did before using the tool. It was not until I rebooted the computer that I was able to see the changes.
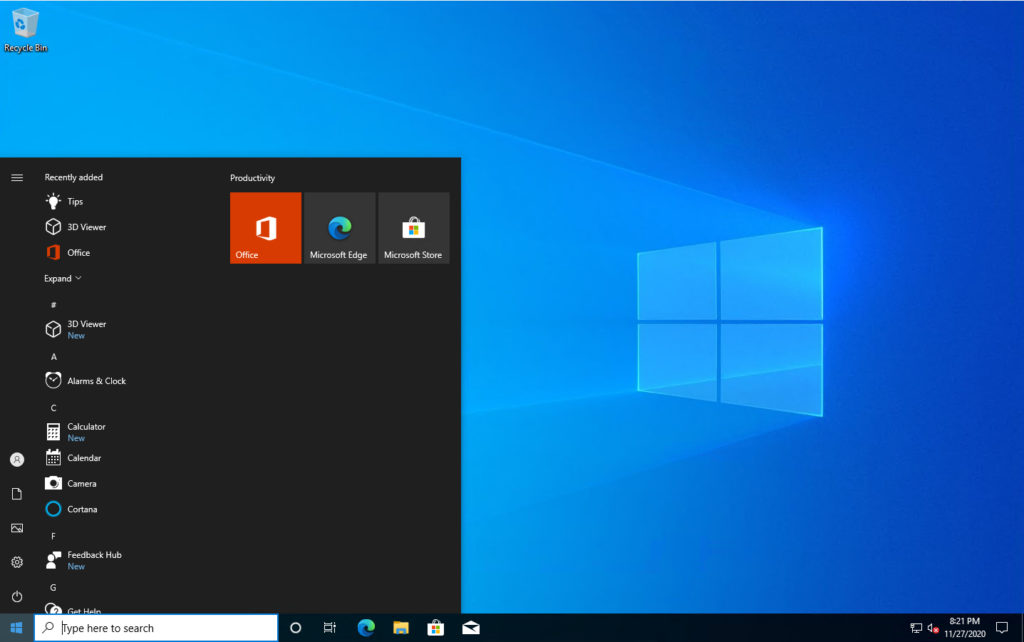
As you can see in the figure above, the Start menu is a lot cleaner than it was, but it may not be perfect. After all, there is still an advertisement for Office, a link to the Feedback Hub, and an icon for Cortana. This goes back to the point that I was making earlier, that what one person considers to be a legitimate program someone else might consider to be bloatware (and vice versa). That’s why it is usually more effective to create a custom blacklist than to simply leave the entire process to the tool’s discretion.
Of course, there are also other ways of reigning in Windows’ behavior. You might have noticed in some of the previous screen captures that there are options for enabling or disabling Cortana and for controlling whether or not the Edge browser takes over PDF files. Other buttons allow you to uninstall OneDrive, disable Windows’ telemetry, unpin tiles from the Start menu, and remove bloatware-related registry keys.
Debloating your Windows 10 bloatware
Ultimately, there are two main use cases for Windows 10 Debloater. One use case is to clean up a new Windows installation when you get a new PC. The other use case is to clean up Windows before running Sysprep and creating a deployment image.
Featured image: Pixabay


Use this all the time on new systems, but as you say why do we need to do this especially with and enterprise license. Really MS should leave this stuff in Home Editions only. Thanks for the article though.
Hi, the issue with removing Bloatware is that as soon as MS comes out with the next Windows update, all the crap is installed back on your computer again!
this impossible to use. there is no .exe file and that is the only thing that any use can be made of. scripts are useless! i want a .exe file. you can’t do anything with scripts! nor with anything that ends with .ps1
Read the readme file on github! you can make use of .ps1 files actually.
Such a childish, lazy response try researching instead of throwing a tantrum.
Although Remove all Bloatwear seems to remove a number of items, I get errors as follows:
ERROR: A required privilege is not held by the client. ERROR: A required privilege is not held by the client.
Disabling scheduled tasks
Disable-ScheduledTask : Access is denied.
At C:\Users\LAF\Downloads\Windows10Debloater-master\Windows10Debloater-master\Windows10DebloaterGUI.ps1:718 char:59
+ … Get-ScheduledTask -TaskName XblGameSaveTask | Disable-ScheduledTask
+ ~~~~~~~~~~~~~~~~~~~~~
+ CategoryInfo : PermissionDenied: (PS_ScheduledTask:Root/Microsoft/…S_ScheduledTask) [Disable-Schedule
dTask], CimException
+ FullyQualifiedErrorId : HRESULT 0x80070005,Disable-ScheduledTask
etc, etc
I am the administrator for the PC so am not sure what extra “required privilege” is required. Can you please help with this? Thanks
Make sure you’re running PowerShell as an admin. Right-click on Start and click on Windows PowerShell (Admin), for example.
This would have been a good article if you had included information about how to execute the powershell command cmdlet and info about how to run the scripts of the debloater
Powershell commands:
Directory: cd c:\yourdirectory
Parimeters: Set-ExecutionPolicy Unrestricted -Force
Run script: .\windows10debloate.ps1
Powershell must be run as an Administrator!
Ok Those who has problem with following this technique, See this video starting from 1:25 min. It’s easy to use.
https://www.youtube.com/watch?v=ktRxzA6QTz4