Azure Web App Services allows mission-critical web applications to run on Microsoft Azure without managing servers. They offer several features to help DevOps teams get applications up and running without complex configurations. In a previous article, we looked at how to create an Azure Web App and App Service plan. In this article, we will focus on some key features of Web App Services, such as defining your own URL to use the Web App, configure autoscale to keep the performance of the application during high utilization of the platform, and slots, which allows the developer team to work on updates and enables an easy transition to production.
The other two items that we will cover is how to protect your Web App and how to integrate the deployment process with GitHub to provide easy and consistent deployment process to your Web Apps.
Configuring the custom domain
When planning to use a Web App in production, one of the first things to configure is the custom domain.
There are several ways to create the custom domain, all involving the configuration of either creating an A record on your public DNS to the public IP or create a CNAME record on your public DNS pointing out to the public name (<webapp>.azurewebsites.net).
The second step is to click on Custom Domains item. In the new page, click on Add hostname. Use the DNS entry that was created previously (in our example www, which was a CNAME for ap171.azurewebsites.net) and click on Validate. If both checks at the bottom are successful, then click on Add Hostname.
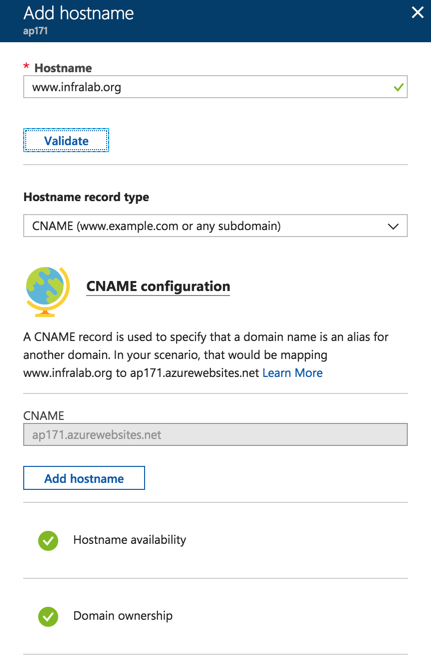
After adding the custom domain, open a web browser and use the new custom domain. The result show be the page displayed.
Configuring deployment using GitHub
In the previous article, we configured a basic website by creating a simple HTML page and imported it using FTP. However, Web App Services offers more elegant and professional solutions, such as Visual Studio Team Services, GitHub, and Bitbucket to mention a few.
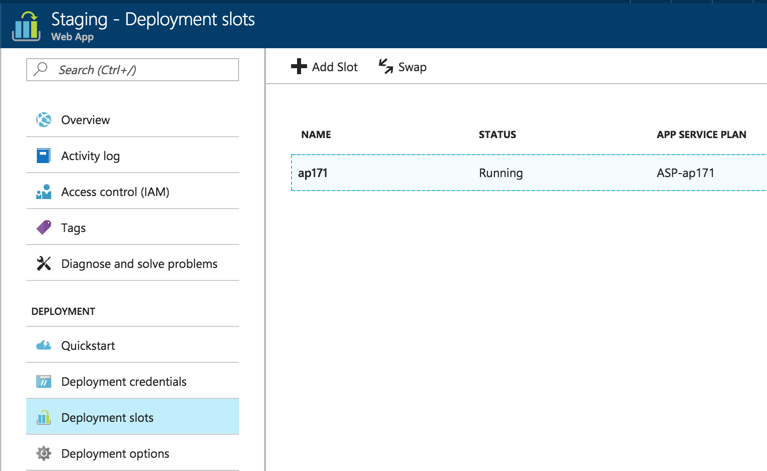
The first step is to create a Slot, which is a separate environment to deploy your Web App, test it, validate it and if everything is working as expected, then we can swap from any given slot to production and get the application up and running without outages to the end users.
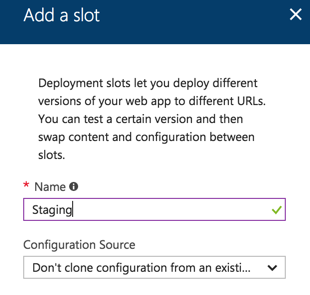
The first step is to click on Deployment Slots, then click on Add Slot button. In the new blade, we will label this first slot as Staging and we will start it from scratch.
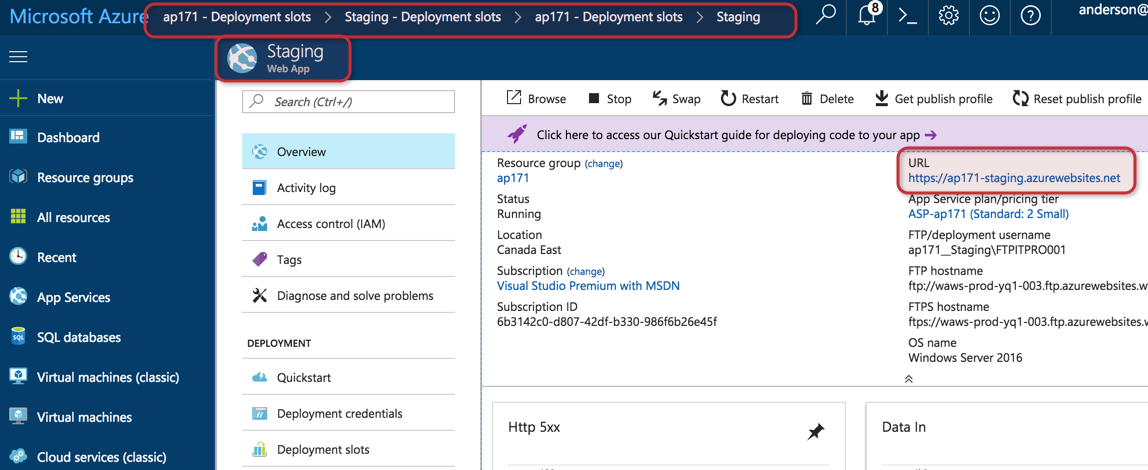
After creating the new slot, a list of all existent slots will be listed on the right side. Click on the first entry — in our example it will be app171-staging (the name is formed using the following format: <web-app-name>+<Slot-Name>).
Click on the slot that we have just created, and the main blade changes to Staging. All changes from now on are being done in that environment and not in production. Click on Development Options.
Having focused on the Staging Slot, our next step is to configure integration with GitHub. We will use the master branch in GitHub to update the staging environment.
It is important to understand what is happening here. We are working on a separate environment of production, and we will be configuring automatic updates on this staging area coming from GitHub. From the Dev/Ops perspective, as soon as they release new updates on GitHub, they can be tested in the staging area. When we are code-complete and are ready to move to production, we will swap the staging to the production. It is important to note that the GitHub configuration is with the Staging slot and it won’t be moved to production even after the swap.
Here is the step-by-step guide to configure the Deployment Options in the recently created staging slot.
- In the Choose Source item, select GitHub from the list.
- In the Authorization item, click on authorize and on the new page enter the GitHub credentials and confirm the authorization.
- In the Choose Project item, select one of the GitHub projects, in our case Azure
- In the Choose Branch item, by default master is selected
- In the Performance Test item, the administrator can select a test to be performed by selecting the number of users, source location, and for how long. This test will be executed after every deployment
After defining the Development Options, we can check the status by clicking on Development Options item again, and at this time a status of the synchronization will be shown. In the example below, we can see the updates being applied.
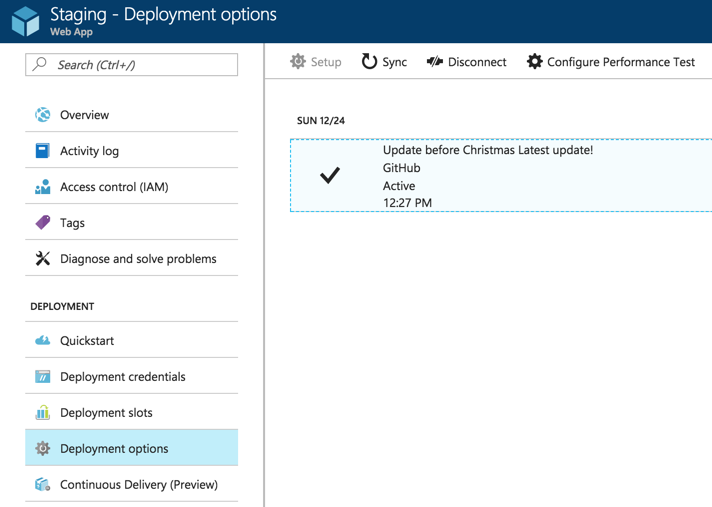
If we check the stating URL of the current app, we can see the updates on the fly. If we push new updates on GitHub, the staging environment will be updated automatically. This deployment process helps the developer team test on the fly their changes without impacting the production environment.

When the staging is code-complete and we need to move to production, we can click on Deployment Slots and then click on Swap.
In the swap blade, we can define the swap type and the source and target for the operations. A new blade called Preview Changes allows checking the differences between Stage and Production. The goal is to leave the environments using the same settings to make a smooth transition between environments.

Managing autoscale
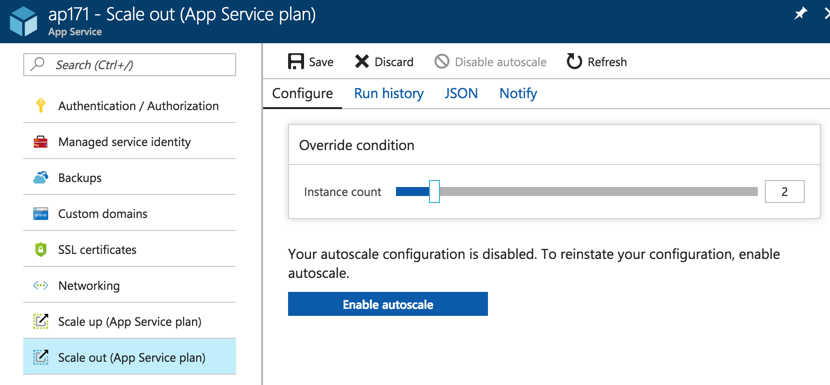
One of the key features of Azure Web App Services is the ability to have an elastic infrastructure where the administrator can scale in and out based on the rules defined by the administrator. This flexibility takes advantage of the Azure elasticity and helps the business to achieve its goals without purchasing new hardware or performing complex configuration — everything is done dynamically by the Web App Services.
In order to scale out, which means add additional servers to the current service, the administrator can click on Scale out (App Service Plan), and we can increase the override condition (in the image below the number of instances defined is two).
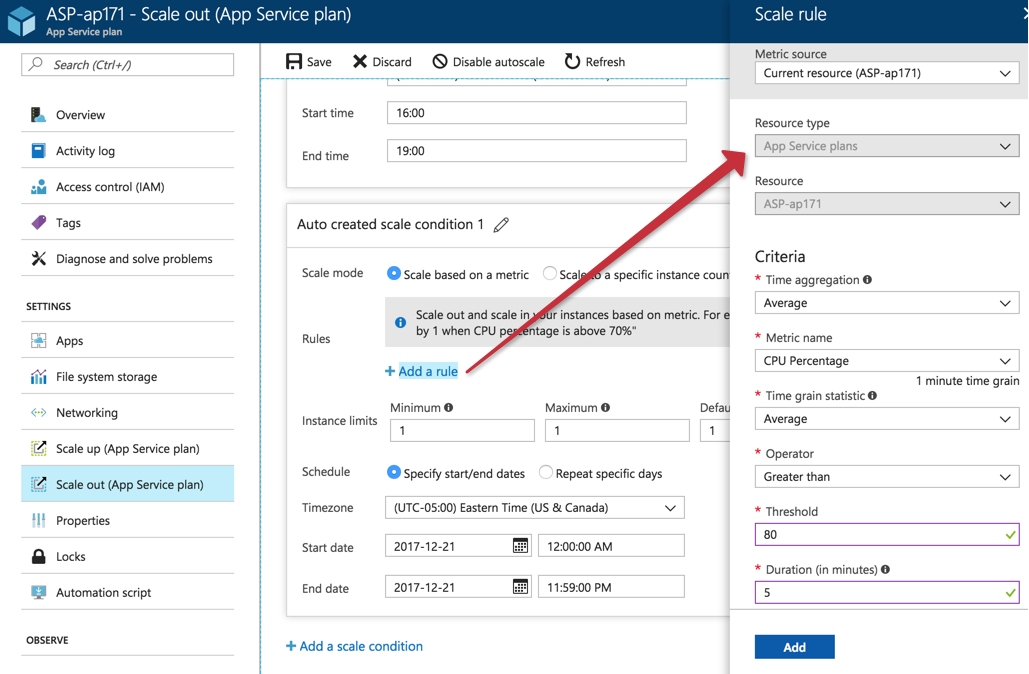
If the Web App has specific requirements based on schedule, we can add a Scale Condition, and configure the number of instances (in this case three) based on either a specific time range or some days of the week with start and end time.

Another possibility is using metrics from the VMs running the Web App to manage the number of instances running at any given time. When creating a new scale condition, the administrator can add a rule, and in that rule, there is a lot of flexibility, such as time aggregation, metric, criteria and for how long it requires the metric to be at that level to trigger the rule, define the number of instances to add, and cool down (time to wait before scaling out again).
At any time, the administrator can track the feature using the Run History option, which will list all activity around the autoscale feature including charts and a list of all events. The administrator can configure notification by email as well, using the Notify tab.

Managing protection
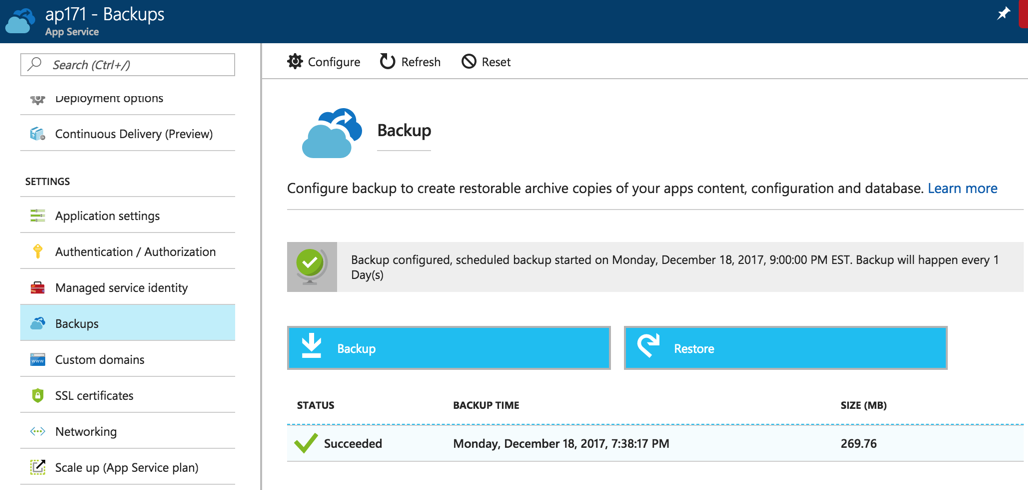
A great feature when using Web App Services is the Backup functionality that allows scheduled backups to run automatically and be kept for X amount of days.
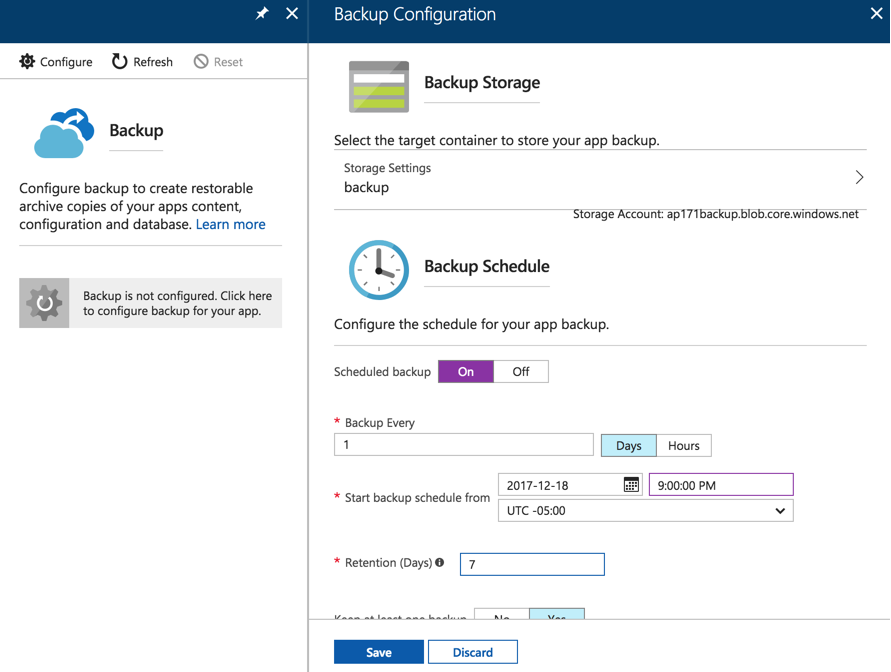
To configure protection to your app, click on Backups, and on the page displayed on the right side, click on Backup is not configured. Click here to configure backup for your app.
In the new blade, first, configure a Storage Account and a container. After that define a schedule for the backup to run and the retention period of the protection. Click on Save.
After having the first backup, a list of all available backups will be listed. The administrator can click on any given backup and download the entire package as a .zip file. There is also an option to Restore, where you can select any previous backup or even select a storage account that has the backup files (.zip extension). The restore can be done to the production Web Site or a different one.
So much more you can do with Web App Services
In this article, we went over some of the cool features when leveraging Web App Services instead of regular VMs running on Infrastructure as a Service (IaaS). Just by looking at some of the features available, we can see how much use and how much time we can have in our hands when deciding to use Web Apps.
Keep in mind that we haven’t scratched the surface yet with Web App Services. There are a lot of tools and resources available on the platform to help DevOps teams to run web applications in Microsoft Azure.


