In one of my previous articles, the focus was on how to enable and protect collaboration tools like Microsoft Teams during a lockdown or restrictive mode that most of the countries are going through. Those articles were to speed up the process to get those solutions implemented. However, they are not the silver bullet, and each environment is unique, and you need to use them as a guideline in your implementation. In this article, we are going to cover Azure Active Directory Identity Protection and how it can increase your security posture. It will help you to protect some of the most critical areas in a cloud era: your data and privacy of your users by allowing only secure connections from non-compromised accounts.
Adding Azure AD Premium to your tenant
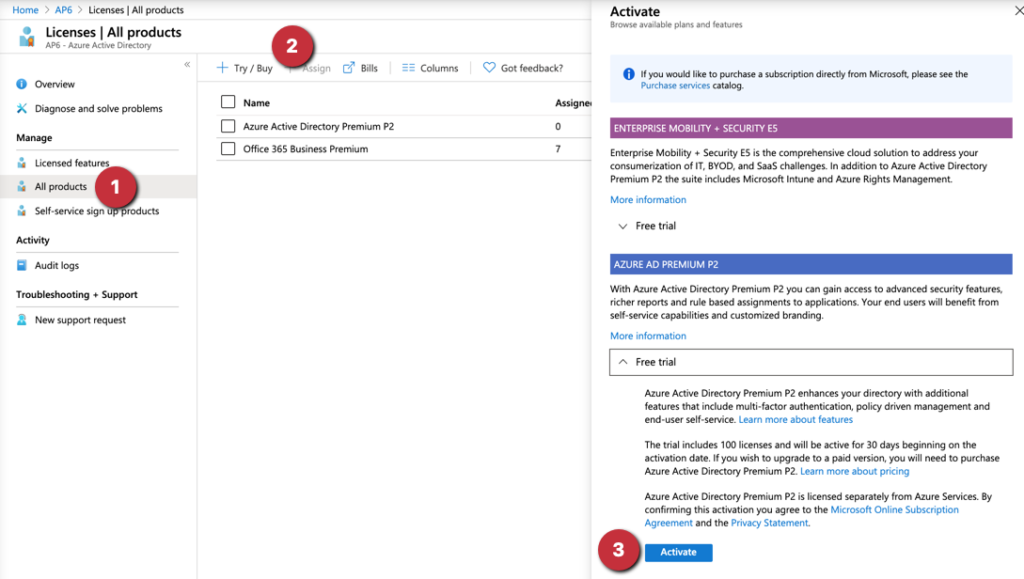
The Identity Protection is part of the Azure AD Premium P2 license. There are several ways to assign a license to your Azure AD tenant. The orthodox approach is going to Azure Active Directory and then Licenses. In the new blade, click on All products (Item 1), and a list of all licenses and their assignments will be listed. To add a new one, click on + Try/Buy (Item 2) and from the list, expand the desired plan/feature and click on Activate (Item 3).
Managing Azure Active Directory Identity Protection features
Before going to the policies available in Azure AD Identity Protection, we should explore the Overview, which is the initial page, and it shows the numbers of risk users (Item 1) and sign-in risks (Item 2) at a glimpse, as well as the Identity Secure Score (Item 3), which helps you track your progress toward a better security posture.

The Identity Secure Store blade has the current Secure Score using the current settings and how the progress has been in the last X days (by default it is seven days, but we can change it to 30, 60, or 90 days).
A list of all items that are being evaluated is shown in the Improvement actions. We can see that every improvement has a score impact, current score, and a maximum that we can get it. The tool also provides the implementation costs and status (which can be default, ignore, or third-party).
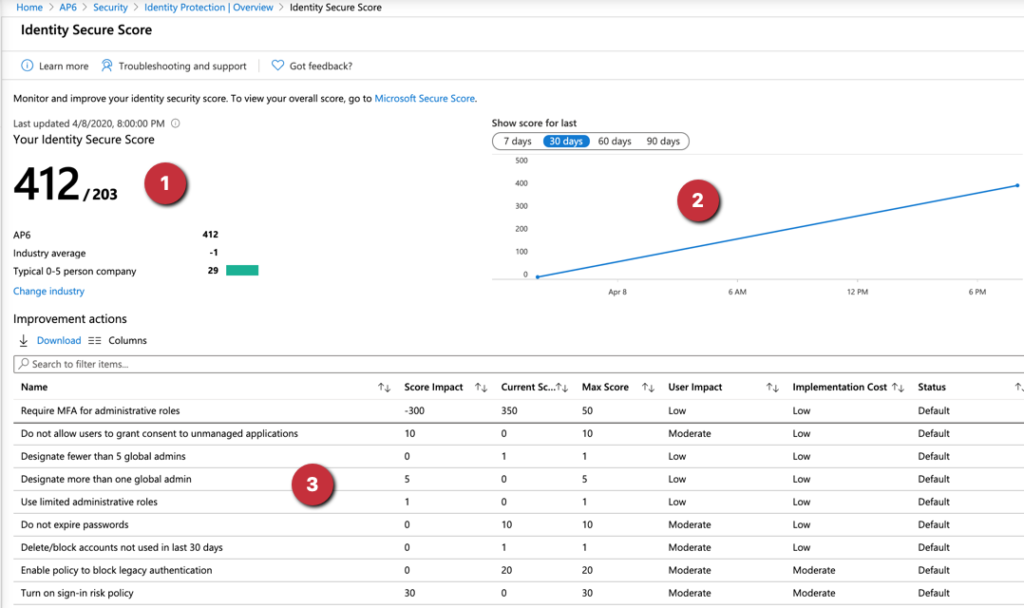
When we click on a specific recommendation, we can see the numbers around the score, change the current status and information about the recommendation, and how to configure it.

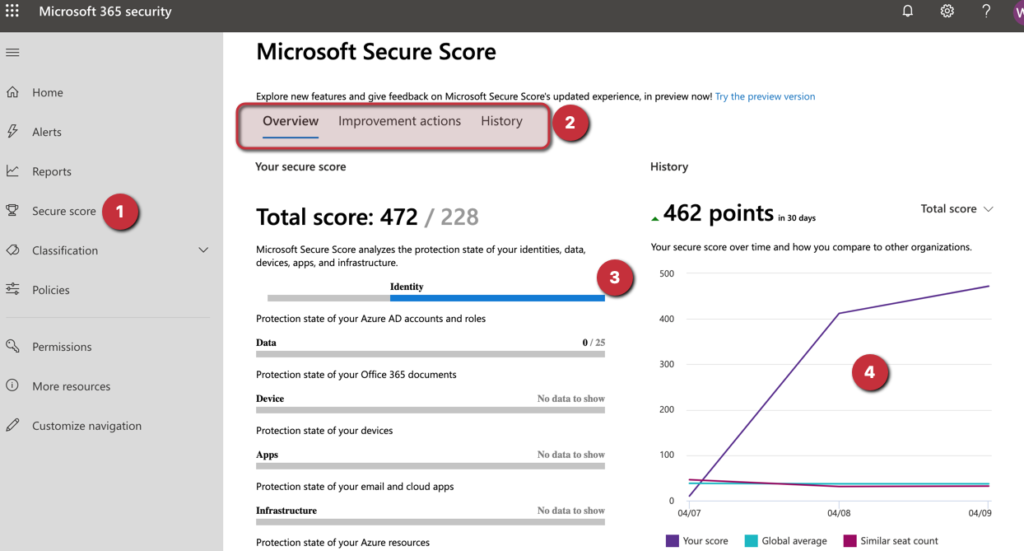
You may not have noticed, but in the first line of the Identity Secure Score, there is a link to access the Microsoft Secure Score. When we click on that link, a new page located in the Microsoft 365 Security Portal will be displayed.
That new page has most of the information that we have seen in the Identity Secure Score blade but a better view and integrated with other components of the platform.
We can access it at any time in Office 365 by clicking on the Secure score (Item 1). All data from Identity Protection is summarized in the section Identity (Item 3). We can see individual recommendations and history by accessing the menu on Item 2, and a similar graph of the improvement of your posture can be seen on Item 4.
Managing user risk and sign-in risk policies
Before configuring the policies around those two critical topics, we need to understand what they are. There is a lot of data being captured from an authentication attempt. The Identity Protection evaluates the risk using that information and Microsoft and trusted partners’ internal and external threat intelligence tools and data, including Dark Web content.
A sign-in risk evaluates if the authentication being performed is coming from a valid end-user. The risk is calculated using several data sources such as malicious/anonymous IP address, unfamiliar sign-in properties, impossible or atypical travel, to mention a few. The higher the risk, most likely a bad actor is trying to authenticate instead of the real user.
A “user risk” is based on Microsoft threat intelligence when there is leakage of data in the Dark Web or when the pattern used to authenticate is part of a known attack that Microsoft is aware of based on the threat intelligence analysis.
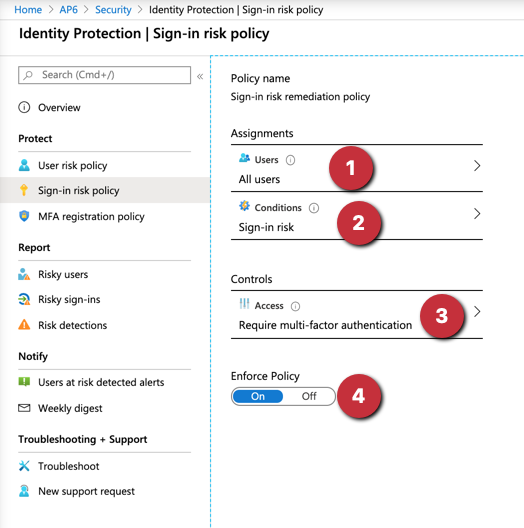
The policies are simple to configure, and we can select the users affected by the policy (“all users” is a good start), the conditions (we define the level of the risk: low, medium, or high) and associate a control. The control for user risk has the values “allow” or “block,” and we can define a password reset when allow is in use. The control for sign-in risk also contains allow or block values, but on this one, we can force MFA in the allow policy.
The third item, which is MFA registration policy, allows forcing the MFA registration to the end-users. By doing that, you can have your users configured before deploying MFA requirements in future service/feature releases. We covered this feature in detail in my article about Teams and MFA here at TechGenix.
Reporting capabilities using Azure Portal
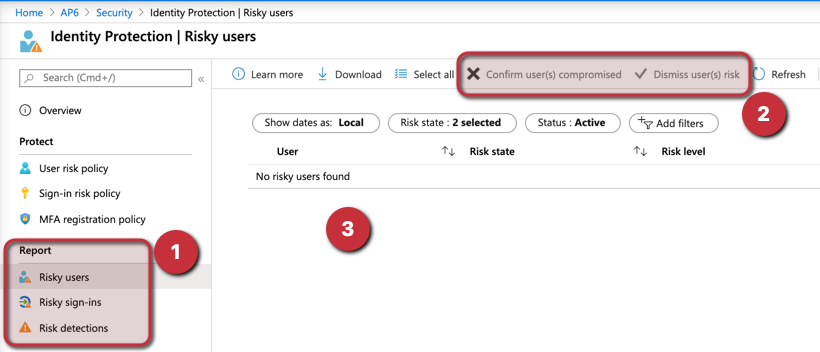
After enabling the feature and configuring the policies, the cloud administrator can see all the action in the Report section (Item 1). We can see in detail risk users and risk sign-ins, as well as risk detections.
The cloud administrator can retrieve more information about the risk, including useful information based on the type of risk, and all risks will be listed (Item 3). An action can be taken, such as confirming a user has been compromised, dismiss as false-positive, reset user password, or block the sign-in.
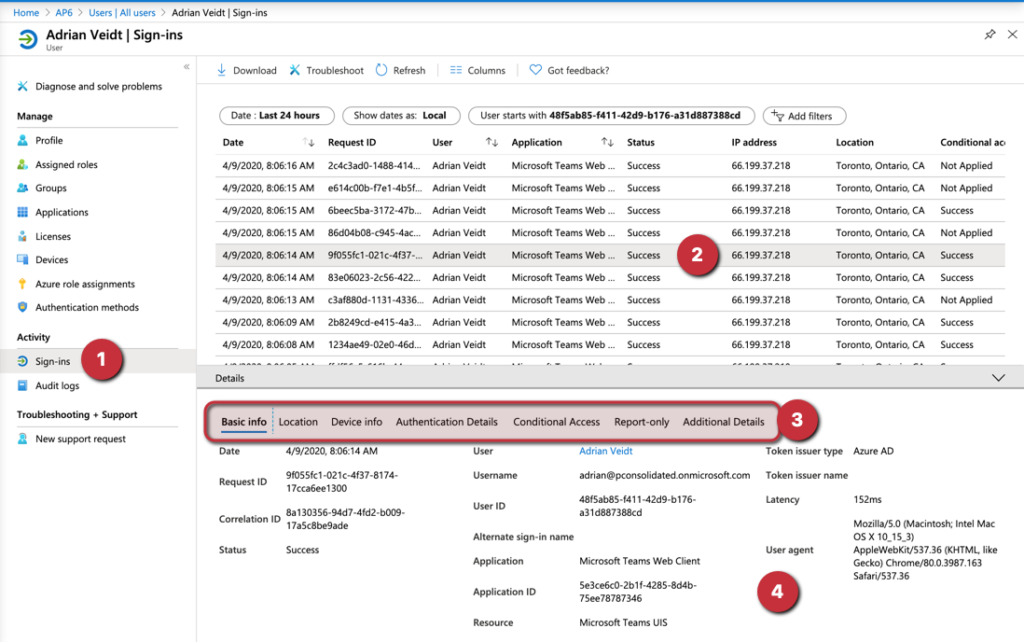
If there is a need to check a specific user, then the sign-ins (Item 1) item under Activity is going to be useful. From there a list of all attempts will be recorded (Item 2), and we can check if the user went through Conditional Access and retrieve all the information about that attempt, including device, location, authentication details, Conditional Access, and more (Item 3)
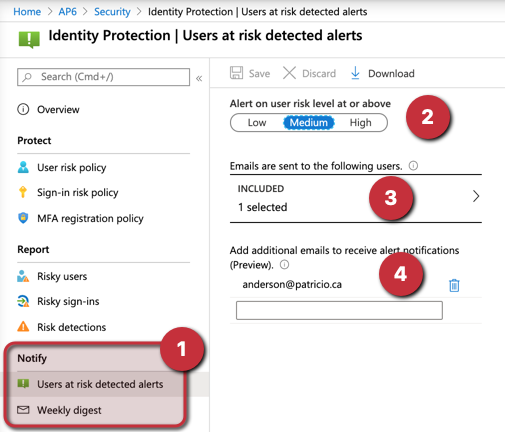
Reporting and notification through email
We can configure to receive alerts based on their severity by email. We can select an email from an existing user in Azure Active Directory or an external email.
We can also configure a weekly digest to be received with a summary of all the risks detected.
Azure Active Directory Identity Protection for extra security
In this article, we covered the essentials to get Azure Active Directory Identity Protection configured when using the Azure Active Directory Premium P2 offer. We can use the benefit of user risk and sign-in risk when using Conditional Access and another extra layer of security when evaluating users authenticating in your environment to access your applications.
Featured image: Shutterstock


