Azure has been evolving at a fast pace. One of the areas where we can see a lot of improvements is the backup and disaster recovery. Azure has a service called Azure Site Recovery, which has been out there for a while but it is constantly receiving updates and new features to help any size organization that is leveraging Azure or using an on-premises environment. In this article, we will address a common requirement of any cloud customer that is using infrastructure-as-a-service (IaaS), which is a secure and consistent way to protect your virtual machines. We will start from the basis by creating a Recovery Services Vault, defining our first backup policy to protect our VMs, and onboard them into the protection using a couple of different ways.
Stay tuned for articles about Azure Recovery Services because they will be interconnected to this one, and I will make reference of this series of articles as we move forward related to this topic.
Creating your site recovery and creating a policy to protect your VMs
Logged on the Azure Portal, search for Recovery Services Vault, and click on Add (if that is your first time the button will be available in the middle of the blade on the right side, if not you will have a list of existent Recovery Services Vault, but the add button is still there on the upper-left corner).
In the new blade, assign a name, and I recommend creating a new Resource Group to keep things separate (however, your Resource Group and charge back scenarios will decide if you should use a new Resource Group or an existent one), and its location. After filling out all the required information, click on Create.
If you prefer the PowerShell way, you can achieve the same end result by running the following cmdlet, make sure that you have the Resource Group created before specifying in the cmdlet.
New-AzureRmRecoveryServicesVault -Name "RSV-Servers" -Location "East US" -ResourceGroupName "AP-RecoveryServices"
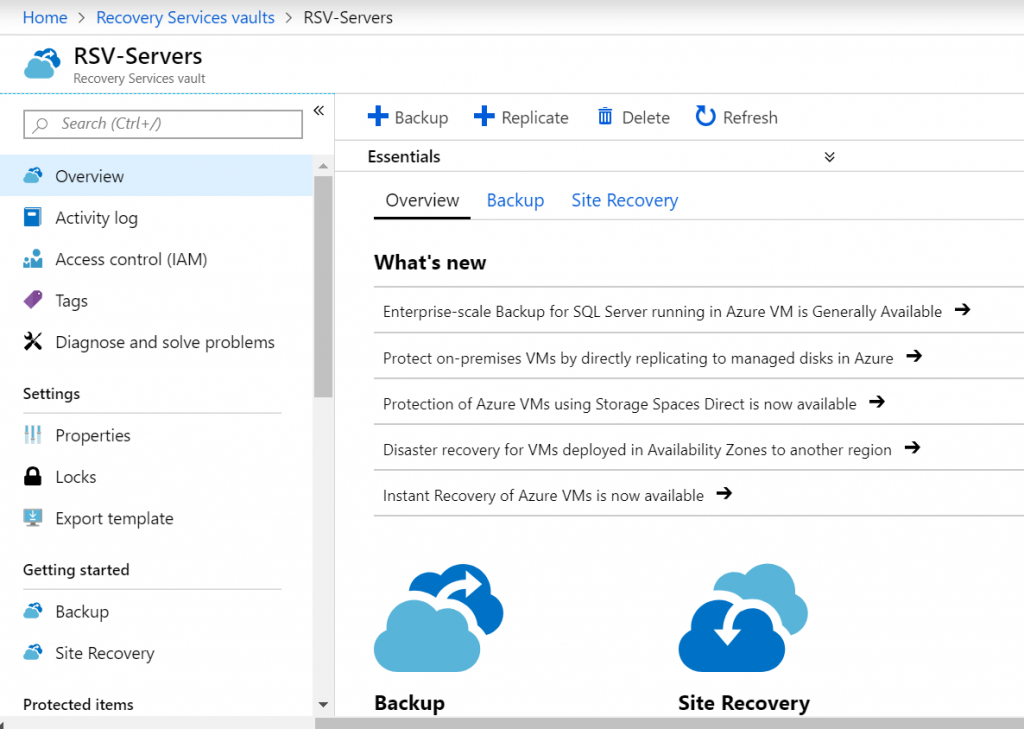
After the creation process is complete, we can click on the new Recovery Services Vault, and the welcome page will be like the image depicted below. From this point on we can start configuring our policies and start protecting our workloads, orchestrate replication and disaster recovery and so forth. Trust me, there is tons of possibilities from this point on.
The goal of this article is to show you how to protect a VM, but before going there we will create a backup policy. Here are a few key concepts about a backup policy that I would like to share with you guys for a better understanding:
- We can have more than one policy and assign them accordingly to different type of workloads.
- Any given VM can have a single backup policy assigned.
- As the time of this writing, we have three type of policies: Virtual Machine, File Share and SQL Server in Azure VM.
- When using the Virtual Machine policy, we can define daily, weekly, monthly, and annual retention within the same policy.
- All other existent and future policies will have specific attributes target to the workloads that they are protecting.
To create a new backup policy, having the desired Recovery Services Vault open in the Azure Portal, scroll down and click on Backup Policies. By default it comes with two policies. Click on +Add button.
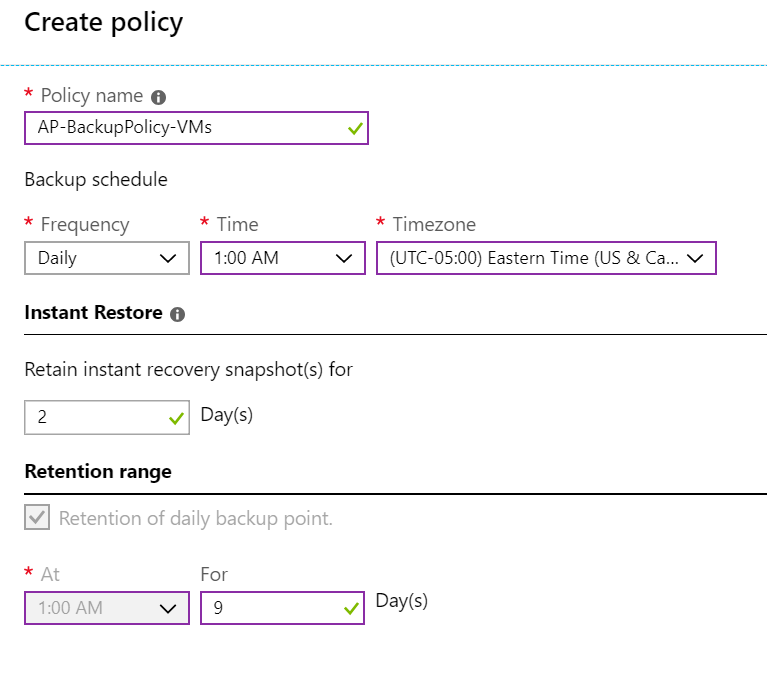
In the new Create Policy blade, assign a name for the Backup Policy (if you are going to use PowerShell down the road, be mindful about the name), and the first thing that we need to define is the frequency, which can be Daily or Weekly, and depending what you chose the options below will change to match your initial decision. In our case we will select Daily and we will define the Time and Time Zone, keep in mind that Time setting will be followed for all the retention windows for this policy (all weekly, monthly, and annual backups will run at same time).
Moving forward in the wizard, when we are protecting VM workloads, we have the option to define Instant Restore between one and five days (by default is two days), which creates a snapshot of the VM and leaves for that amount of days available to the administrator. This makes things easier to restore, and we don’t have to wait for the data to get to the Recovery Services Vault. Having these snapshots available considerably reduces restore time for files that were just lost.
The rest of this blade is to configure the retention, which can be configured for daily, weekly, monthly, and annual backups. It is recommended to give some room by overlapping the backups, for example, a daily you can keep for nine days, and then have a weekly backup. It is old-school thinking but makes this humble author feel good with that extra room, but keep in mind that in the cloud environment we don’t have the regular issues form a traditional datacenter (bad tapes, the operator forgetting to rotate tapes, long weekends with nobody around).
Onboarding your first VM in the Azure backup
Now that we configured our Recovery Services Vault to support our requirement to protect VMs running in Azure, we have a couple of ways to configure the VMs to be protected. We can use Azure Portal (at least from three different locations), PowerShell, or get even fancier and use automation to do that automatically.
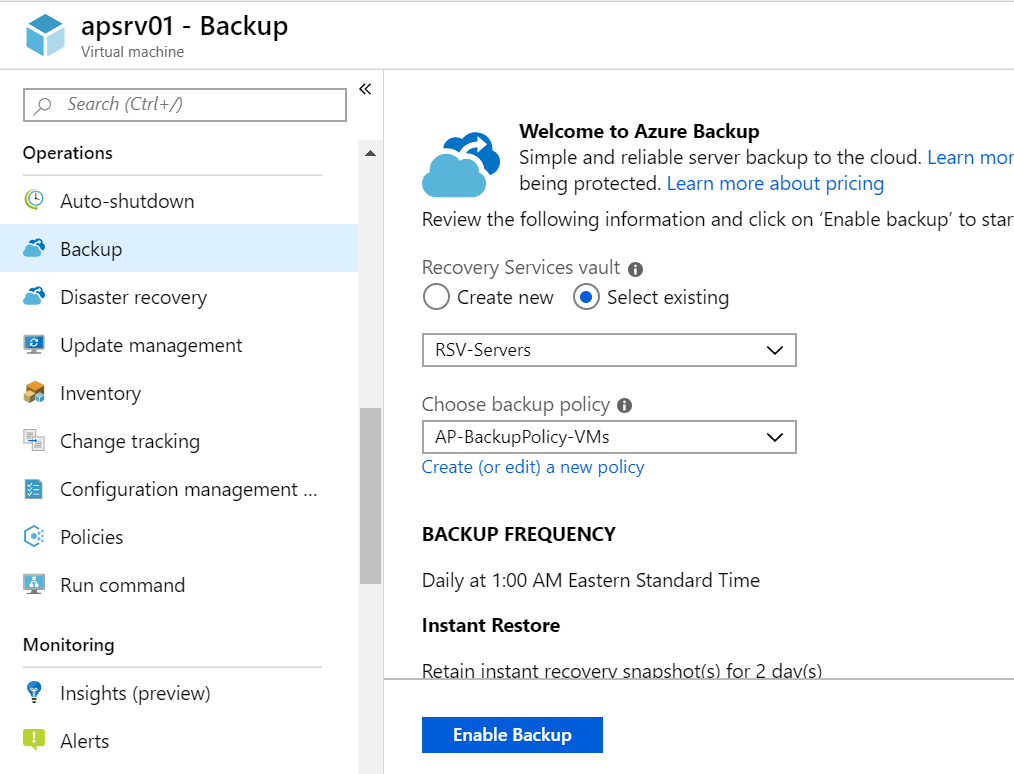
From the VM properties blade, we can click on Backup and on the right side we can select an existent Recovery Services Vault. We are going to use that we have just created, and the only option left is to select or create a new backup policy, and we will select the one that we have just created. Click on Enable Backup and that’s it!
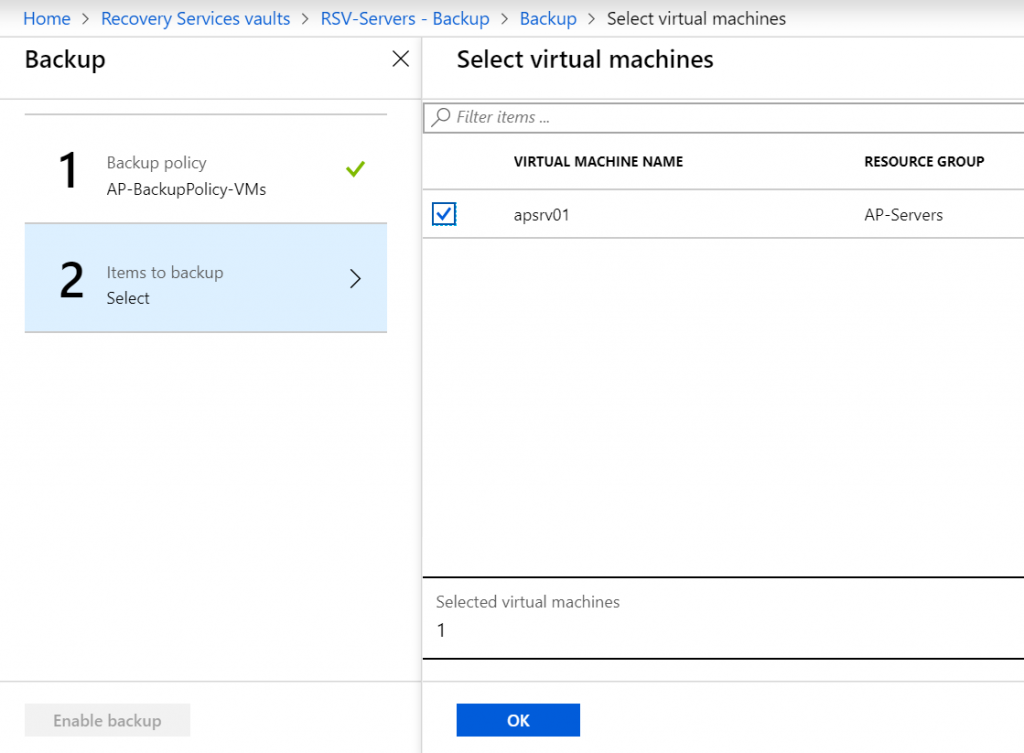
We can enable the protection from the VM that we are looking at the properties. Another easy way to do it is using the Site Recovery Services interface. Click on Backup, select Azure and Virtual Machine and click on Backup.

A new Backup blade will show up and it will have two steps, in the first one we need to select an existent Backup Policy, and then click OK. Select all the VMs that you want to enable the Backup protection and click OK, and last but not least, click on Enable Backup and wait for the confirmation of the process.
Featured image: Shutterstock


