With the increase in cyberattacks — especially on Exchange Servers that are not patched — your backups should be the No. 1 priority. This situation is ongoing, as this bulletin from Microsoft just this week illustrates. If your backups are sound and can be restored, you can recover with minimal data loss. In this article, we will talk about backing up Exchange 2016 using Microsoft System Center Data Protection Manager (DPM), which I am sure many of you are familiar with. There are a number of other vendors out there that can back up Exchange. Here are just a few:
- Veeam Backup
- Acronis Cyber Backup
- Veritas Backup Exec
- Windows Backup
We won’t be covering the full Data Protection Manager installation, but you need to be aware that you have to have a license for the product. If you are working in SQL, then you need SQL licenses. If you want to know about pricing, reach out to your Technical Account Manager (TAM) or vendor regarding System Center Data Protection Manager.
Exchange backup: No shortcuts
There are a number of questions IT admins often have regarding backups, and we will list them below. But one important question people have asked me is, “Can I just delete the log files eating up space on the server and avoid having to do backups by copying the .EDB database file to a different directory?” The answer is no. Exchange truncates the log files with backups and also stamps the database when an incremental and full backup has taken place.
If you copy the Exchange database file to a different directory, you will not be able to mount it as you will be missing needed log files. If your server does not have space, then you did not plan your migration or installation properly. Some of the other questions commonly asked are listed here:
- Can I backup the DAG?
- Do I have to backup all copies (similar to point 1)?
- How often do I need to do backups?
- Do I need to test my backups?
- How do I restore a backup?
Microsoft System Center Data Protection Manager is DAG (Database Availability Group) aware. When you run a DAG, all the copies of the databases will have the same information as the primary. You can choose to back up the primary and perform copy backups as well of your Exchange databases.
When it comes to the times of backups, each company has its own preference. But I have seen a number of companies do incremental backups throughout the day and a full backup on a Saturday or Sunday. The choice is yours on how you want to backup Exchange. Just remember, the more often you back up, the more space you will need on DPM. Let’s now take a brief look at what System Center Data Protection Manager looks like and how you perform your backups.
A look under the hood of System Center Data Protection Manager
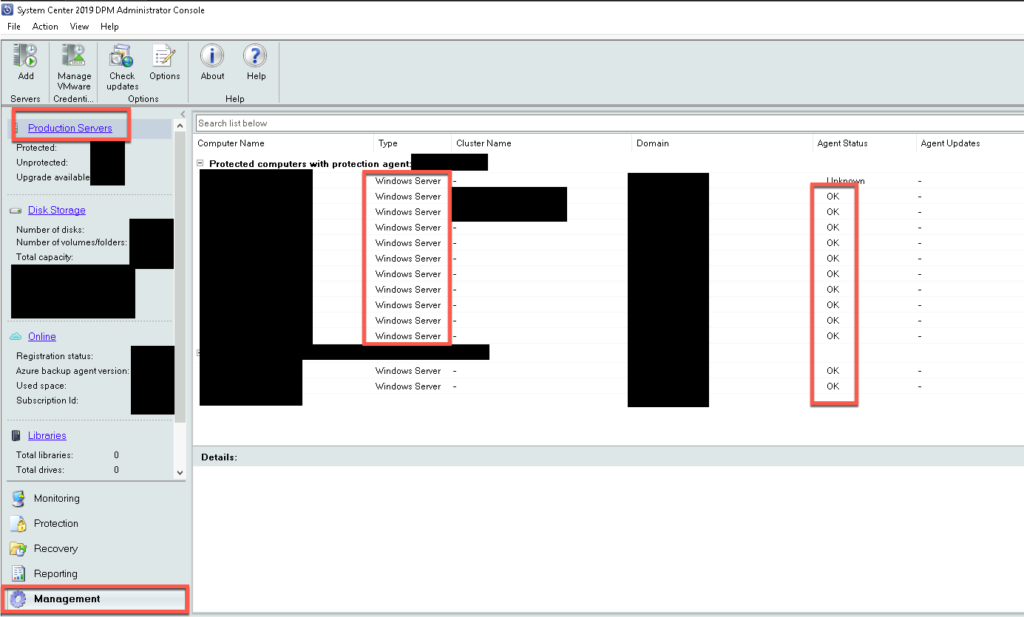
System Center Data Protection Manager (DPM) uses an agent. You can choose to either deploy the agent from the DPM console or install it manually and then attach it. If we look at the image below, once you launch the DPM console, you can click on Management, and under Production Servers, you will be able to add and view your servers:
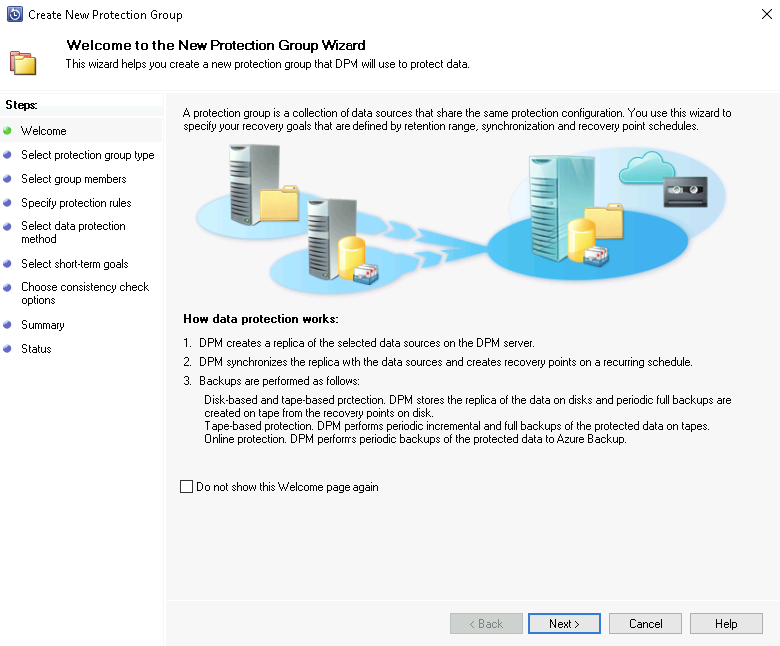
Once you have added in your Exchange Server or Servers, you can now click on the Protection tab so that you can add a backup set for Exchange. In the top left-hand corner, you have a New button. Click on this to start the New Protection Group Wizard, as shown below:
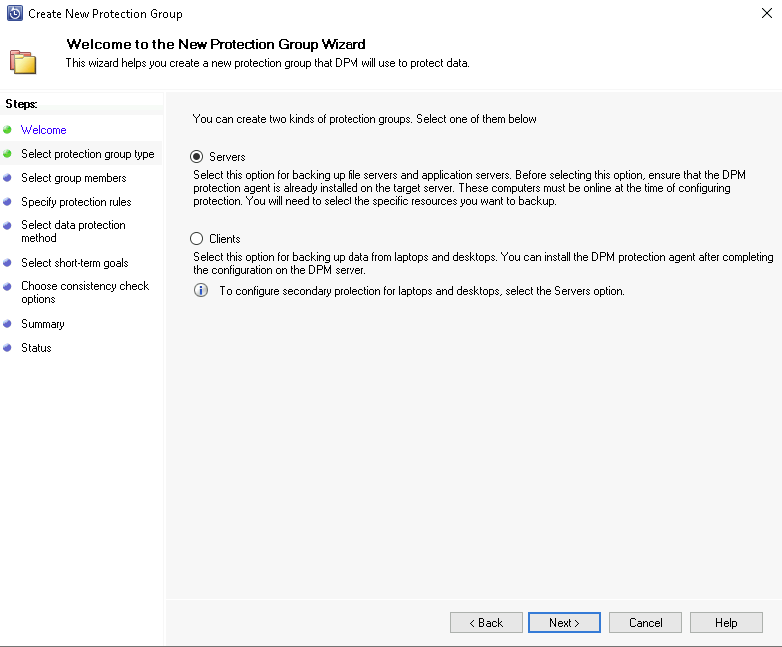
In the wizard, you can see on the left-hand side you have a number of options to complete. Click Next to bring up the next page where you can select if you are backing up servers or clients. In our scenario, it will be the default, which is Servers, as shown below:
Once you click Next, on the next page you will be presented with your Domain and server list based on what agents are installed:

Select the Exchange Databases on the left and tick the checkbox. This will place the database on the right-hand side. The next set of steps are straightforward. You will need to provide a Protection Group Name and then choose the option for short-term backups to disk and tape drives, which is long-term. If no tape drive is added to System Center Data Protection Manager, that option will be grayed out. You can also backup to Office 365, which is online protection, and we will cover that separately in another article. See below for an example:

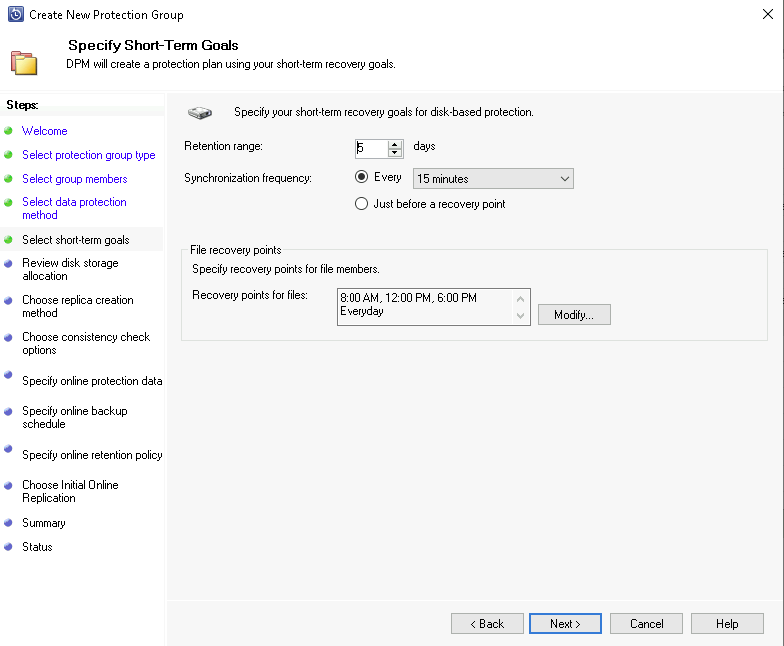
Once you have made your selection and clicked Next, you will be asked for the retention range, synchronization frequency, and recover points. Take note that the bigger the range and frequency, the more space you need. Below is what the window looks like:
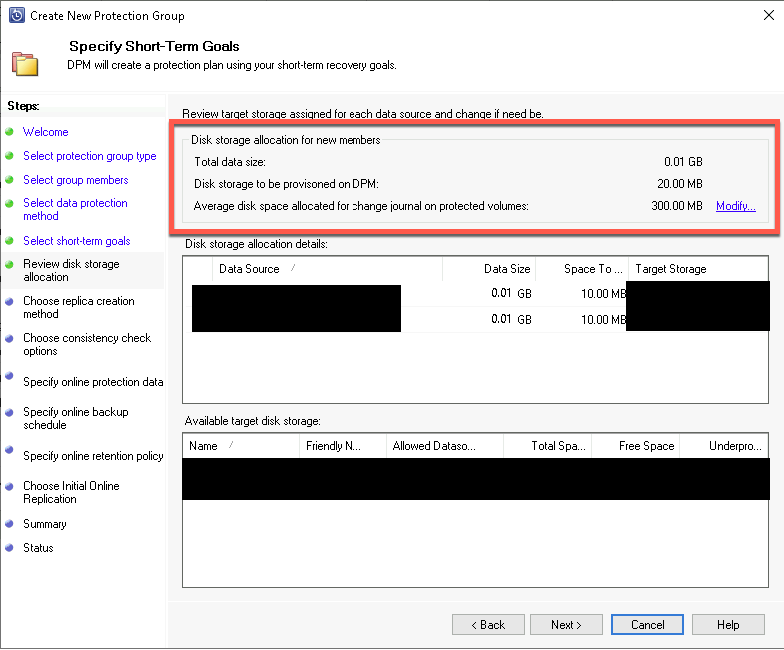
On the next page, DPM will automatically select the disk storage and allocate the backup. You will also see the size of the backup as shown by DPM below:
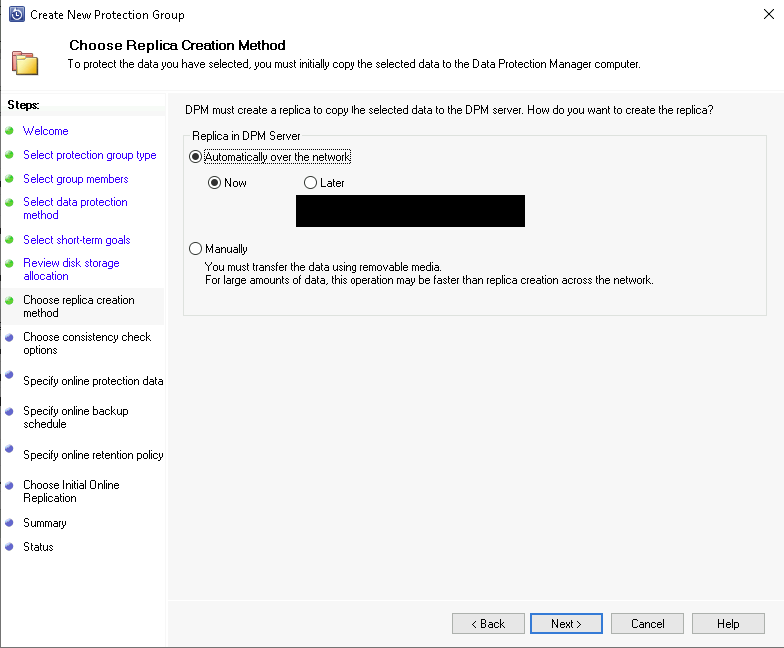
If you are happy with what your DPM has presented, you can click Next, which will bring up the replica section asking you when you want to perform the replica. This can be automatically or manually, as shown below:
On the last window for setting information, you can leave the defaults regarding the consistency check if a replica becomes inconsistent and then view the summary and finish setting up the protection group.
Depending on your selection, you will see the protection group being created on the left-hand side, and then a sync will start.
Now, let System Center Data Protection Manager finish its sync. When you check the properties of your Exchange databases, you will see that it has a timestamp for a backup, and the log files would have been truncated.
Featured image: Shutterstock


