Here is my previous article on backing Exchange 2016 or Exchange 2019 up with System Center Data Protection Manager (DPM).
In that article I went through the steps of creating local backups to disk which could be JBODs or a SAN. In this article I will take you through how you can add backups to the cloud from System Center Data Protection Manager (DPM).
The first step is to either create a Pay-As-You-Go account in Azure and set up a storage account, or add a storage account for backups to your existing subscription. Choose the option that best works for you. Once you have the storage account active, you will need to download the backup agent and install it on your DPM server. I would not recommend having DPM shared with any other application as it is CPU and Memory intensive and your backups may end up failing or taking very long.
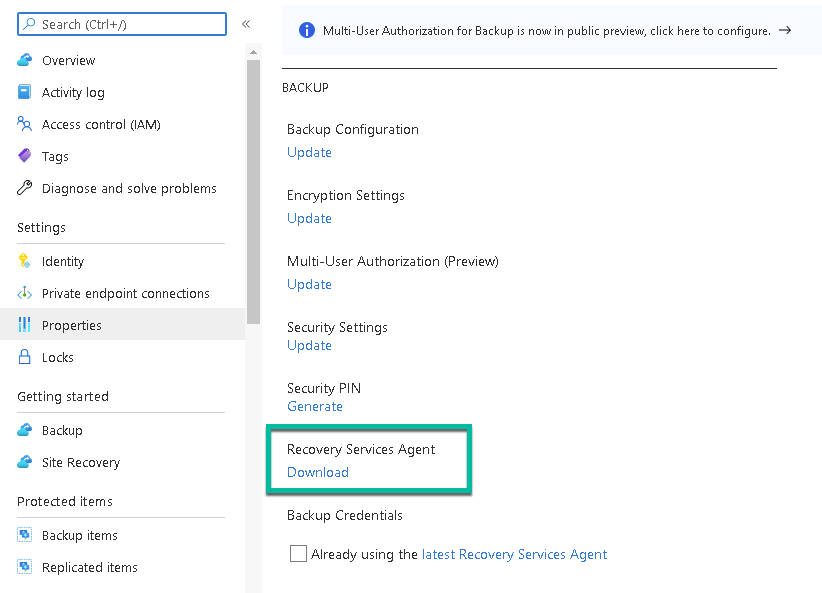
On Azure, navigate to your Recovery Services Vault and go to the properties. You should see a list similar to the one below. As highlighted, click the download button:
Once you have run the installation, go to System Center Data Protection Manager (DPM). Launch the console if you do not have it open yet. Then at the bottom, click on Management as shown below:

On this page, you will be presented with the following options with blue highlighted links:
- Production Servers
- Disk Storage
- Online
- Library
We will be working with Option 3 – Online. Click the link and you will see a new menu as shown below:

On the ribbon, click the Register button to bring up the Register Server Wizard as shown below:
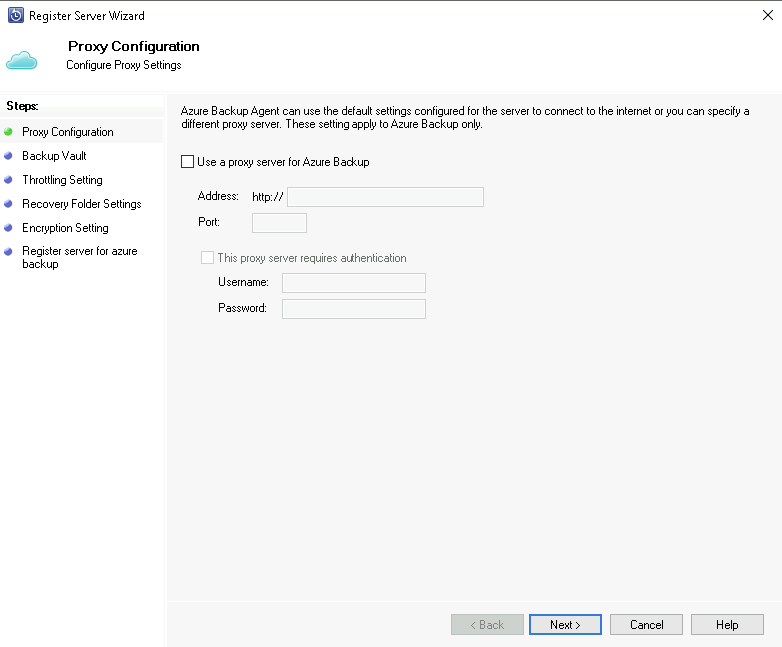
I will not go into much detail since it is self explanatory, but the options you will need to cover are as follows (with some pointers):
- Proxy Configuration
- Backup Vault (I want to highlight this. You need to download the Vault Credentials from Azure which will have the type of “VAULTCREDENTIALS File” once saved.)
- Throttling Settings (You need to make sure you do not eat all the bandwidth on the line during the day. Make your adjustments for how much can be used during business hours and after hours.)
- Recovery Folder Settings
- Encryption Settings
- Register Server for Azure Backup
The wizard will take a few minutes to complete, so don’t stress. Once it is finished, you should now see an Online Subscription on the right hand side of the console. Close and open your console again to update the view. I have found that it does not always show the correct information immediately.
I left mine to sync and update for a few hours. This is obviously region dependent, but I find it a good practice. Once the wait is over, return to your backups by clicking the Protection Tab, which will display your Protection Groups. Right click on a Protection Group and select Modify Protection Group. It will bring up the window just like you had when you first created your Protection Groups.
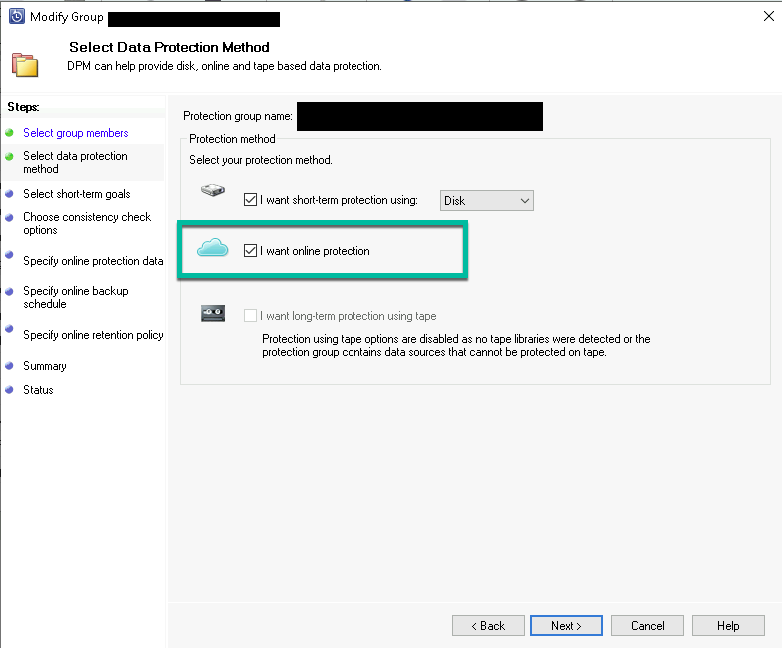
Leave the first page as is, where you have your members selected and the items you have selected to backup, and click the Next button. On the next page, you can now select the option: I want online protection (as shown below). Take note, this option will be greyed out if you do not have your Data Protection Manager Server setup for Online Protection, which are the previous steps we covered.
Once you have selected the option, click the Next button until you get to the option called: Specify online protection data. If an item is not selected, it means that Azure has classified it as unsupported. You can click the link regarding this and read more about it. If it has selected it, you can click Next and then select your schedule, which can be the following:
- Day
- Week
- Month
- Year
Also select the times you want the Online backups to run. Select a second time if you need to, or leave it as None and then click Next. On the next page you can select your retention policy, as shown below:

If you do not require an option, you can simply unselect it as shown above. If you select an option like Weekly Retention Policy, select the day and then select the number of days and weeks that you want to keep the data. I used 14 days and 4 weeks (Minimum Value) as an example.
Once you are happy with the selection, you can click the Next button to take you to the summary page. Finish the wizard and wait for the modification to the group to show you success.
If at any time you need to change the retention period or the time online backups run, you can modify the Protection Group. Take note you cannot change anything under your subscription in DPM until backups have completed.


