Introduction
The Edge Transport server role in Exchange 2007 performs a number of functions including routing messages between the Exchange organization and the internet, as well as providing Anti-virus and Anti-Spam protection. It is meant to be installed on the edge of the corporate network, or on a screened subnet. This location makes it more vulnerable than the servers on your protected network. This means you are required to do a little more work to secure the server itself. The Security Configuration Wizard in Windows Server 2003 SP1 is an ideal tool to use to reduce the attack surface of your Edge Transport server(s).
The Security Configuration Wizard (SCW) is a new feature in Windows Server 2003 that is part of Service Pack 1. It is an easy to use wizard that allows you to quickly create and apply security templates to servers. Being wizard based, it is very user friendly and has some great features to help you secure, not only your Edge Transport servers, but all your Windows 2003 SP1 servers. Some of my favorite features include the ability to copy the XML file to other servers and apply them throughout the network and the ability to rollback changes in case you went overboard with the restrictions and broke something. If you are unfamiliar with this new tool be sure to check the links at the end of this article for more information.
Installing SCW
Installing the Security Configuration Wizard is pretty straight-forward. Open up Add/Remove Programs, select Add/Remove Windows Components and scroll down the list until you see Security Configuration Wizard (see Figure 1). Check the box and click Next to complete the installation.
Figure 1: Install Security Configuration Wizard

That takes care of the basic installation. For Exchange 2007 servers there is one more step. You must register the Exchange2007.xml & Exchange2007Edge.xml files for SCW to be able to load and apply the rules. If you are planning on using SCW only to configure the Edge Transport Server, you only need to use the Exchange2007Edge.xml, but if you are running SCW to configure multiple Exchange Servers, I would recommend registering both.
Begin by browsing to C:\Program Files\Microsoft\Exchange Server\Scripts and locate a file called Exchange2007.XML & Exchange 2007Edge.XML. Copy these files to %windir%\Security\msscw\kbs. Once complete open up a command prompt. From the command line change directories to %windir%\System32 and run the following command:
SCWCMD Register /kbname:MSExchangeEdge kbfile:%windir%\security\msscw\kbs\Exchange2007Edge.xml
SCWCMD Register /kbname:MSExchange kbfile:%windir%\security\msscw\kbs\Exchange2007.xml (Not required unless running SCW remotely to configure multiple Exchanger Servers)
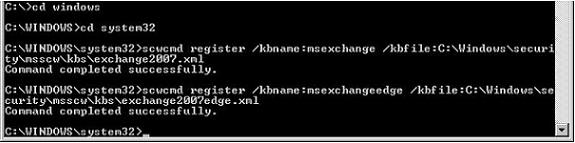
Figure 2: Register Exchange 2007 SCW Database
Believe it or not, that was the hard part!
Running SCW
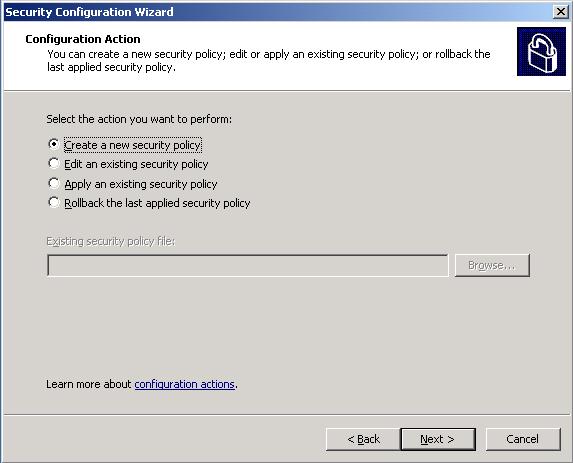
With all that out of the way we are ready to run SCW and lock down our Edge Transport Server. To launch SCW, click Start > Programs > Administrative Tools > Security Configuration Wizard. You will be welcomed with the Welcome to the Security Configuration Wizard page at which you can click Next to begin. On the next screen you will be asked to create, edit, apply or rollback a configuration. The last one is a lifesaver if you happen to mess up and things stop working. We are starting with a base system so choose Create a new security policy (see Figure 3) and click Next.
Figure 3: Create New Policy
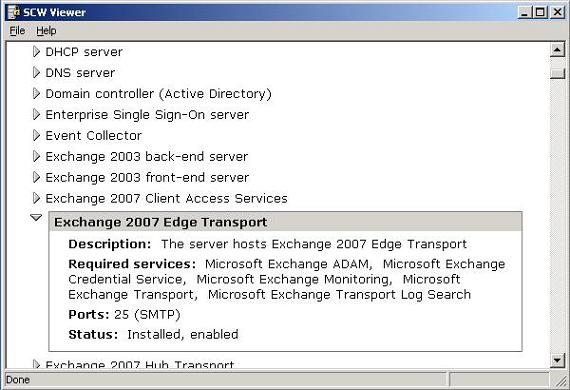
The next screen allows you to choose a server for your base server. In this case I am going to choose the local server, but you do have the option of doing this for remote servers as well. Once you click Next the SCW will configure the Security Configuration Database. Once this is complete, click on View Configuration Database to open up SCW Viewer and then scroll down the list. Everything you see here includes a custom template to begin securing that particular server. If you successfully registered the XML file you should see some Exchange 2007 entries including Exchange 2007 Edge Transport. By clicking of the triangle next to the entry you can expand it for more information (see Figure 4).
Figure 4: SCW Viewer
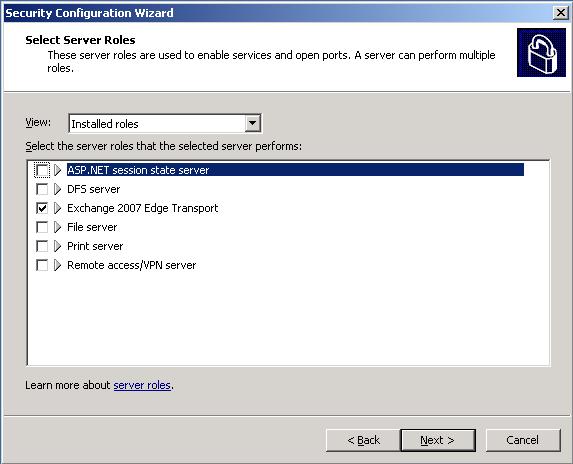
Close SCW Viewer and click Next to proceed. The first set of configuration options come under the Role-Based Server Configuration. Click Next and under Select Server Roles choose Exchange 2007 Edge Transport (see Figure 5) and uncheck any roles not being performed (File Server for example) then click Next again.
Figure 5: Select Server Roles
Click Next again on the Select Client Features page, the Select Administrator and Other Option page and the Select Additional Services Page. Those selections will be chosen for you based on the role you chose earlier and any services required. Next you will be asked if you wish to change the startup of unspecified services. Unspecified services are defined as services not listed in the database or not yet installed. If you set this to disabled and then install a new application that installs a service, that service would be set to disabled and require you to enable it manually. The choice is yours; I set it to disabled and then enabled them manually. The next screen shows you what changes to the services will be made. You can review this and if one of those unspecified services shows up here as disabled, you can enable it.
Once you click Next again, the Network Security portion of the wizard starts. Here is where access restrictions and ports are configured and there is some customization required here so click Next once again to continue. The Open Ports and Approve Applications page requires a few modifications. We first need to open TCP/UDP 25 (SMTP) and TCP 50389 (LDAP for ADAM) and TCP 50636 (LDAP/SSL for ADAM) to allow ADAM to communicate with Active Directory. To do this simply click on Add and under the Port Number tab enter the port number and check of TCP, UDP or both. You will need to add the following three ports. (Note: Exchange 2007 final does not include TCP/UDP Port 25 in its SCW Configuration unlike the beta version)
|
Port Number |
Protocol |
|
50389 |
TCP |
|
50636 |
TCP |
|
25 |
TCP/UDP |
Table 1
Once those two have been added (see Figure 6) there is some additional configuration that needs to be performed before we can proceed.
Figure 6: Additional Ports for ADAM
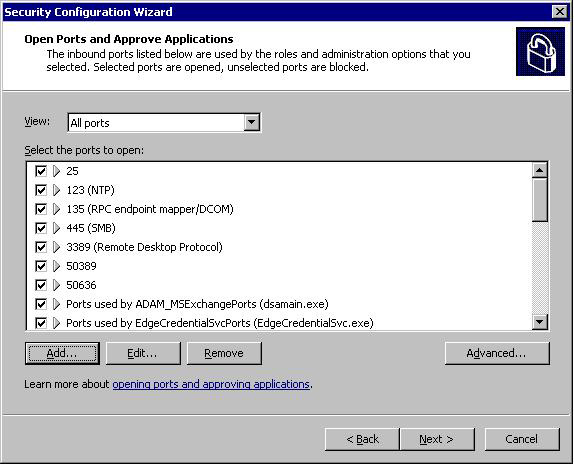
The next thing we want to do is restrict the interface that some of the ports can communicate through. Your Edge Transport server should have two network interfaces, one internal and one external. The goal here is to prevent LDAP traffic to go through the external interface which would not be very secure!
Select 25 (SMTP) and click on Advanced. Click on the Local Interface Restrictions tab and then choose Over the following local interfaces and check both the internal and external interfaces. Repeat for the two ports you created, 50389 and 50636, and for 3389 (Remote Desktop Protocol) EXCEPT only choose the internal interface (see Figure 7).
Additionally, you made add remote address restrictions to limit which internal addresses may communicate via ADAM to your Edge Server. This can be performed by clicking on the Remote Address Restrictions tab in the Advanced Port Configuration window.

Figure 7: Local Interface Restrictions
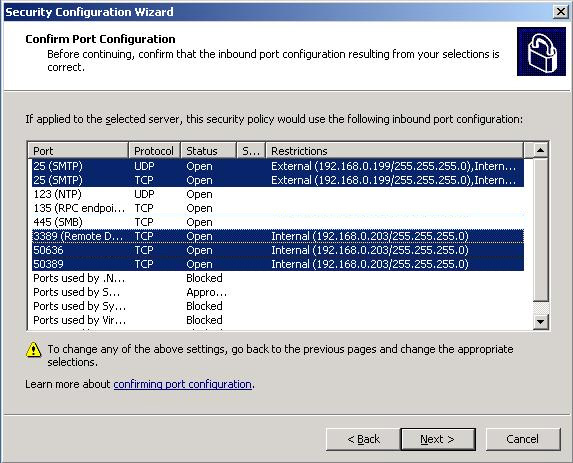
Click Next and verify the ports and interfaces are correct as shown in Figure 8.
Figure 8: Confirm Port Configuration
Click Next again to proceed. The next section is the Registry Settings portion of the wizard. Check the box next to Skip this section and click Next. You can also skip the Audit Policy section of the wizard. That completes the creation of the policy! Not so hard was it! Before we get carried away let’s save the configuration.
Clicking Next will take you to the Security Policy File Name page which allows you to name the policy and offer a description of what the policy does, some of the custom settings etc… You can also view the settings with the SCW Viewer by clicking on View Settings. Enter the name of the policy and click Next. Your final choice will be to apply the policy now, or leave things as is and apply it later. Leave the default of Apply Later and click Next one last time. You are at the end of the wizard and clicking Finish will close it out. You are now ready to apply the policy to your Edge Transport server or servers.
Applying the Policy
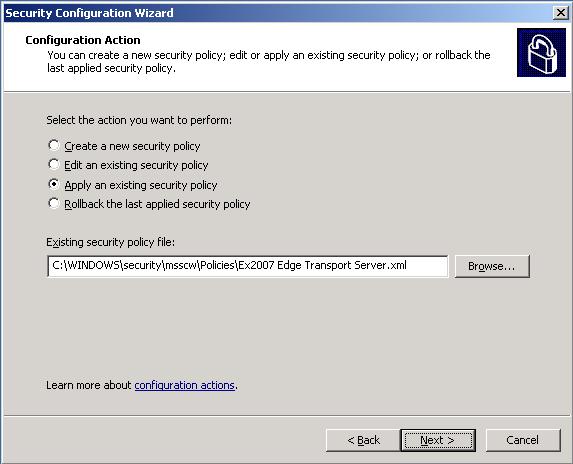
Applying the policy couldn’t be simpler. Launch SCW and make your way to the second screen. This time choose Apply an existing security policy and click Browse to locate the policy (see Figure 9).
Figure 9: Apply Existing Policy
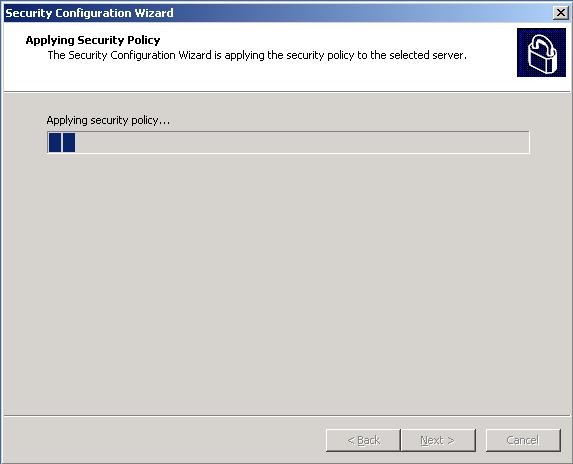
Next choose the server you wish to apply the policy too and click Next twice to apply the policy (see Figure 10). Once it is complete click Next and then click Finish. You have now applied the policy and locked down your server. Copy the XML file to your other Edge Transport servers and apply it to them as well.
Figure 10: Applying the Security Policy
Conclusion
The last thing you should do is test that everything is still functional. After that sleep easier knowing your Edge Transport has a reduced attack surface that will go a long way to keeping it your server!
Related Reading
Security Configuration Wizard in Windows Server 2003 Service Pack 1
Introduction to Exchange 2007 Server Roles
