If you would like to read the other parts in this article series please go to:
- Uncovering the Exchange 2007 Edge Transport Server (Part 1)
- Uncovering the Exchange 2007 Edge Transport Server (Part 2)
- Uncovering the Exchange 2007 Edge Transport Server (Part 3)
- Uncovering the Exchange 2007 Edge Transport Server (Part 5)
- Uncovering the Exchange 2007 Edge Transport Server (Part 6)
Introduction
The Edge Transport server includes several anti-spam features that have been created, in order to do just that. Most of the features are features that we already know from Exchange Server 2003 and Exchange Server 2003 SP2; they have just changed names and of course been improved further. In Table 1 you can see a comparison of anti-spam features between Exchange Server 2003 RTM, Exchange 2003 SP1, Exchange 2003 SP2 and Exchange Server 2007. It’s not difficult to see how much the Exchange Product group invested in improving the Anti-spam features in this version of the Exchange product.
|
Anti-spam feature |
E2K3 RTM |
E2K3 SP1 |
E2K3 SP2 |
E2K7 RTM/SP1 |
|
IP Allow and Deny List |
Yes |
Yes |
||
|
IP DNS Black Lists |
Yes |
Yes |
||
|
IP Safe List (Bonded Senders) |
Yes |
|||
|
Sender Filtering |
Yes |
Yes |
||
|
Sender ID |
No |
Yes |
Yes |
|
|
Recipient Filtering |
Yes |
Yes |
||
|
Content Filtering (IMF) |
Yes |
Yes |
||
|
Content Filter Updates |
Bi-weekly |
Intra |
||
|
Computational Puzzle Validation |
Yes |
|||
|
Protocol Analysis Data Gathering |
Yes |
|||
|
Protocol Analysis Sender Reputation |
Yes |
|||
|
Open Proxy Validation |
Yes |
|||
|
Dynamic Spam Data Update Service |
Yes |
|||
|
Per User/OU spam Settings |
Yes |
|||
|
Admin Quarantine Mailbox |
Yes |
|||
|
Automatic DNS Block Lists |
Yes |
Table 1: Comparison of Anti-spam Features in Exchange Versions
Note:
In addition to the anti-spam features listed in the table above, the Edge Transport server has full support for antivirus scanning products such as Forefront Security for Exchange server and the most popular 3rd party products.
The anti-spam features on the Edge Transport server are known as filtering agents, you can see a list of these agents in Figure 1.
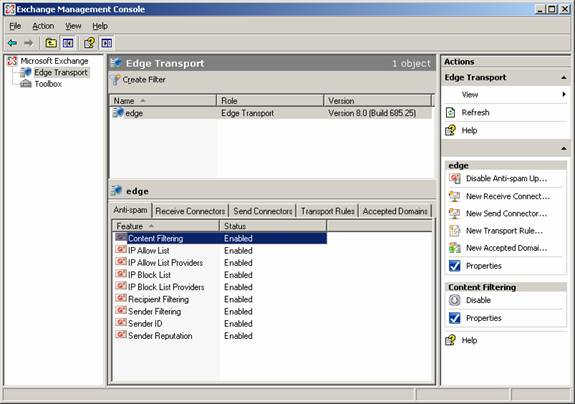
Figure 1: Filtering Agents on the Edge Transport Server
Although we specifically cover the Edge Transport Server role in this articles series, you can actually install them on a Hub Transport Server as well. Yes that is right! It is done by opening the Exchange Management Shell, then type: CD C:\Program Files\Microsoft\Exchange Server\Scripts. Now type .\Install-AntispamAgents.ps1. When the script has finished, you can control the anti-spam agent settings under Organization Configuration | Hub Transport | Anti-spam tab in the Exchange Management Console, as shown in Figure 2.

Figure 2: Installing the Filtering Agents on the Hub Transport Server
When an SMTP session is established between an external SMTP server and the Edge Transport server, the filters listed in Figure 1 are applied in a specific order. In the next section, I’ll show you in which order the different filters are applied.
The Connection Filtering Agent
When an SMTP session is established to the Edge Transport Server the first filter applied is the Connection Filter. The Connection Filtering agent will first check whether the IP address of the external SMTP server is listed on the IP Allow List, which is shown in Figure 3.
Note:
You can both specify individual IP addresses as well as a range of IP addresses under the Allowed Addresses tab on the IP Allow List property page (see Figure 3).

Figure 3: IP Allow List
If the IP address is listed here the SMTP server will be allowed to connect and transmit E-mail messages to the Exchange 2007 organization, but the E-mail message(s) will be sent to the Sender Filtering agent for further processing.
If the IP address of the SMTP server is not listed on the IP Allow List, the Connection Filtering agent will check whether the server is listed on the IP Block list shown in Figure 4.
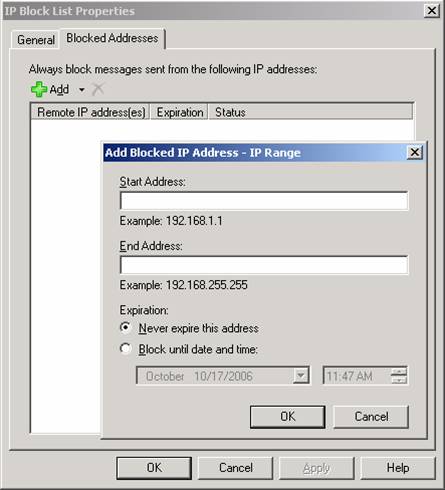
Figure 4: IP Block List
If the IP address of the SMTP server is listed on the IP Block List, connections from the server will be refused.
Note:
A neat little improvement to the IP Address Block list is that you now can set an expiration date and time for an individual IP address or a range of IP addresses, this was not possible back in Exchange Server 2003 SP2. If the IP address of the SMTP server is not listed on either the IP Allow list or the IP Block list, the Connection Filtering agent will check whether the IP address is allowed by any IP Allow List provider you may have specified (see Figure 5).
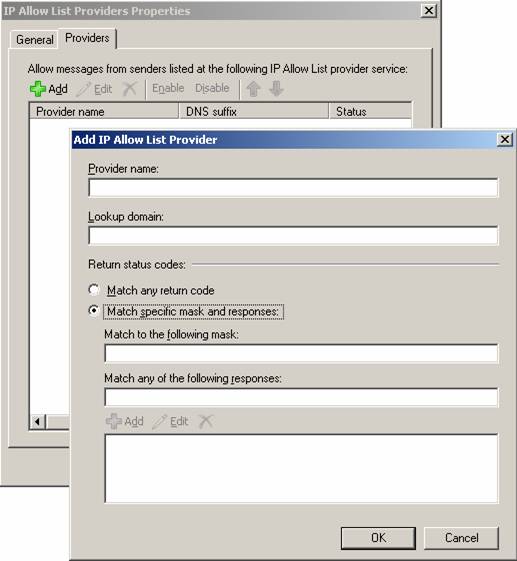
Figure 5: IP Allow List Providers
An IP Allow List provider is a provider which maintains a list of sender domains/IP addresses that you can rely on sends legitimate E-mail messages and not spam. You can specify multiple IP Allow List providers and even specify how the miscellaneous provider features should interpret the returned status.
If the SMTP server is not listed on any of the lists above, the Connection Filtering agent will do one last check, before it allows the SMTP connection. It will check whether the server is listed on any real-time blocklists (RBLs), you may have specified under the Providers tab on the IP Block List providers property page (see Figure 6).
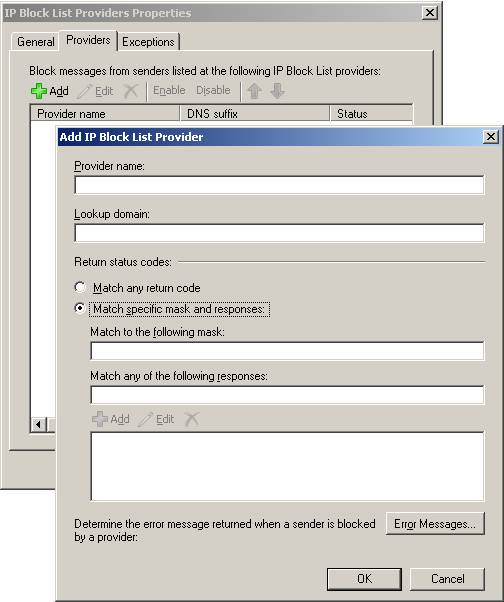
Figure 6: Adding an IP Block List Provider
For those who should not know, an RBL is an Internet-based service, which tracks systems (and then adds that system’s IP address to a public list) that are known to or suspected of sending out spam. You can read more about what RBLs are as well as how they work at Wikipedia – DNSBL. In addition you can find a list of RBLs here.
In addition to specifying IP Block List providers, you can also enter a custom error messages that should be returned to the blocked SMTP server. Last but not least there is an Exceptions tab under which you can specify IP addresses to which E-mail messages should not be blocked regardless of the feedback from the RBL.
The Sender Filtering Agent
When the connection filtering agent has processed the SMTP connection the next filtering agent involved is Sender Filtering which will check the E-mail address of the sender against the list of Email addresses or domains, you may have specified under the Sender Filtering property page (see Figure 7).
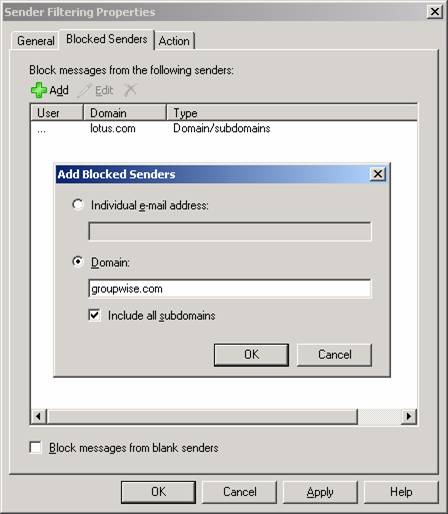
Figure 7: Blocked Sender List on the Sender Filtering Property Page
The Sender Filtering agent lets you reject individual E-mail addresses, single domains or whole blocks of domains (that is a domain and any sub domains). When the Sender Filtering agent rejects an E-mail message a 554 5.1.0 Sender Denied is returned to the sending server. The agent also lets you reject any E-mail messages that don’t contain a sender.
In addition to rejecting E-mail address and/or domains specified on the Blocked Senders list on the Sender Filtering property page, you can also choose to Stamp messages instead of rejecting them (done under the Action tab). When choosing this action the metadata of the message will be updated in order to indicate the message was sent by a blocked sender. The stamp will then be used when the Content Filtering agent calculates Spam Confidence Level (SCL) of the message.
Bear in mind that the Sender Filtering agent overrides the Outlook Safe Senders List (which we will talk about later in this section), which means that senders specified on the Block Senders list will be rejected even though they are included on a Outlook Safe Senders list.
The Recipient Filtering Agent
When a message has been processed by the Sender Filtering agent and has not been rejected it will be handed over to the Recipient Filtering agent (well this is not exactly true as the Connection Filtering agent will run once more, before doing so), which will check the recipient of a given E-mail message against the Recipient Block list. As you can see in Figure 8 you can block recipients based on their E-mail address (that is the SMTP address in the RCPT TO: field) as well as messages sent to recipients not listed in the Global Address List (GAL). The Edge Transport server can only check whether a recipient is in the GAL if you make use of EdgeSync subscription, otherwise recipient data will not be replicated to from Active Directory to ADAM.
Note:
Any SMTP addresses entered on the Blocked Recipients list will only be blocked for senders located on the Internet, internal users will still be able to send messages to these recipients.
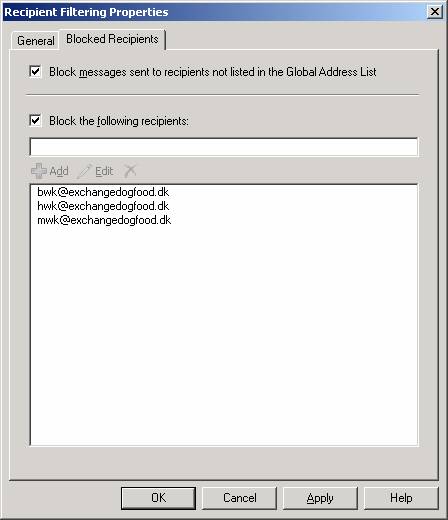
Figure 8: Blocked Recipients List on the Recipient Filtering Property Page
If an external sender sends an E-mail message to a recipient that is either listed on the blocked recipient list or not present in the GAL, a 550 5.1.1 User unknown SMTP session error will be returned to the sending server.
It is worth noting that the Recipient Filtering agent only works for domains for which the Edge Transport server is authoritative. This means that any domains for which the Edge Transport server is configured as a relay server will not be able to take advantage of Recipient Filtering.
As I mentioned earlier in this article, the EdgeSync service will replicate recipient data from Active Directory to ADAM every 4th hour. With this in mind be aware that any new recipients created on your mailbox server on the internal network will not be able to receive E-mail messages from external senders, before the EdgeSync service has taken place here after.
The Recipient Lookup feature also includes a SMTP Tarpitting feature which helps combating directory harvest attacks. For those of you who do not know what a directory harvest attack (DHA) is, let me try to give you a short introduction. A DHA is a technique used by spammers in an attempt to find valid SMTP addresses within an organization. This is typically done with the help of a special program which is capable of generating random SMTP addresses for one or more domains. For each generated SMTP address the program also sends out a spam message to the specific address. Because the program will try to deliver a message to each generated SMTP address, an SMTP session is of course also established to the respective Edge Transport server (or whatever SMTP gateway is used in the organization). The program can therefore collect a list of valid SMTP address as the SMTP session will either respond with an 250 2.1.5 Recipient OK or a 550 5.1.1 User unknown, depending on whether the SMTP address is valid or not.
This is where the SMTP Tarpitting feature comes into the picture, as this feature basically delays the 250 2.1.5 Recipient OK or 550 5.1.1 User unknown SMTP response code during an SMTP session. By default the SMTP Tarpitting feature on an Edge Transport server is configured to a delay of 5 seconds (but the value can be changed for each Receive connector), which should help make it more difficult for a spammer to harvest valid SMTP addresses from your domain.
Figure 9: Edge Transport Server with Recipient Filtering Agent Disabled

Figure 10: Edge Transport Server with Recipient Filtering Agent Enabled
The SMTP Tarpitting feature was originally introduced back in Exchange Server 2003, in Exchange 2003 the administrator had the option of specifying a tarpit value in which he could define the number of seconds to delay a response to the RCPT TO command during an SMTP session. The problem in Exchange 2003 was that this value was fixed, which enabled the spammers to detect this behavior so they could work around it. A common practice was in fact to have the spam application establish a new SMTP session, if it detected it was being tarpitted. To solve this problem the Edge Transport server uses a random number of seconds, making predictions much harder. Event if the spam application reconnects it won’t be in better shape as the Edge Transport server will know it’s the same sending server, so it will retain the tarpit state.
The Sender ID Filtering Agent
When an E-mail message has been processed by the Recipient Filtering agent and still has not been rejected, it will be handed over to the Sender ID Filtering agent.
For those who do not know, the Sender ID is an e-mail industry initiative invented by Microsoft and a few other industry leaders. The purpose of Sender ID is to help counter spoofing (at least to make it more difficult to spoof messages), which is the number one deceptive practice used by spammers. Sender ID works by verifying every e-mail message indeed originates from the Internet domain from which it was sent. This is accomplished by checking the address of the server sending the mail against a registered list of servers that the domain owner has authorized to send e-mail.
If you do not have any experience with Sender ID, it can be a bit difficult to understand, so let me try to explain how it works.
An organization can publish a Sender Policy Framework (SPF) record on the public DNS server(s) hosting their domain. The published SPF record contains a list of the IP addresses that should be/are allowed to send out messages for a particular domain. If a particular organization has published a SPF record, and someone at that organization sends a message to a recipient behind an Edge Transport server in another organization, the Edge Transport server will examine the SPF record in order to see whether the SMTP server that sends the message is listed here.
Figure 11: How Sender ID Works Behind the Scene
Sender ID can provide several different results and stamp it appropriately. I’ve listed each of the results as well a short description and the action taken in Table 2.
|
Sender ID Result |
Description |
Action taken |
|
Neutral |
Domain is neutral (makes no decision about IP address) |
Stamp and Accept |
|
Pass (+) |
IP address for PRA permitted set |
Stamp and Accept |
|
Fail (-)
– Domain doesn’t exist |
IP address for PRA not permitted set |
Stamp and Accept then either Delete or Reject |
|
Soft Fail (~) |
IP address for PRA not permitted set |
Stamp and Accept |
|
None |
No SPF record published for the domain |
Stamp and Accept |
|
TempError |
Transient error (could be unreachable DNS server) |
Stamp and Accept |
|
Perm Error |
Possible error in record, so couldn’t be read correctly |
Stamp and Accept |
Table 2: Sender ID Results
No matter what the result of the SPF check is, the result will be used in the calculation process when an SCL rating is generated for a message.
If you want to check which IP addresses are allowed to send E-mail messages for a given domain you can open a command prompt and type nslookup –q=TXT domain.com. You should then be able to see the SPF record including the list of the IP addresses allowed to send e-mail messages for this domain.
For additional information about Sender ID I recommend you visit Sender ID.
When the Sender ID Filtering agent checks whether a sending SMTP server has an appropriate purported responsible address (PRA), you can specify what action it should take for a given E-mail message that doesn’t have an appropriate PRA.
You can configure it to Reject message, Delete message or Stamp message with Sender ID result and continue processing, the last one is the one selected by default (Figure 12).
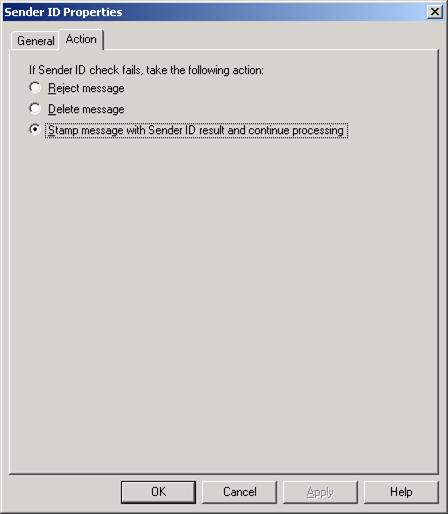
Figure 12: Action Tab on the Sender ID Property Page
If you set Sender ID to reject the message, the message will be rejected by the Edge Transport server and an SMTP error response will be returned to the sender.
If you configure Sender ID to delete message, the message will be deleted without sending an SMTP error response to the sender. Since the message is deleted without informing the sending SMTP server, you would think that the sending SMTP server would retry sending the message, but this is not the case. The Sender ID filter has been made so clever that the Edge Transport server will send a fake OK SMTP command before deleting the message.
When configuring Sender ID to stamp messages with Sender ID result and continue processing the E-mail message will be stamped with information that will be used when the message is evaluated by the Content Filtering agent in order to calculate the SCL.
Note:
If you have not already done so, I highly recommend you create an SPF record for your domain as this will make it much more difficult for spammers to forge your domain in order to spam domains in other organizations. Creating your own SPF record is a relatively simple process, Microsoft even provides a web-based GUI wizard that will help you do this (see Figure 13).
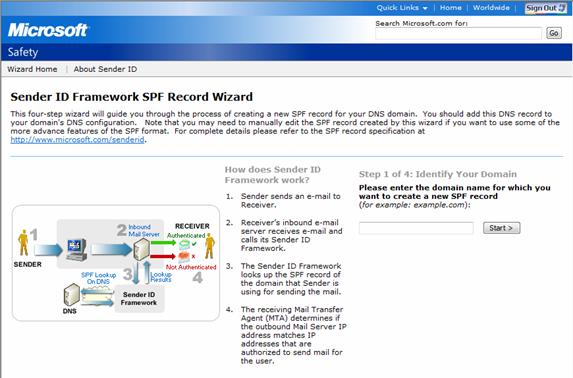
Figure 13: Sender ID Framework SPF Record Wizard
You can find the wizard here.
If you would like to read the other parts in this article series please go to: