In our previous article here at TechGenix, we covered the required steps to create and manage management groups in Microsoft Azure, which allows centralized and consistent management of your subscriptions. In that article we showed you how we can assign permissions and policies from a central location, and as new subscriptions are being added to the organization, the administrative work is summarized to assign subscriptions to the proper management group. In this article, we will explore the relationship between Azure AD roles and RBAC permissions at the subscription level and check how we can use global permissions and policies using the very first level of the management groups: the tenant root group.
The neutral zone
I may be (well, definitely I am) watching too much “The Man in the High Castle,” but there is a gray area between Azure AD roles and RBAC permissions (IAM also known as Access Control) in Azure Portal. The first level of management groups is the tenant root group, and all permissions/policies assigned to this level are propagated to all management groups, which gives us great flexibility to implement Global Policies. Azure AD roles do not play an essential role in the Azure Portal because they are separate entities. However, there is a known path to get access to the tenant root group when we need to perform management group administration. Reasons you may want to do this include restoring access or assigning permission to the entire organization to a service account.
The goal when using Azure management groups is to configure based on your design, and then lock down the structure and preferably remove the ability for anyone to be able to change it. If we do have changes, we can always check the logs to find out who performed the changes, but the idea is to avoid changes. If a change is required, then proper planning, documentation, and change management process should be part of the process.
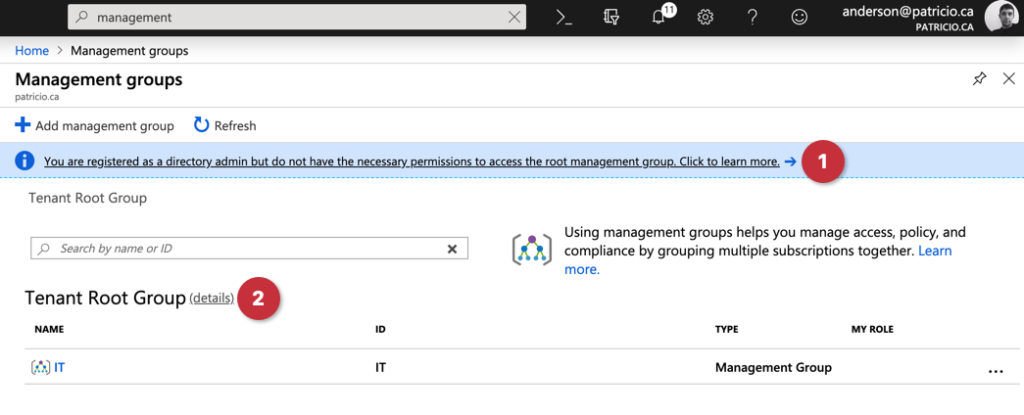
When using the management group feature in Microsoft Azure, a banner stating that our logged user is a directory admin but does not have the necessary permissions to access the tenant root group will be displayed, as depicted in the image below. That gives us an insight that the elevation is not being used (the door is closed).

Logged as Global Administrator in the Azure Portal, open Azure Active Directory, click on Properties, and then switch to Yes the Access management for Azure resources section.

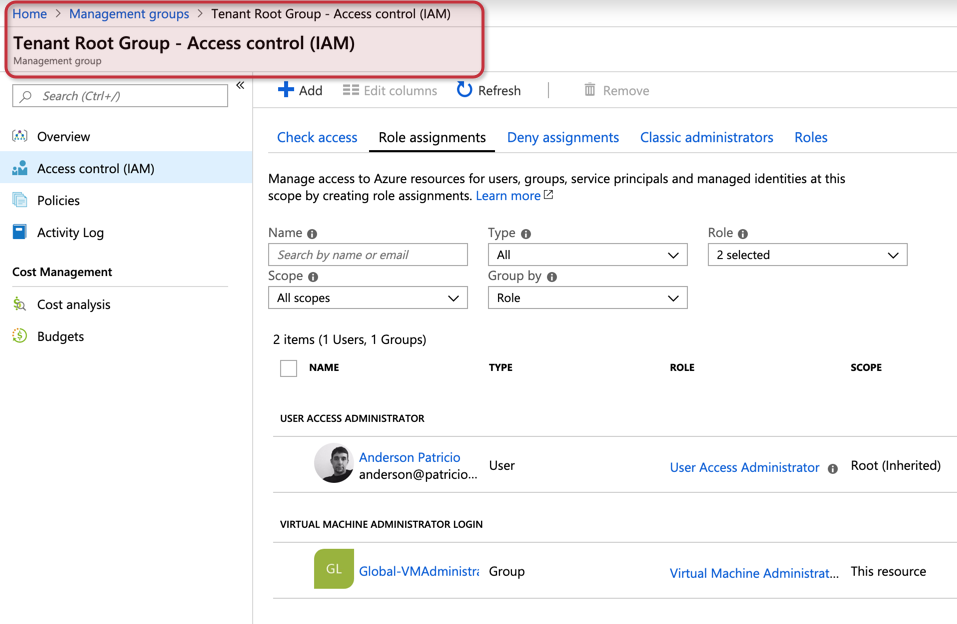
After completing the previous step, go to management groups, and click on details located beside of tenant root group on the first page of the blade being displayed. In the new blade, click on Access control (IAM), and we can check that our current user was added with User Access Administrator role, as depicted in the image below. Keep in mind that it says inherited, which means that the entry came from our previous step into the Azure AD properties.

Locking down the Azure management groups
Every environment has its requirements and political battles that the cloud administrator will have to fight with the teams that will consume Azure resources. There isn’t a single design that fits all, but here are some recommendations that you should try on your environment when planning management groups:
- Keep it simple: Don’t create too many permissions if you don’t have to.
- Assign permissions to groups whenever possible.
- Consider removing any Owner permission from the management groups.
- Avoid assigning permissions at the subscription level.
- If possible, have a structure ready for new departments/areas that want to be part of your Azure environment. Make sure that you have the groups prepared to assign permissions during the onboarding process instead of creating groups as they are being requested.
- When new permissions and policies are required, switch the Azure Active Directory property (as shown in the previous section) on and perform the changes. Turn the same option off when the work is complete.
- Assess your environment and identify the global service accounts, and work with them at the tenant or higher levels in your management groups.
- If assigning permissions to a single account, make sure that is a service account.
- Avoid assigning permissions at the tenant root group level. Use it only when such account requires access to the entire environment.
- Use more than one level of management groups. For example, if a department requires three environments using different subscriptions, create a management group for the department, and underneath create one management group for each environment.
- If an account/group needs access to all environments, assign the permission at the department level.
Managing Azure Active Directory roles
If you want to manage Azure AD Roles, the best way is using Azure Active Directory. Search for it, and click on it. In the new blade, click on Users and double-click on the desired user from the list on the right side.
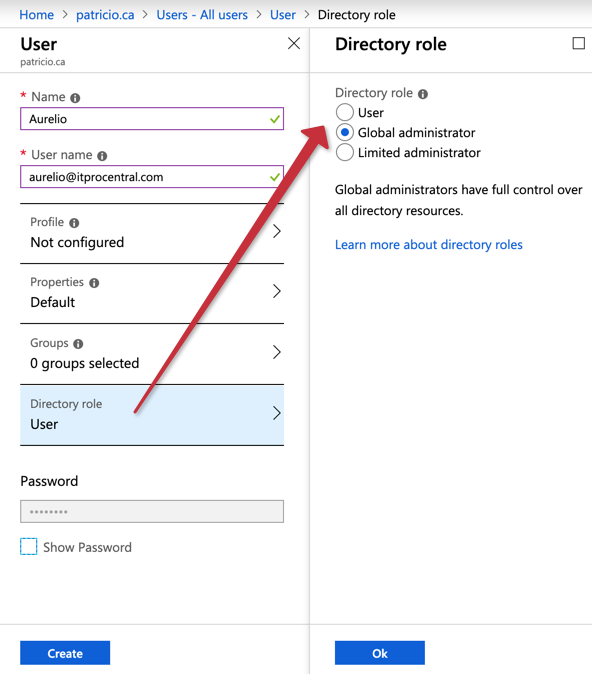
In the new blade, click on Directory Role, and select Global administrator, as shown in the image below. Next time that user logs on to the Azure Portal, they will be able to change the Azure AD properties to elevate their access to manage the management group tenant root, which means all management groups.
Testing the delegation
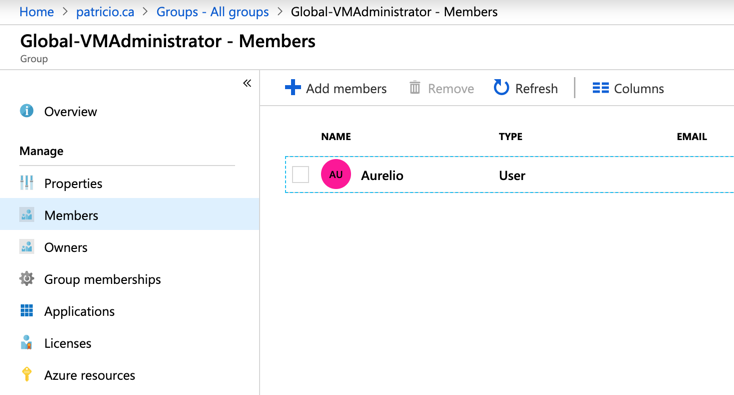
Let’s create a user for my best imaginary cousin ever, whom I hired to manage my corporation. Before his first day, I created his account in Azure AD (it could’ve been provisioned through AD synchronization as well) and I added him to the group Global-VMAdministrator, as depicted in the image below.
Next, we will add the Global-VMAdministrator to the permissions at the tenant root group and assign the role virtual machine administrator, which means any member of this group will be able to manage any VM in our organization.
When a member of that group connects to the Azure Portal, all the permissions required for his daily routine are defined at the management group level. If a new member of the same team needs to add the user to the group — and it doesn’t matter if we have one or 50 subscriptions — all permissions will be in place.
If the user tries to check permissions at the subscription, because he doesn’t have the role assigned to his account an error will be displayed, and no permission information will be available.
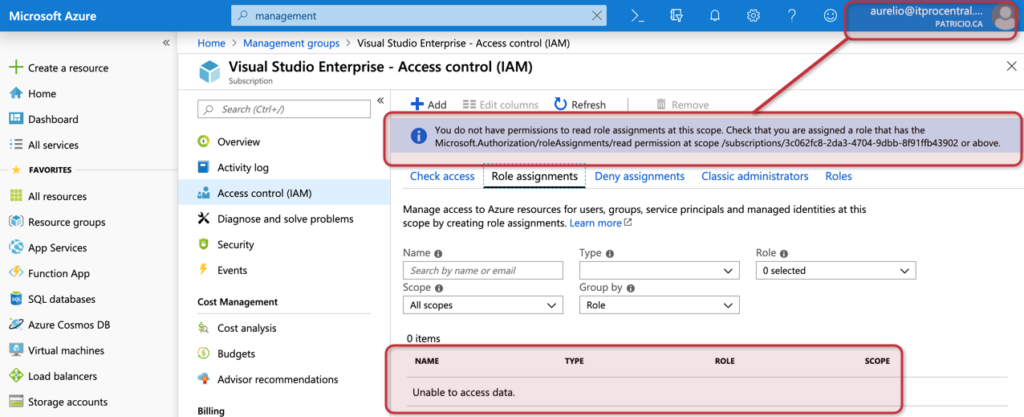
The last piece required is to lock down the environment, so we turn off the access management at the Azure Active Directory properties after performing the changes. The results are being shown in the image below, where my user no longer has access to the tenant root group.
Featured image: Pixabay


