We have been exploring Azure DevOps here at TechGenix for a while, and several of my previous articles covered several areas of the solution. One of these focused on the Azure DevOps capabilities to plan and track the team members, and it can be found here. In this article, we are going a little bit further where we left off in our last article, and we will cover some small tricks and improvements that can be done on Azure DevOps to improve your skills managing tasks and connecting features and save you time.
We are going to cover the process to add users to the team, a better and easier way to manage status, and activities in the Sprints, check the queues and charts and see some integration features between Tasks and other areas of Azure DevOps.
Adding users to your Team
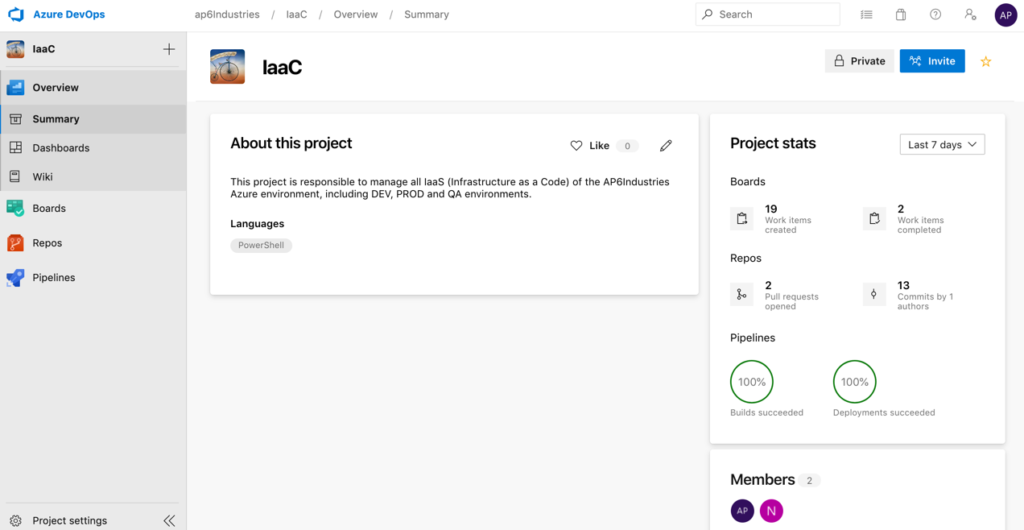
There are plenty of ways to add users to a project. The easiest way is through the Overview item. A summary of the project, project stats, and existing members will be listed. To add new users, click on Invite.
Provide the name of the users, and you can pick and choose from the list (all users in Azure Active Directory are available) and click on Add.
The result of this operation is all those users will be added to the group called <Project Name> Team, in our article is IaaC Team, which will give them permissions to use the Azure DevOps Portal and perform a variety of tasks.
We can check this out by going to Project Settings, Teams, and then IaaC Team we will see a list of all users that are part of our project.
Note: When assigning tasks to users in Azure Boards, we can select users that are not part of the current project or even organization.

Managing Azure DevOps services and project administrators
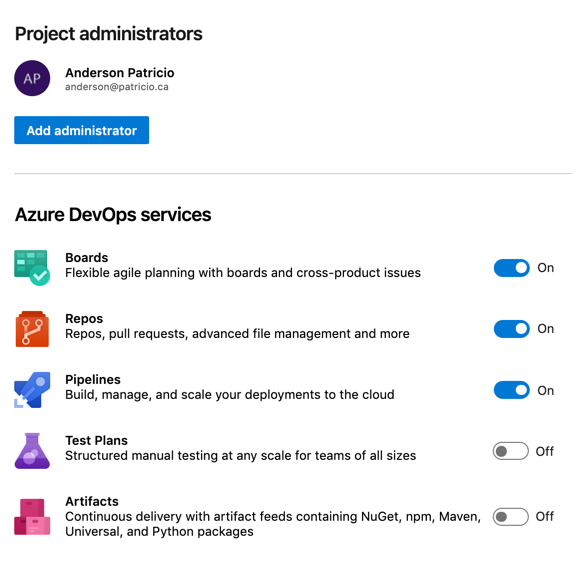
An essential step when establishing your project is to make sure to assign at least one administrator. Click on Project Settings, Overview and select at least one administrator to the team.
The second step is to make sure that only the services available to this project will be listed in the portal. In our case, we are going to use Azure Boards, repos, and pipelines. We can switch off all services that we are not planning to use at this moment. Team members will see only the features that are being in use.
Organizing your team, tasks, time and more
Before going over the steps of this section, make sure that you provide enough information that you need on your tasks, such as time required, activity, and so forth.
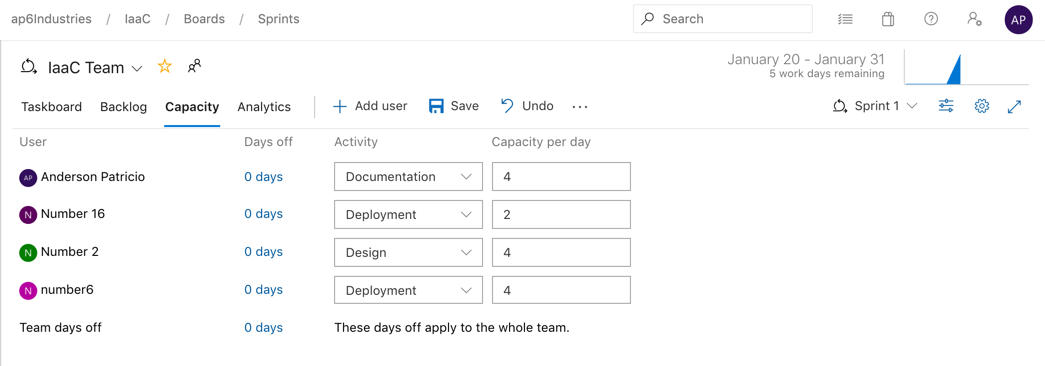
The first step is to define the team’s capacity, and the best way to do that is to understand how much time they have per day to help in the current project.
We can start by adding the team members to the Capacity tab, and if you don’t see all team members, you can click on the ellipsis and then Add all team members or Copy from last sprint. After that, add an Activity (and you can add more than one per user) and define the hours available.
This process does two things: It helps to identify how much bandwidth the team has and the utilization of your resources.
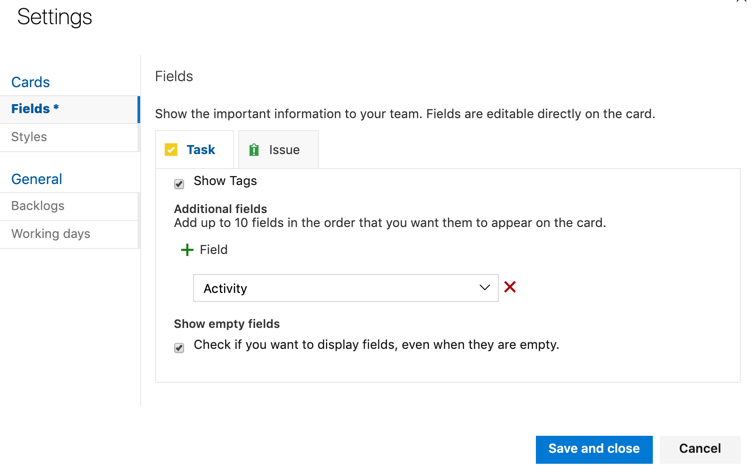
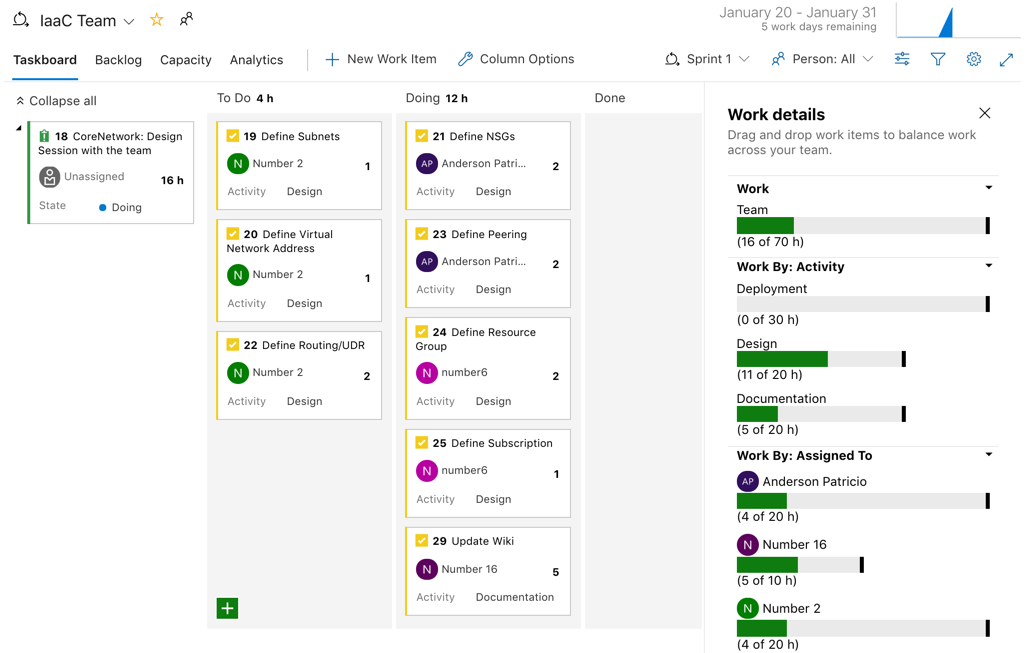
Let’s click back on Taskboard to see all the current tasks that are available on the current sprint. By default, the cards come with some basic information, but they are customizable. I like the idea of seeing the activity to organize better the tasks for the team. Click on Settings, click on Fields, select task tab, and add the desired field (in our case, Activity) click on Save and close.
The second feature that helps a lot when organizing your sprint and team collaboration is selecting Work Details (click on View Options). At this point, we should have our issues on the first column on our left, and several tasks spread between to-do, doing, and done.
On the Work Details, we have the total hours available for our team based on the information that we added into the capacity, and we have three sections: Work, Activity, and Assigned To.
The beauty of this is that we can move tasks from the left side to both Activity and Assigned To, and that will reflect the status and the number of hours on each respective area automatically and update the card automatically. That saves a lot of time.
Using queries and charts
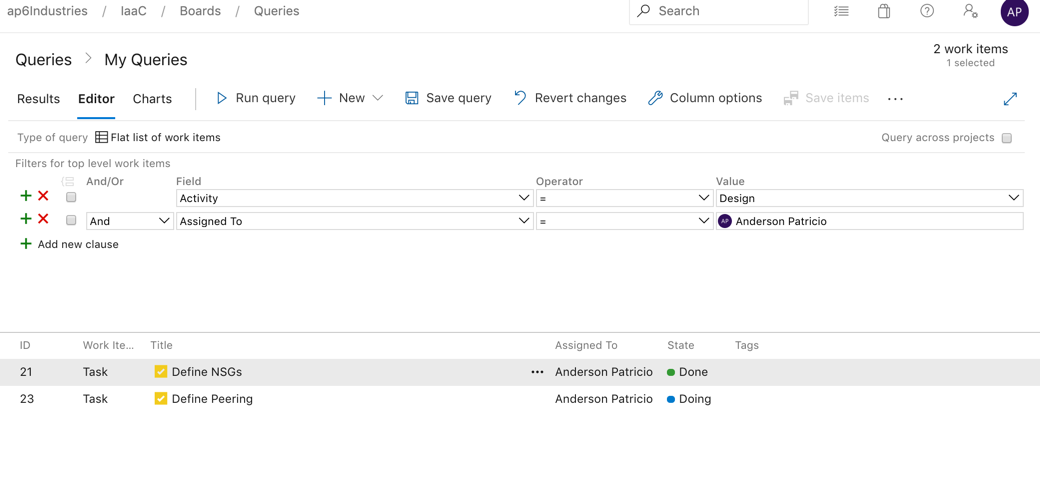
We can query virtually any data that we have in the Work Items. We can start simply as checking a single field or creating logical (AND or OR) to narrow down the results. A query can be saved, and after it is saved, we can generate charts from its results.
In the example below, we are looking for all design activities assigned to a specific user.
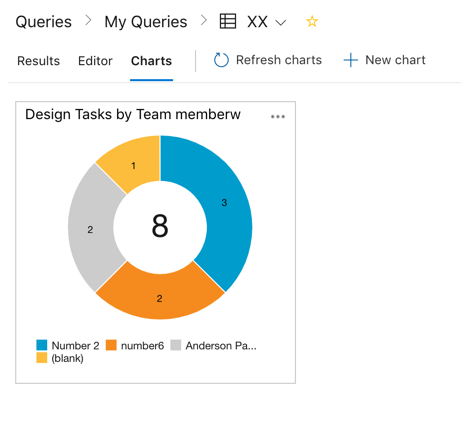
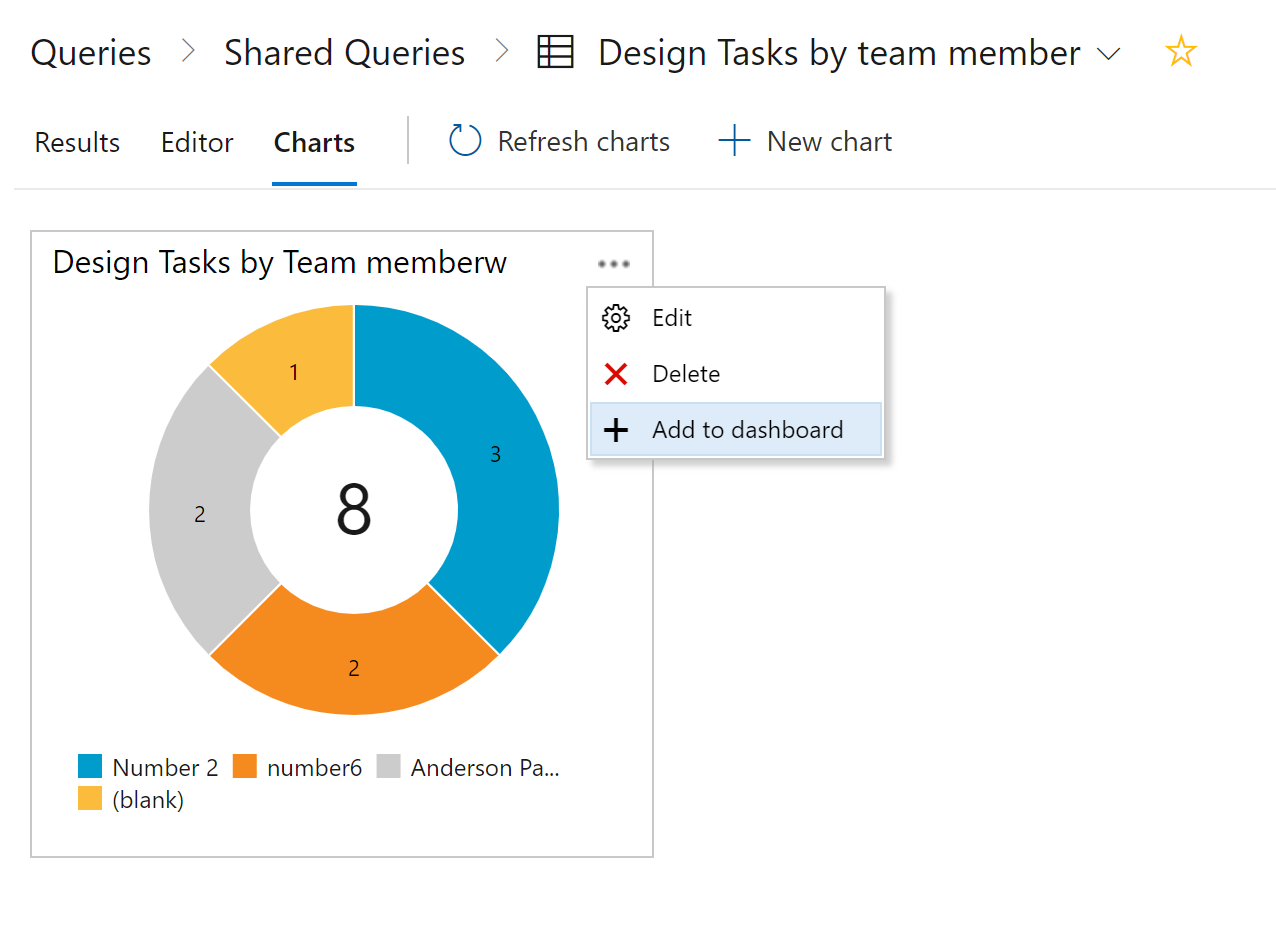
We are going to remove the second condition of the query (to get more data out of the query), click on Save Query and assign a name. Click on Charts, and a chart of all tasks by team members will be displayed, as depicted in the image below.
Queries can be exported to CSV or sent by email and the URL that has the query saved for future use.
Adding a chart to the dashboard
A neat feature is to use the chart generated in a query in the project’s dashboard. In the image depicted below, we can see that the query that we have just executed in the previous section is being displayed.

Although the query uses the same logic from the previous section, there is a small caveat: To make a query displayed in the Dashboards, when saving an existing Query, make sure to select the Shared Queries folder. That allows the Query to be used outside of the current scope.
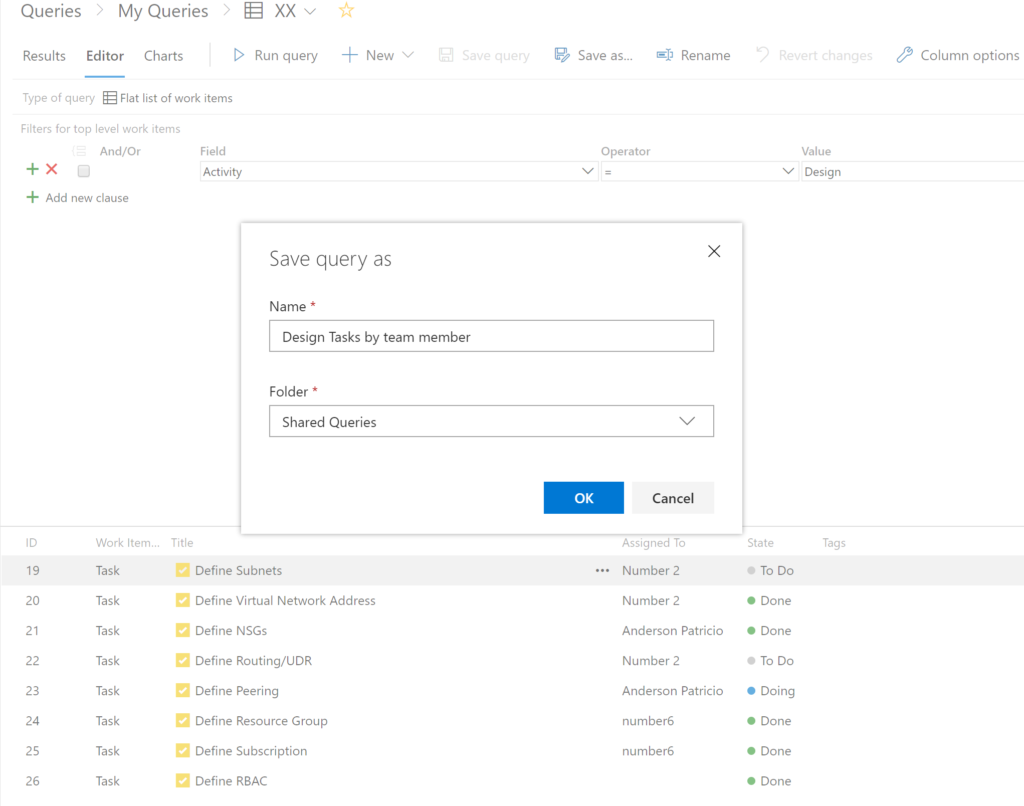
After visualizing the chart created by the query, click on the ellipsis, and then Add to dashboard. A new blade will show up. Select which of the existing Dashboards where you want to place the new chart as a widget and click on OK.
Improving your tasks
There is a lot of flexibility when managing issues and tasks where they can be customizable. Their properties blades also have plenty of built-in features and integration with other Azure DevOps areas, which will help you managing tasks.
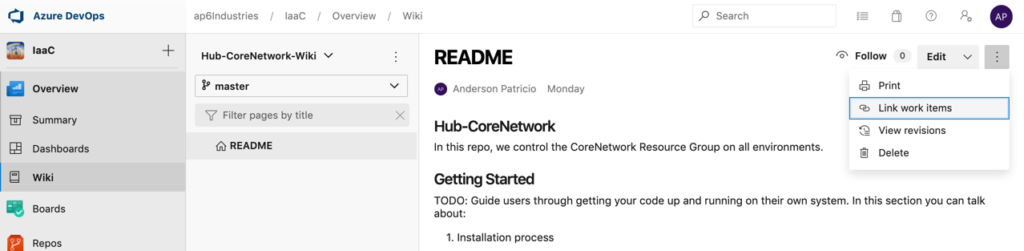
One that helps to combine several areas of Azure DevOps is the Link Work Items. An example is a README.md file, which is generated as a documentation source for every repo. We are matching a repo for every resource group at the subscription level, and we can document an entire service/workload by documenting on its README.md file.
We can click on the Wiki (we have an article just talking about Azure DevOps Wiki here at TechGenix) and use the option Link work items. We can link to the task that is related to update the documentation to save the time of the resource looking where to update the information.
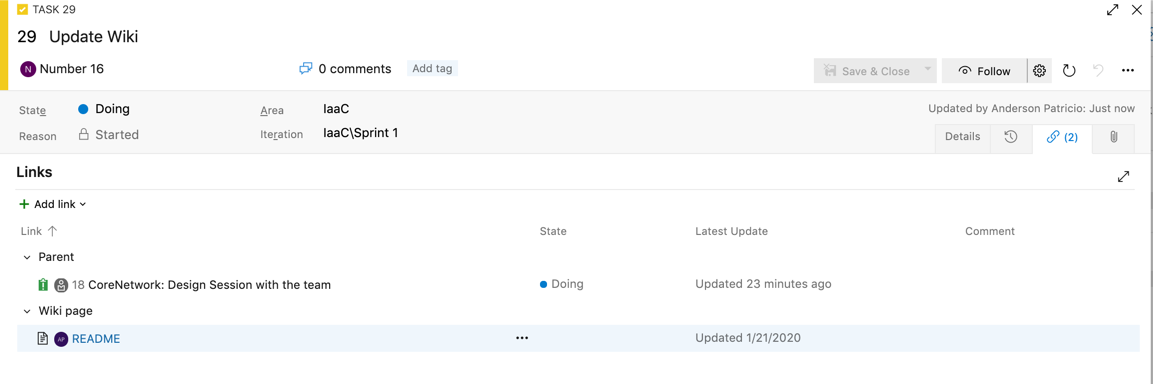
The result will be the Wiki reference in the Links area of the task properties. This type of integration makes it easier for the resource that is receiving the task to work on it.
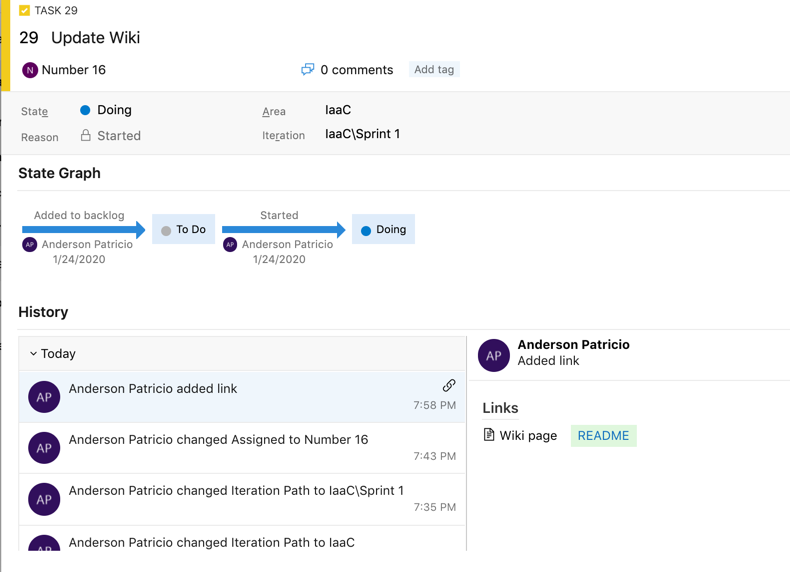
Another cool feature at the tasks properties level is in the History tab. One can see all activities for that task, links added, state changes, and so forth. It has a graphical view of the task and helps to understand since its inception to the present state.
Azure DevOps: Much more to come
We explored a few hints to improve your Azure DevOps skills managing tasks and connecting features when planning and tracking activities. There are way more features to be explored in the Azure DevOps and we will be covering them in upcoming articles here at TechGenix. Stay tuned!
Featured image: Shutterstock


