One of the things that I have always liked about PowerShell is that it allows you to extract data from various types of objects. In the past, I have often used PowerShell to examine system services and processes, disks, virtual machines, and a lot more. Sometimes though, simply viewing this information on screen just isn’t enough. Every once in a while, you may find that you need to write the data to a CSV file so that you can store it for future reference or perform additional processing — and PowerShell can come in handy here, too.
This is exactly the situation that I found myself in recently. I accumulated a large number of geotagged photos as a part of a project that I am working on. I needed to extract the GPS coordinates from each photo’s metadata and then save the coordinates to a spreadsheet.
Extracting the GPS coordinates from a photo’s metadata is beyond the scope of this article. I mostly want to focus on what it takes to get document metadata into a CSV file. However, I will tell you that I found a script that someone else had written that could extract the GPS coordinates so that I didn’t have to write the script from scratch. However, the script was designed to extract metadata from a single photo, so I needed to modify the script to make it so that it would be able to handle large numbers of photos and to output, all of the GPS coordinates to a CSV file rather than just displaying them on the screen.
Create CSV files with PowerShell
The first step in the process was to create the CSV file. This is actually a really easy process that can be accomplished with a single command:
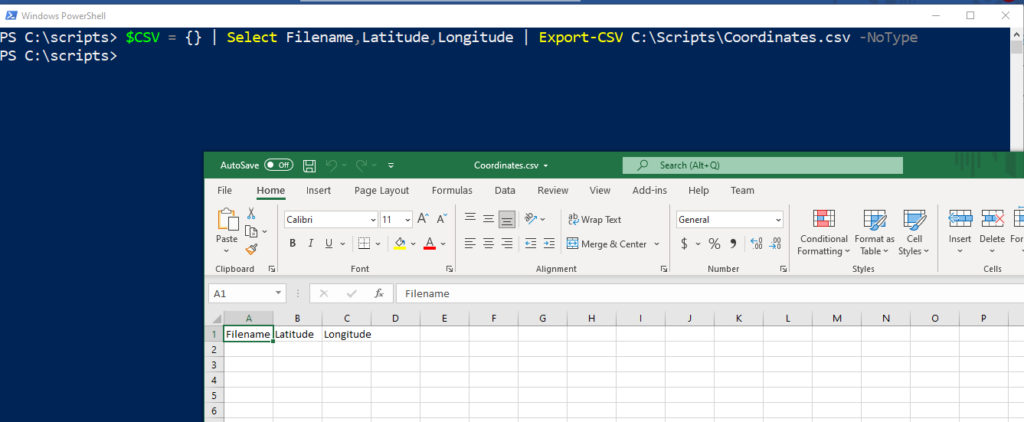
$CSV = {} | Select Filename,Latitude,Longitude | Export-CSV C:\Scripts\Coordinates.csv -NoType
The command shown above creates a CSV file named C:\Scripts\Coordinates.csv. It also creates a header row containing headers named Filename, Latitude, and Longitude. The NoType switch tells PowerShell not to place a type declaration on the first row of the file. You can see what this looks like in the next figure.
Keep in mind that even though I am using the extraction of GPS coordinates from file metadata, this is only intended as an example. The techniques that I am demonstrating in this article can be used for a wide variety of purposes.
So now that a CSV file has been created, the next step in my project was to modify the script so that it would process all of the files in a folder rather than simply extracting the data for a single file.
The original script (which was written by Willem-Jan Vroom and can be found here), used a function named Get-EXIFDataFromJPGFile to perform the actual coordinate extraction. The only value that had to be passed to the function was the name of the file to be processed. This made it simple to create a loop that would read all of the filenames from a folder and then pass the filenames, one at a time, to the function. Here is what that block of code looks like:
ForEach ($File in Get-ChildItem ‘C:\Scripts\GPS’)
{
$Filename = "c:\Scripts\GPS\" + $File.name
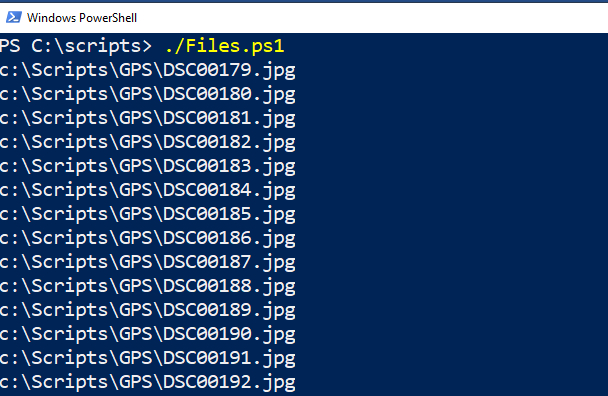
Write-Host $Filename
}
The first line in this block of code creates a for each loop that is based on the files stored within a given folder. In this case, the folder name is C:\Scripts\GPS. The loop executes once for each file in the folder. With each pass, the loop creates a variable called $Filename. This variable stores the name of the file that is currently being examined and its path. I also included a Write-Host command that displays the filename on screen, just so that you could see how this portion of the script works. You can see the output in the screenshot below:
Once I had written a block of code to retrieve a list of the files that are stored within a folder, I replaced the Write-Host command (which displays the filename on the screen) with a command to call the function that retrieves the GPS data. Here is what the code looks like:
ForEach ($File in Get-ChildItem ‘C:\Scripts\GPS’)
{
$Filename = “C:\Scripts\GPS\” + $File.name
Get-EXIFDataFromJPGFile $Filename
}
The last part of the process was to modify the script to write the GPS coordinates to a CSV file rather than displaying them on the screen. As you saw earlier, I already added a command to create a CSV file, so now I just needed to add data to the existing file. Somewhat surprisingly, however, this proved to be the trickiest part of the process.
An unforeseen problem
Adding data to a CSV file using PowerShell isn’t overly difficult to do, but there are countless methods for doing so, and it seems like everybody uses a different method. For whatever reason, I just couldn’t get some of the more commonly used methods to work. That being the case, I want to show you how I eventually solved the problem.
The script that I was modifying outputs GPS coordinates in both decimal format and in degrees. For my particular project, I only needed the coordinates that were in decimal format. The variables used to store those coordinates are named #LatOrt and $LonOrt. In addition to the coordinates, I decided to also write the filename to the CSV file. I accomplished this with a single line of code:
[PSCustomObject]@{Filename=$Filename;Latitude=$LatOrt;Longitude=$LonOrt} | Export-CSV C:\Scripts\Coordinates.csv -Append -Force -NoType
This line of code creates a PowerShell custom object. It then associates the $Filename variable with the Filename column header, the $LatOrt variable with the Latitude column header, and the $LongOrt variable with the Longitude column header. All of this is then written to my CSV file via the Export-CSV cmdlet.
The most important thing that you need to know about this command is that the Append switch is absolutely necessary. Otherwise, the CSV file will be overwritten. The -Force switch isn’t really needed, but it can prevent an error from occurring if there is a column mismatch. Once again, the NoType switch keeps type data from being written to the file.
The thing that I like about this particular command is that it makes it easy to map variables to column headers. Even though I am using GPS coordinates in this example, the technique I am using can be used to write nearly any type of data to a CSV file with PowerShell.
Featured image: Shutterstock


