Mac Mail has been around a long time, but so has Microsoft Outlook for Mac. Obviously, with Microsoft Outlook, you can do more than with the native Mac Mail. Still, many prefer using what comes with the machine, and others stick by Microsoft Office — and we not here to compare that in this article. We will go into a technical session on how to set up your accounts for both on Exchange 2016 and show you how simple it is.
First, when you set up an account either on Mac Mail or Outlook, you will be making use of EWS in Exchange 2016. Yes, that is correct, Mac uses EWS for connectivity compared to a Windows machine that will use MAPI or RPC, depending on the version they are running. In Microsoft Office, whether you are running Office 2016, Office 2019, or the Microsoft 365 edition, you have a few options to choose from. They are:
- RPC
- MAPI
- POP
- IMAP
RPC is used for the older clients, and the new way of connecting to Exchange 2016 is using MAPI, which has to be configured on the Exchange end, and you need clients that support it. I did not list Office 2010 or Office 2013 as they are at end-of-life.
Microsoft Office
Let’s start with setting up an email account using the Microsoft Office suite, and we will then move onto Mac Mail. First of all, you need to download the ISO or DMG file for the version you have purchased or have access to and launch it. The setup will prompt you for your Mac credentials to perform the installation and then will take a couple of minutes to complete it. Once the setup is done, you will be asked to move the ISO or DMG file to the trash.
After that, you can open up applications from Finder or from your dock and open it. This is what the icon looks like. You may have an updated one compared to what I am running:
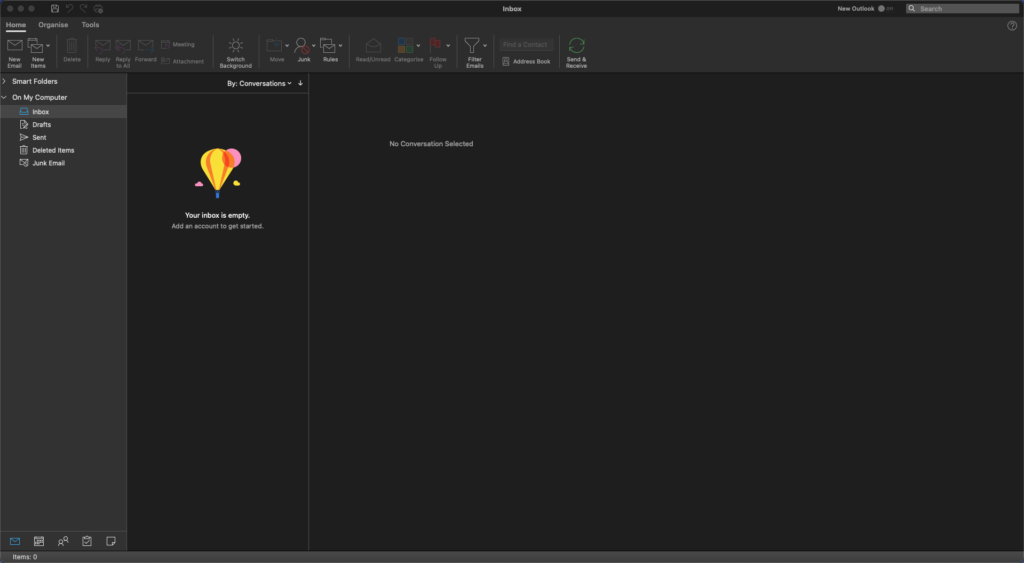
When you open Outlook, you may either be prompted for a new account or be presented with the interface as shown below. From here, we can then add a new account:
On the top section where you have Home, Organize, and Tools, click on Tools, which will bring up a new ribbon as shown below:
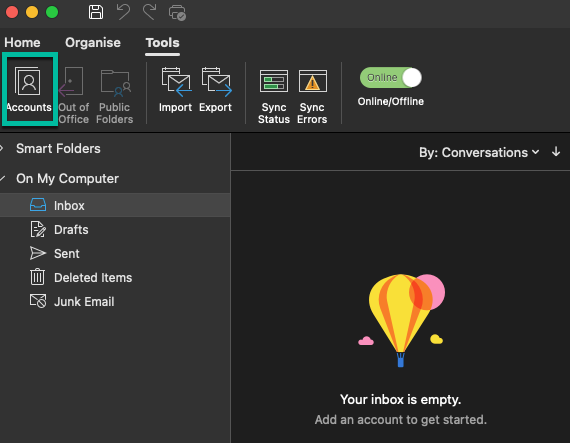
You can now click on Accounts, which will bring up a new window as shown below:
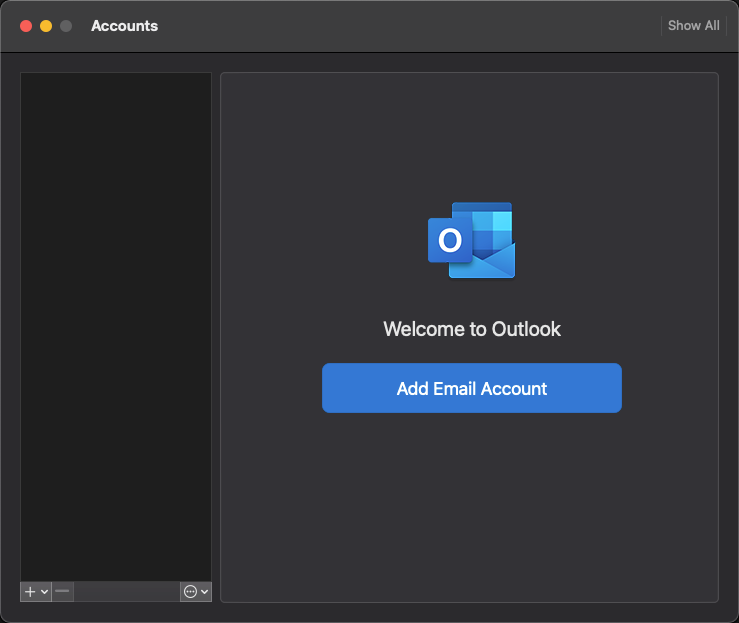
In the above window, you can click on “Add Email Account,” which will bring up another new window as shown below:

Type in your email address and click Continue, which will bring up a new window where you can select a provider as shown below:
As we setting up an Exchange account, the provider is Exchange, so click this and you will be presented with the next page:

Enter in the following information, which will be provided by your IT department or ISP:
- Select your method.
- Enter your email address.
- Enter your login details, which will most likely be your email address.
- Enter your password.
- Enter your server details, which can be mail.domain.com.
Once all the above is entered, you can click on Add Account, and you should be on your way.
Now, let’s look at setting up an account with Mac Mail.
Mac Mail
If you navigate to applications again either in Finder or the dock, you can click on the mail icon as shown below:

Double-click on the icon to launch Mail. When you add your Apple account to your Mac, it normally sets up your .me account in mail. Once it launches, you should see a view similar to the one below:
You will notice that the ribbon is different from Outlook. To get to accounts, click Mail next to the Apple, and from the drop-down, click on accounts or add account, whichever you prefer.
![]()
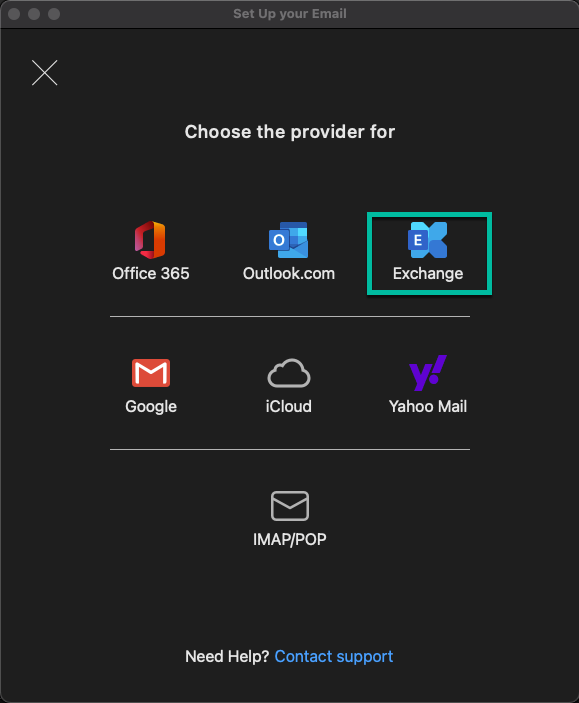
A new window will open as shown below. Your existing accounts will be on the left and you have the option on the right to choose what you want:
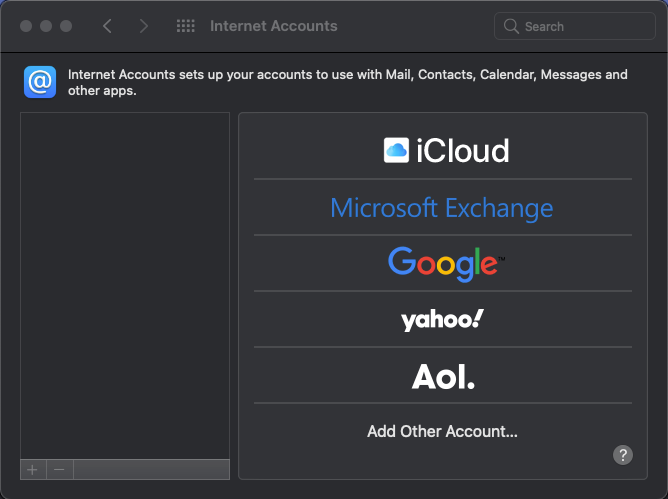
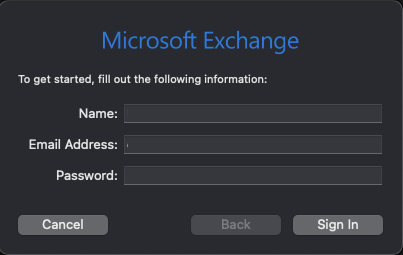
Select “Microsoft Exchange” in the list and a new window will appear prompting you for the following:
- Name
- Email Address
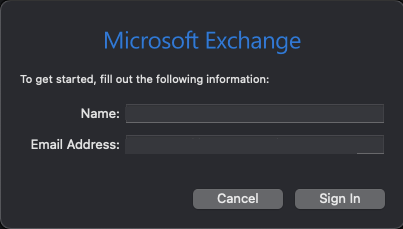
Once you have entered in the information, you can click Sign In, which will open another window as shown below:

You can select either “Sign In” or “Configure Manually.” In this case, we will choose the latter. Once you select Configure Manually, it will bring up another window to enter your password, as shown below:
Once you have entered in all details, it should sign you in. If it cannot detect the settings or this is a POP account, for example, you will receive the following screen:
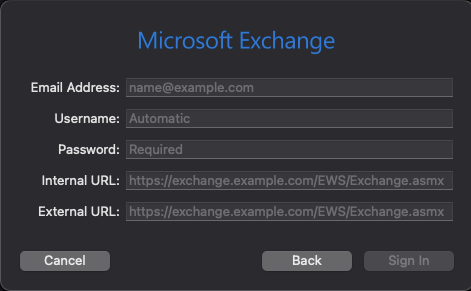
You can see that the Internal URL and External URL requires information. Both fields can be set to the following, for example:
- https://mail.domain.com/EWS/Exchange.asmx
Take note that mail.domain.com should be what you have configured in your URLs in Exchange 2016 for EWS. Once all the information is added, you should be able to sign in without an issue.
As you can see, Outlook setup is simpler, and most of the time Autodiscover should work. Mac Mail requires a few more settings if the account cannot be determined, but it is straightforward to set up.
Featured image: Shutterstock


