In the previous two articles of this series, we started getting acquainted with Google Cloud Platform (GCP) and looked at some comparisons with Microsoft Azure features. So far in this series, we provisioned our GCP account and started establishing the organization, which requires creating the basic structure that will enable the company to grow in the cloud. That process includes creating the organization, which we did in the previous article. Now we will continue by validating the domain on Google Cloud, creating core groups to allow role segmentation, and checking what those changes are doing behind the curtain as we go along.
Step 1: Validating your first Google Cloud Platform domain
It is important to mention that although everything in Google is in Smurf’s land (blue top bars), we need to pay attention to the name located on the left. When using Cloud Identity, we are in the Google admin, meaning that to get to that location, we need to type https://admin.google.com.
The first page of the Google Cloud Platform console is to verify the domain that we defined in the series of questions that we have just finished. Click on Verify to check the domain, and the next page will be a description of the process we are about to start. Click Continue.

The real estate and patience of the new users seem to be a cheap resource nowadays, so the next page will be very similar to information that we have just seen in the previous step (making that page pointless), but with the data that we need to use to prove our domain.
Long story short, we need to add a TXT record in our DNS to prove that we own that domain. When complete, click on Verify my domain. The refresh is nonexistent if something goes south, you may be waiting for five minutes before finding out about a typo.
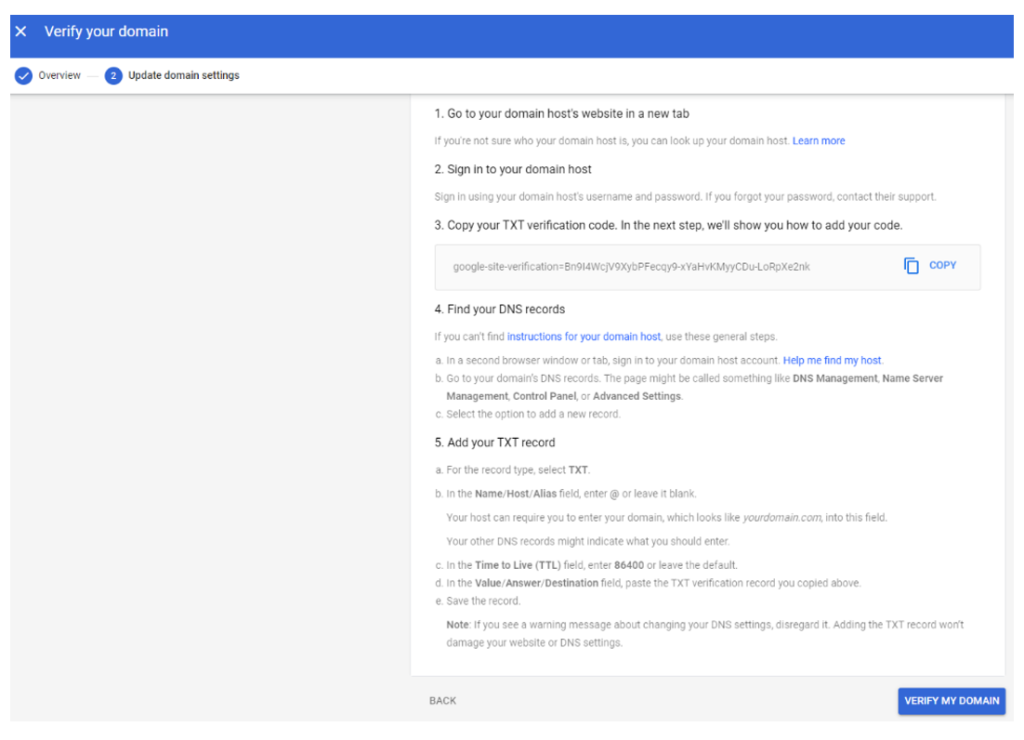
If you don’t feel comfortable playing with your TXT records for any reason, you can choose other methods, such as CNAME record, meta tag (on your website’s home page), or uploading an HTML file to your main website on that domain.
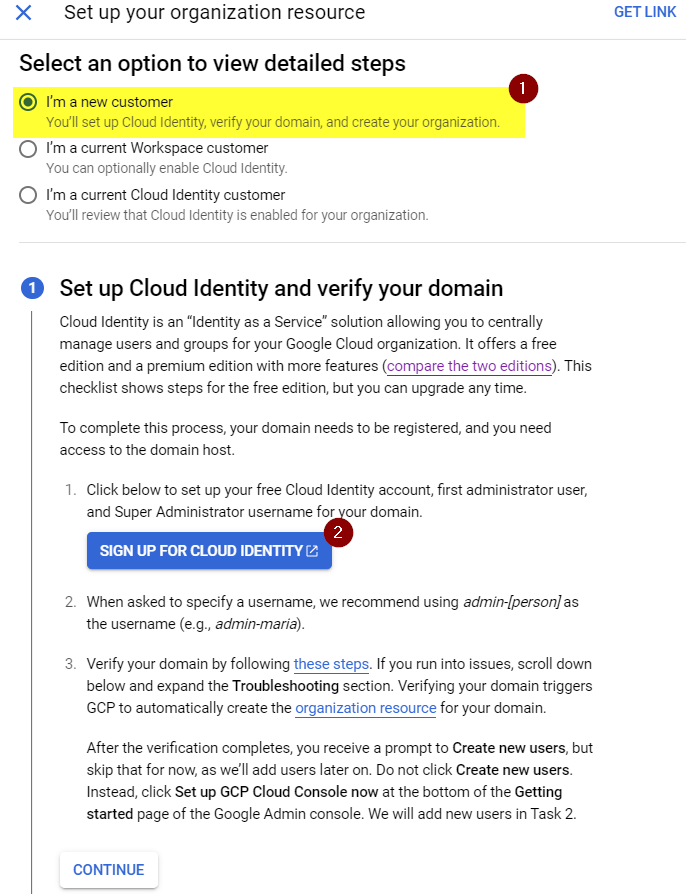
After verifying your domain name, we can start creating new users or go to the main page by clicking on Set up GCP Cloud Console now (which is incorrect because that link sends you to the Cloud Admin and not the console).

On the Google Admin main page, we have access to all identity-related stuff, like users and groups.

Checking the progress in the GCP Console
Going back to GCP Console, same wizard and same step, the result will be similar to the page listed below. We created a new account as an administrator in the Cloud Identity, and that account does not match with the account that we are currently logged on.
Click on Switch Accounts and then select the administrator we defined in the previous section. After authenticating and answering some questions because you don’t have anything else to do, a pop-up to refresh the page (Yep, that’s right) will be requested.
The result will be a new organization being listed. Click on Continue, and then on Mark Task as Completed.
Alleluia!! We finished the rather lengthy step! Let’s work on the remaining steps.
Step 2: Add users and groups to your organization
We are back to the list of the 10 commandments (sorry, I was thinking about the sheer size of the description to go through them, but I meant steps!). Now we can check that we have the organization (Item 1) selected. Let’s click on Open (Item 2) to add additional users and some groups to support the GCP environment moving forward.

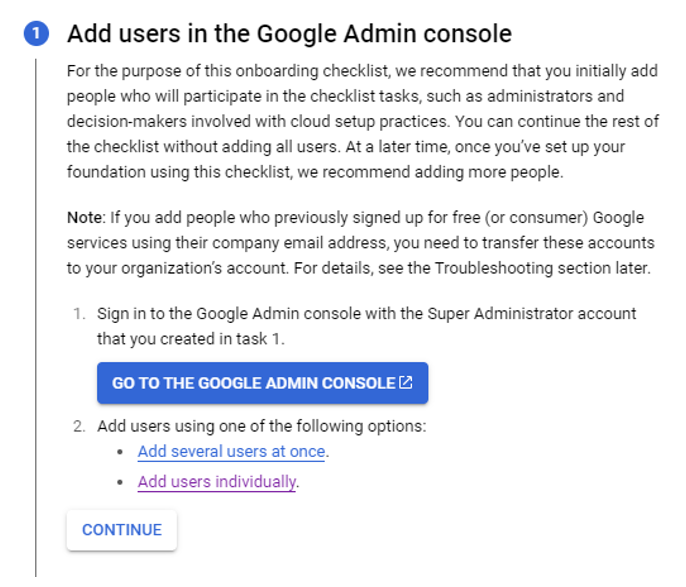
The process to create your organization may involve more than one administrator, and the wizard on the second step allows you to create users. It can be easily performed by clicking on the Go to the Google Admin Console, which will open a new tab in your browser in the area to create new users in the Cloud Identity. You can finish up the process with a single user. When complete, click on Continue.
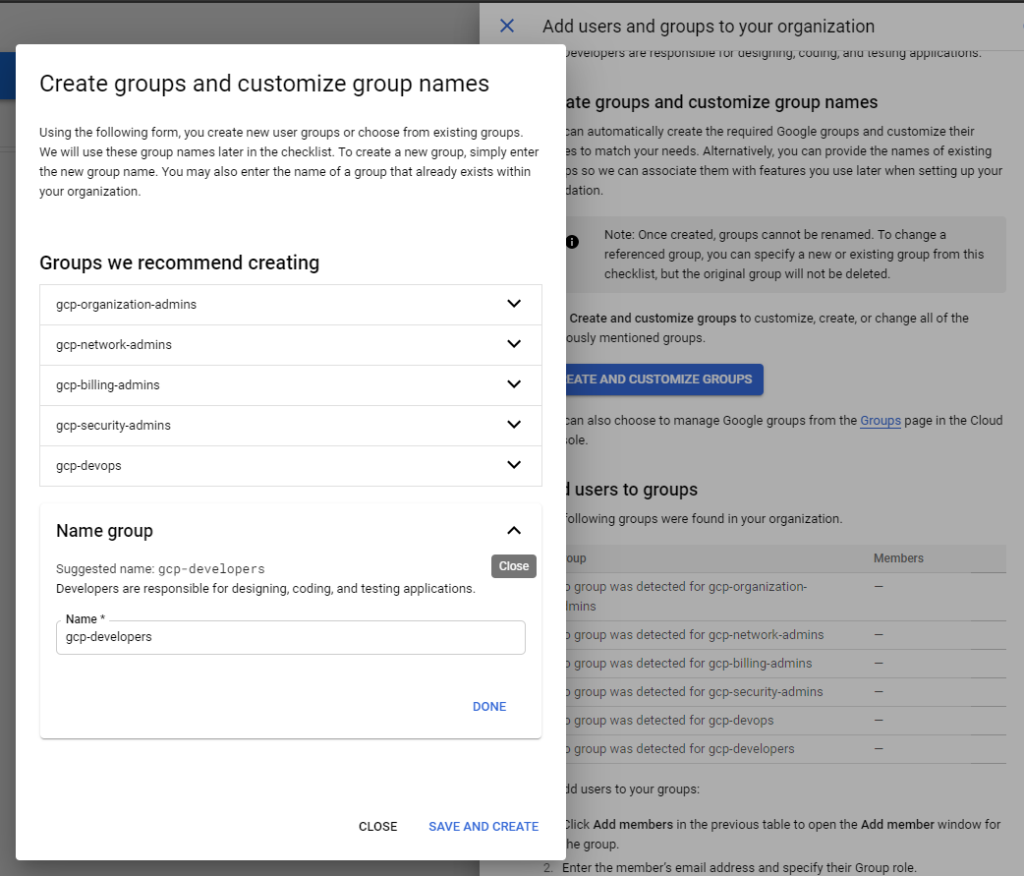
In the second step, we must create groups to cover your GCP administration’s core areas: the organization, network, and billing. Some additional groups are also suggested, such as DevOps, developers, and security.
To create all of them based on Google’s suggestions, click on Create and Customize Groups.
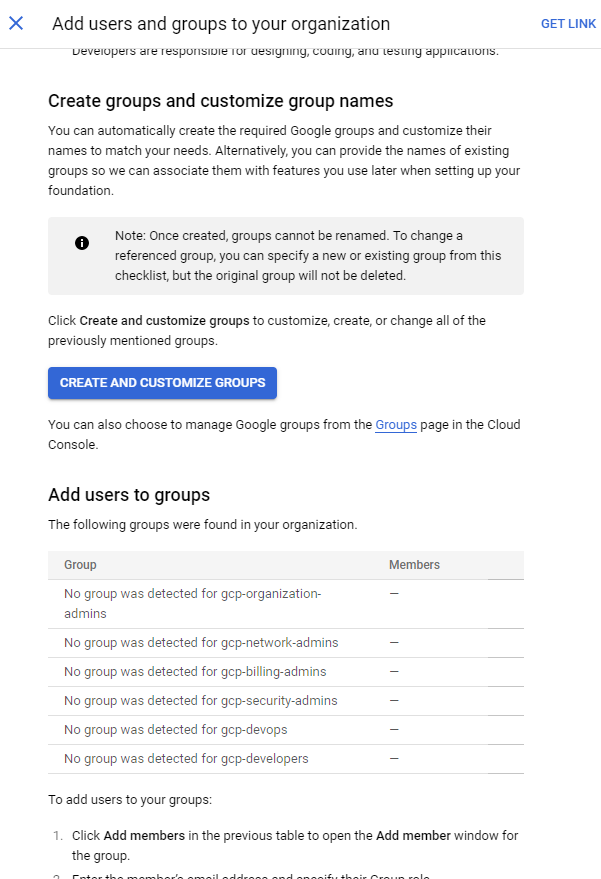
A new window will be displayed where the proposed names will be created in the Cloud Identity. As depicted in the image below, we can customize the suggested names by expanding them and entering the new names.
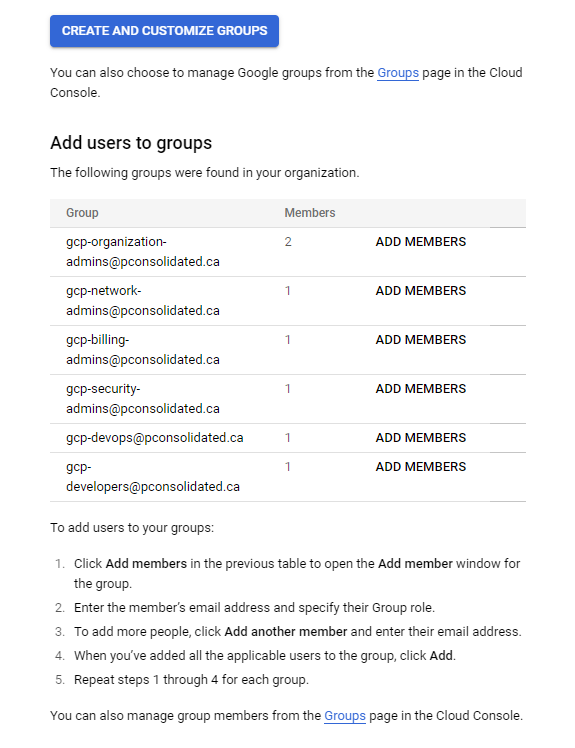
After the group creation process is completed, a list with all the groups and the existing members will be populated automatically. We can even add members directly by using the link beside each new group.
In this area, Google prepares an organization to support delegation since its inception. Azure requires a deeper knowledge of the platform to go to management groups and start delegating accordingly using Azure AD Groups.
Step 3: Setting up administrator access to your organization
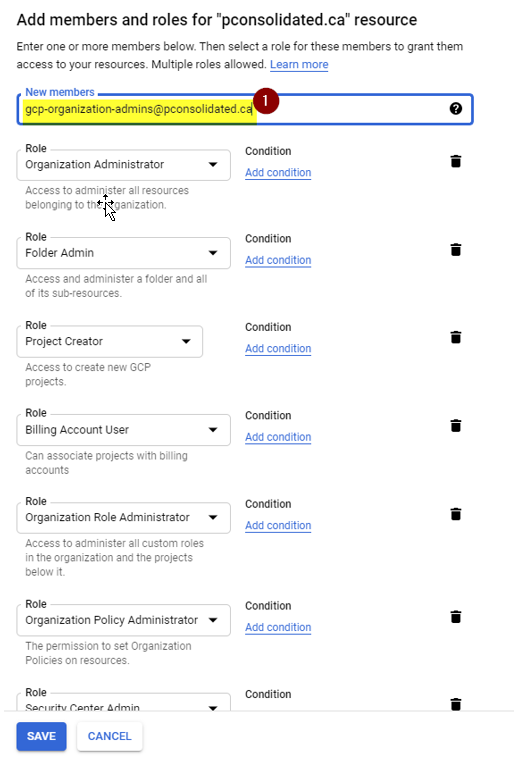
In this step, we will configure proper access to the group GCP-organization-admins that we created in the previous step. A cool feature of GCP is that the wizard provides information based on the current user’s context (Item 1). Some of the roles that will be added are documented in Item 2.

As part of the steps, it asks to copy the group name, and then there is a Grant Access button. That was pretty cool! Click on Save, and this step is complete! When we click on it, we will have all the roles ready to be applied, paste the group’s name and click on Save.
Our Google Cloud journey has more miles to go!
We have just finished a significant milestone in our GCP journey. We validated the Google Cloud Platform domain that our organization will use, created the core groups that will allow role segmentation to increase our security posture, and defined the organization administrators.
In our next article, we will manage the organization hierarchy structure and organize our environment using GCP components.
Featured image: Shutterstock


