Last year, I wrote an article for this site about how to enable and manage guest access for Microsoft Teams. As helpful as it may be to allow guests to participate in Teams meetings, guest access can extend to much more than just Teams. Guest users can attend Teams meetings, view shared documents, and participate in chats. Additionally, guest users are supported in Microsoft Teams, SharePoint Online, and Azure Active Directory. The main advantage to creating a guest user is that guest users do not have to be licensed. If you have a user who needs access to Microsoft 365 data but does not need access to Microsoft 365 applications, you can create guest users accounts that will give the user access to what they need without having to incur the expense of a Microsoft 365 license.
Enabling Microsoft 365 guest users
To enable access for guest users, open the Microsoft 365 admin center, expand the users section, and then select the Guest Users tab. When you do, you will be taken to the Guest Users screen, which you can see below.

To set up a guest user, click on the Add a Guest User icon, shown in the figure above. When you do, you will be taken to the New user screen. As you can see in the figure below, the New User screen contains two main options.
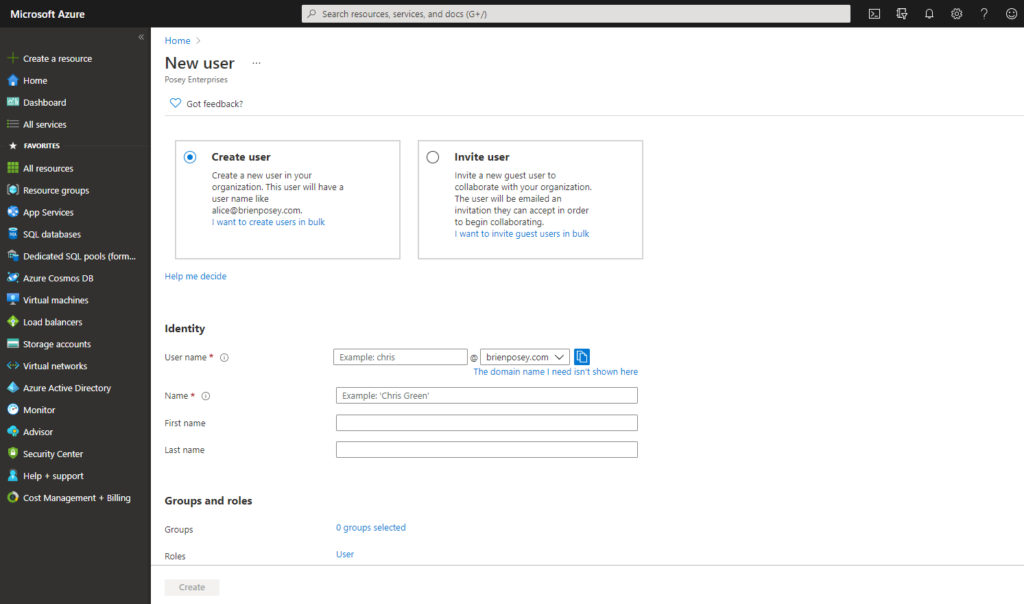
The first option is to create a new user. Early on, Microsoft did not include an option to manually create a guest user, but thankfully this option was added later on. As you would expect, the Create User option works similarly to creating other user accounts in Microsoft 365. Initially, you need only to provide a username, the user’s first name, the user’s last name, and the user’s full name. As you might have noticed in the previous screen capture, there is also an option to add the guest user to various groups within the organization and assign roles to the user. Believe it or not, you can assign administrative roles to guest users. This can be useful if you have a third party performing some sort of administrative function but who does not need access to the various Microsoft 365 applications.
Active Directory attributes
As you scroll further down the screen, you’ll find options for populating the various Active Directory attributes such as the user’s location, job title, and company name. When you are done entering any required information, click the Create User button to create the user account.
One of the odd things about creating guest users in this way is that the user account you create will not appear on the list of guest users. Instead, you will find the new account in the Active Users tab but not on the Guest Users tab.
The other option for creating a guest user is to send an invitation to the user who needs guest access to your Microsoft 365 environment. To do so, go to the New User screen shown in one of the earlier screen captures and then select the Invite User option. This will take you to the screen shown in the figure below.
At first glance, the screen looks exactly like the Create User screen. However, there are some key differences. The biggest difference is that this screen asks you to enter an email address for the user that you are inviting. In contrast, when you create a new guest user, that user is assigned an email address associated with your organization’s domain name. When you invite a user, however, that user uses their own email address.
Another difference that you might have noticed is that the Invite User screen includes a section for a personal message. The personal message is displayed within the invitation email message that is sent to the user who is being invited to participate in your Microsoft 365 environment. As was the case when creating a new user, the Invite User screen gives you the option of choosing the user’s roles and groups and populating the various Active Directory attributes.
Inviting the user
So now that I have covered the basic process, let’s look at what happens when you invite a user to participate as a guest. For the sake of demonstration, I sent an invitation to my backup email account. You can see what the email message looks like in the figure below.
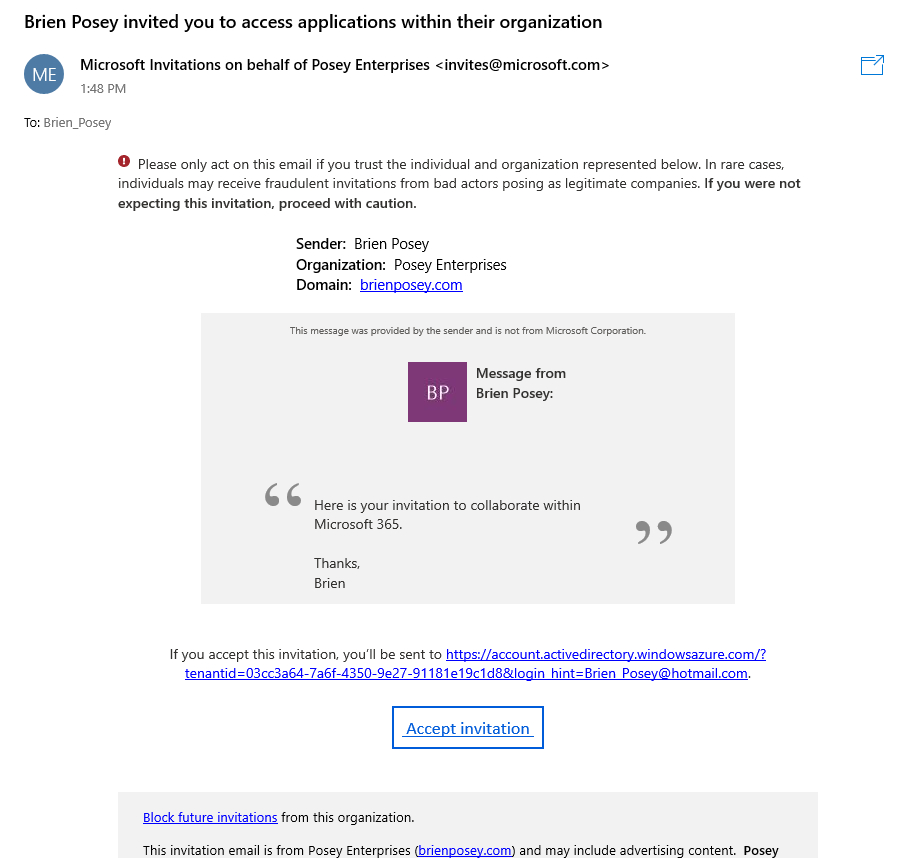
The area in the gray box in the figure above is the personal message that I added to the invitation. Just beneath that is a link that needs to be clicked in order to accept the invitation.
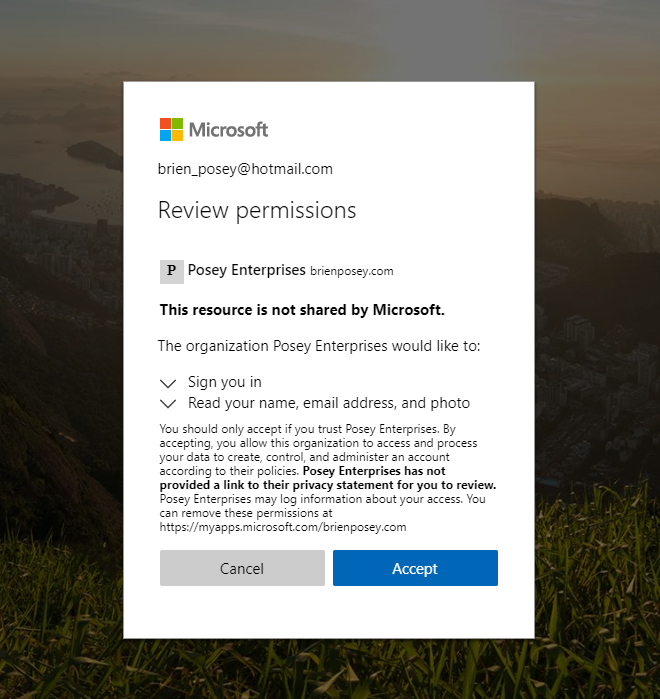
When you click the link to accept the invitation, you are taken to the Review Permission screen shown below. The screen makes it clear that the invitation is coming from my organization and not from Microsoft.
Once the recipient has accepted the invitation, they are taken to the My Apps screen, which you can see in the next figure. This screen shows the apps that the user has been granted access to. In this case, the screen is empty because I did not assign any group memberships to the user.

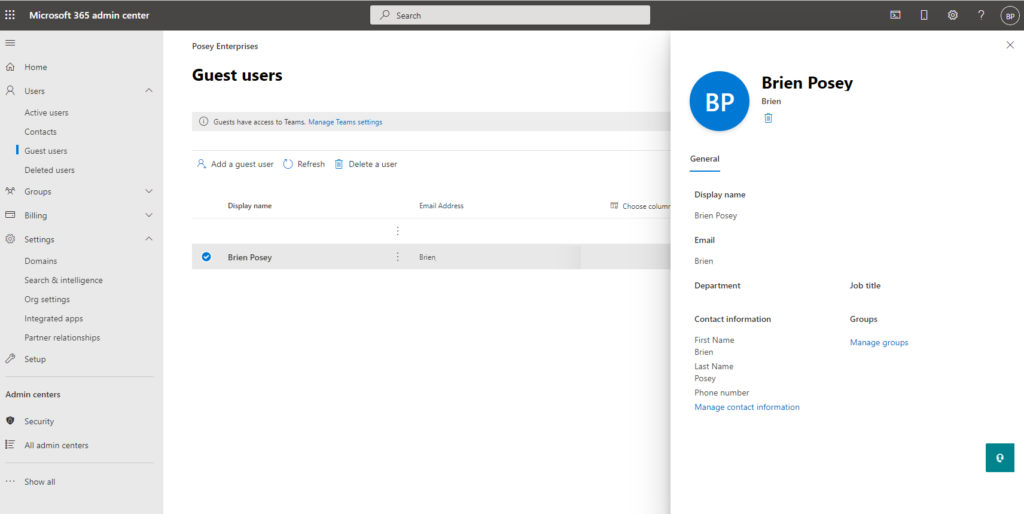
If I wanted to add some group memberships later, I could simply go back to the Guest Users screen, click on the user account, and then use the Manage Groups link, shown in the figure below, to add or remove group memberships.
There are a number of reasons why you may want to set someone up as a guest user. Typically, however, guest users will be employees of partner organizations who need access to some of the data that you store in the Microsoft 365 cloud. Setting those users up as guest users is a great way to get them the access they need without incurring the expense of purchasing a Microsoft 365 license.
Featured image: Shutterstock