Source: Unsplash
If any security or compliance-related incident occurs in your Microsoft 365 environment, it’s important to find out the source of the issue. Fortunately, Microsoft provides a very nice audit interface within the Microsoft 365 Defender portal that can help you research any event in your Microsoft 365 environment.
In this article, I’ll show you how you can perform an audit using Microsoft 365 Defender. Let’s get started.
Performing an Audit
I’ve broken down the process of performing an audit into 4 steps. Let’s start by accessing the audit interface.
1. Accessing the Audit Interface
As mentioned earlier, if you want to audit your Microsoft 365 environment, you’ll need to use the Microsoft 365 Defender portal. You can access the Audit interface by completing the following steps:
- Log into Microsoft 365
- Click on Admin to open the Microsoft 365 Admin Center
- Click Security to open the Microsoft 365 Defender portal (depending on your Microsoft 365 license type, you may need to click All Admin Centers and then click Security)
- Select the Audit tab
You’re now ready to perform an audit search.
2. Performing an Audit Search
Auditing events through Microsoft 365 Defender essentially involves querying Microsoft 365 audit logs. The Audit interface, which you can see in the screenshot below, includes numerous query options.
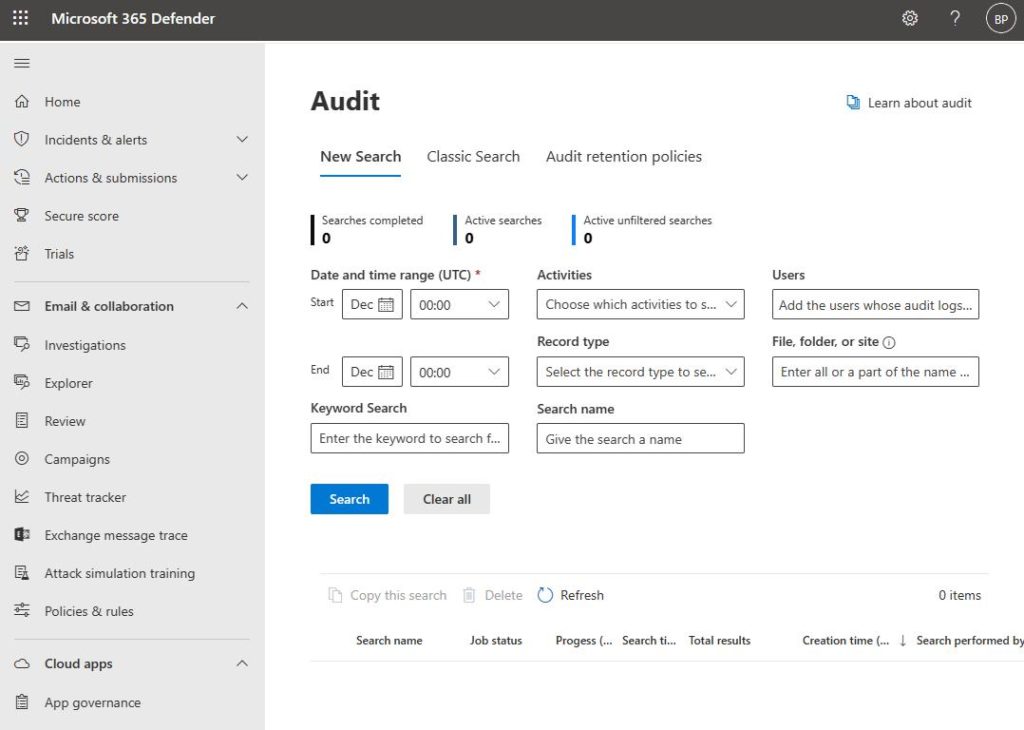
The first thing that you’ll typically want to do is specify a date and time range. Microsoft 365 can produce an overwhelming number of log entries, so specifying a date and time range can help you narrow down the results. This makes it much easier to find what you’re looking for.
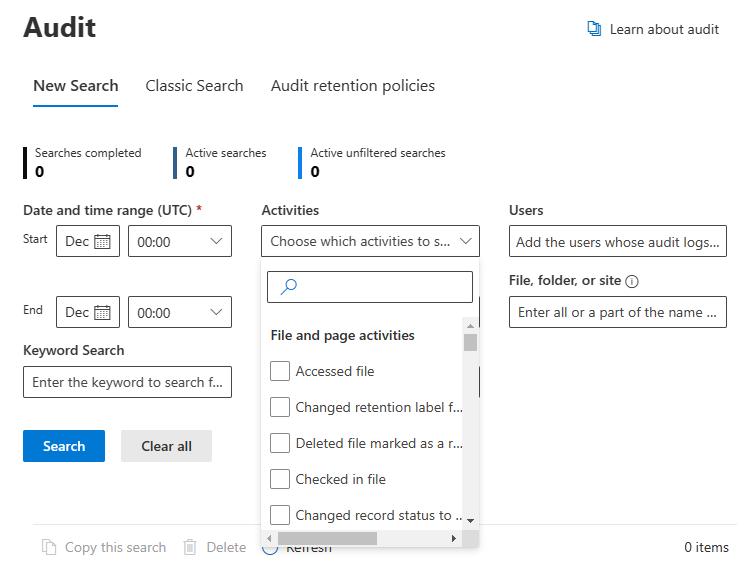
Next, you need to specify the type of activity you’re looking for. The Activities drop-down, as shown in the screenshot below, contains dozens of activities you can choose from. You can select one or multiple, depending on your needs. You can also search for a specific activity using the handy search box.
Then, you can specify the users whose logs you wish to examine. Also, under the Users field, you can specify individual files, folders, or sites. Lastly, you can use the keyword field to search for any logs containing a specific keyword.
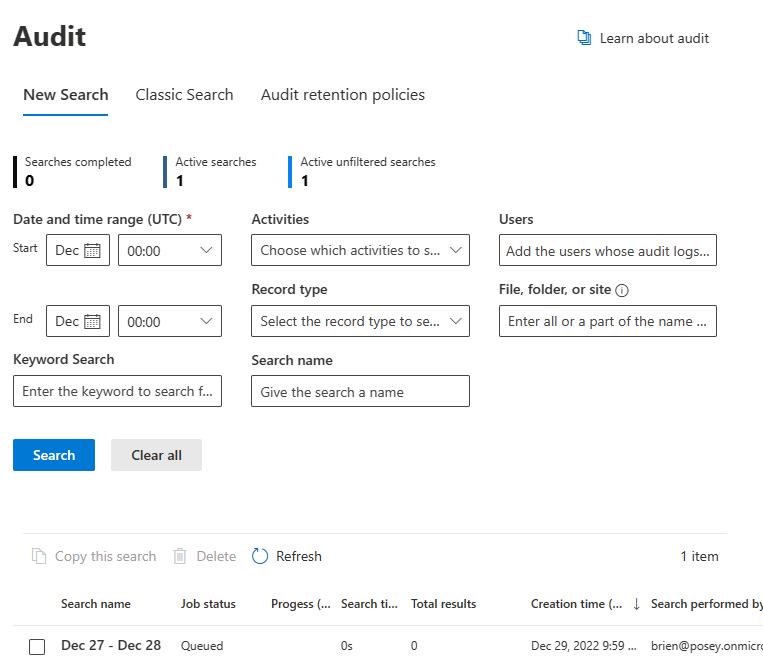
When you finish entering your search criteria, click the Search button. This will queue your audit as a job (as shown in the screenshot below). You can also click the Refresh button to get updates on the job’s status.
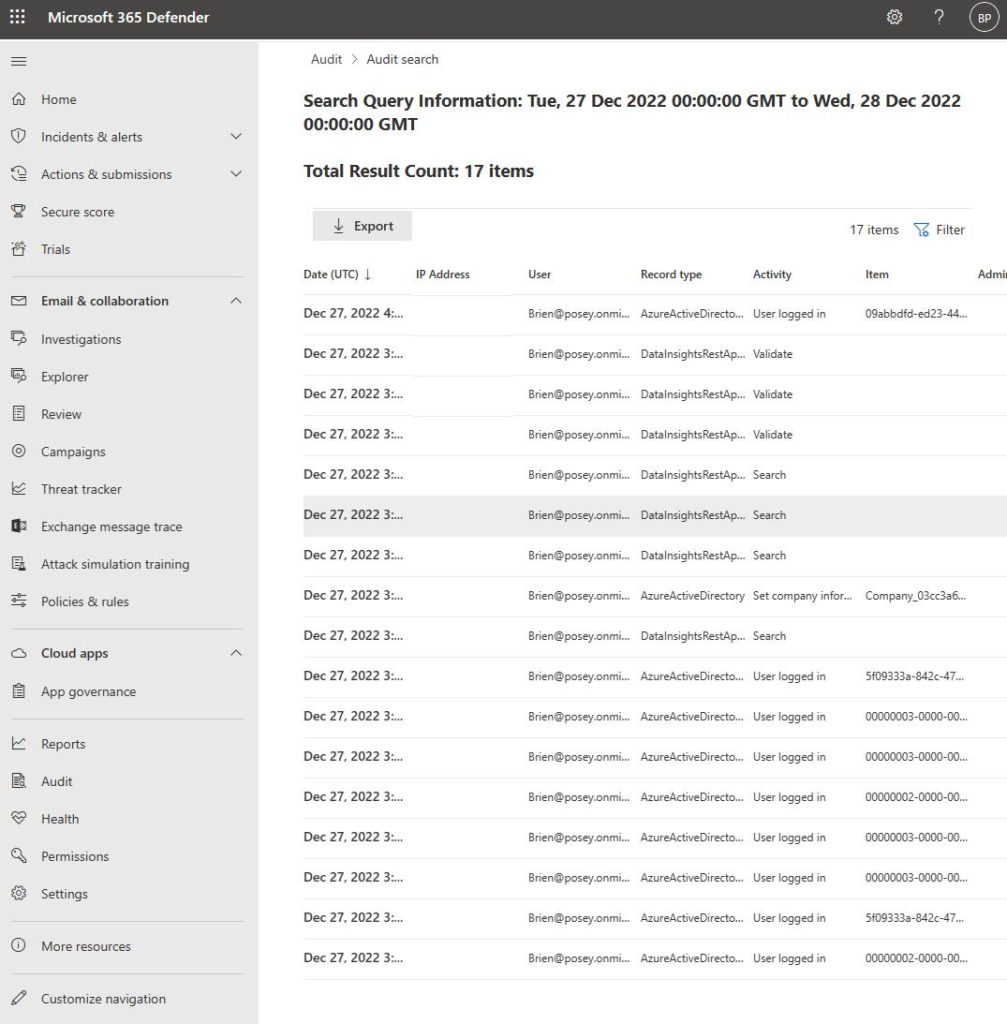
When the search completes, the Job Status column will indicate a status of Completed. Clicking on the word Completed will cause Microsoft 365 Defender to display the search results. You can see an example of a completed job in the screenshot below.
Let’s review your results!
3. Reviewing the Audit Results
As you review the audit report (as shown in the previous screenshot), you can click on any of the log entries to see additional details. These details vary widely in scope depending on the type of log entry that you click on. If you’re overwhelmed with the excessive number of entries listed, you can use the Filter button to narrow down the results.
You can also export the search results to a file by clicking on the Export button shown in the previous screenshot. Again, you’ll have to refresh the display before the download link appears.
One final thing to mention involves audit retention policies. Let me briefly explain this point before we wrap up.
4. Configuring the Audit Retention Settings
Audit reports pull results from Microsoft 365 audit logs. Due to this, you’ll only see a search result if whatever you’re looking for appears in a log entry. Therefore, it’s worth taking a moment to examine your audit retention policies.
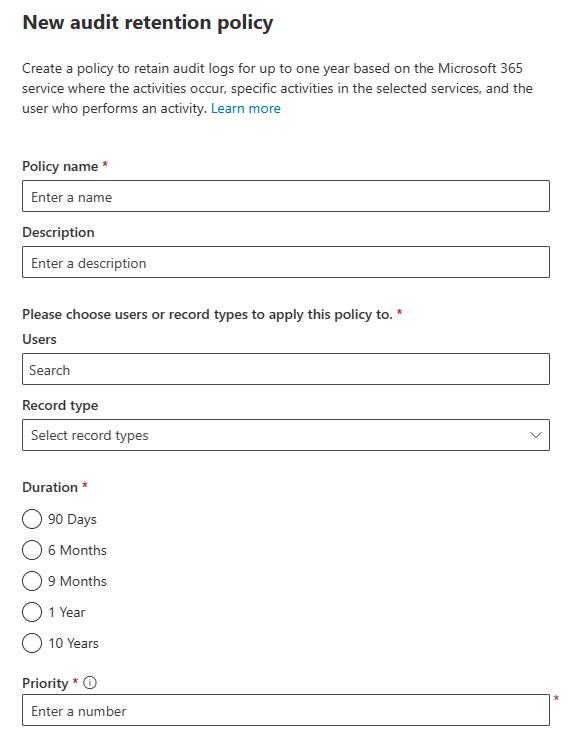
At the top of the Audit interface, you can see the Audit Retention Policies tab. Clicking on this tab takes you to a screen (shown in the screenshot below) where you can create an audit retention policy. To create one, simply follow these steps:
- Click the Create Audit Retention Policy link
- Enter a name and an optional description for the new policy
- Choose the users or the record types for which the policy should apply
- Enter the policy duration (you can save logs for a minimum of 90 days and a maximum of 10 years)
- Enter a policy priority (the priority is just a number that determines policy precedence in case you want to create multiple, contradictory policies; lower priority numbers have higher precedence)
- Click Save
Alright, time to recap.
Final Words
In essence, a security or compliance-related issue can cause a lot of problems if not rectified immediately. Microsoft 365 auditing can help you identify the source of these incidents. Through the Audit interface, you can create detailed logs that can help you quickly identify the issues at hand. The interface itself is also comprehensive, offering a lot of criteria to help you in your search.
Overall, I hope this article helped you out in some way. As always, feel free to save it as a point of reference for the future.
Do you have more questions about Microsoft 365 auditing or other related topics? Check out the FAQ and Resources sections below!
FAQ
What is the difference between New Search and Classic Search?
New Search is the preferred audit search method because it gives you a few extra options that Classic Search doesn’t. Specifically, these options include the ability to search by record type, keyword, or search name.
I can’t access the Microsoft 365 Defender Portal. Why not?
Microsoft 365 Defender isn’t included with all Microsoft 365 subscriptions. Generally speaking, you’ll need an enterprise subscription such as Microsoft 365 E5 or A5, or E3 with an add-on such as Microsoft 365 E5 Security, Enterprise Mobility + Security, or A5 Security. You can also get Microsoft 365 Defender with Windows 10 or 11 Enterprise E5 or A5, or as a separate add-on. You can find the full licensing requirements here.
How do I know which Microsoft 365 license I have?
If you want to know what Microsoft 365 license you have, log in as a global administrator or billing admin. After that, go to the Microsoft 365 Admin Center and click on Billing, followed by Licenses.
I only have a vague idea of what I am looking for. What are my options?
It’s fine if you don’t know exactly what you’re looking for. Microsoft provides various query fields for your convenience, but you don’t need to use them in your search. You can populate as many or as few of the query fields as you like. Normally though, the more fields you populate, the fewer results you’ll receive.
What is the downloadable file format when I export an audit report?
The audit report file will be in comma-separated values (CSV) format. You can natively open it in Excel or any text editor. It’s also possible to write a PowerShell script to parse the contents of a CSV file.
Resources
TechGenix: Article on Internal Audits
Read more on how to conduct an internal audit for your organization.
TechGenix: Article on the Importance of Internal Security Audits
Find out why internal security audits are so important.
TechGenix: Article on Microsoft 365 and Multi-Factor Authentication (MFA)
Discover why MFA is now more important than ever for Microsoft 365.
Microsoft: Article on Searching the Audit Log
Educate yourself on how to search the audit log in the compliance portal.
Microsoft: Article on Managing Audit Log Records
Learn how to export, configure, and view your audit search results.