Most of the time, creating a Hyper-V virtual switch is an effortless task. Every once in a while however, you may find that Hyper-V refuses your request and gives you an error message stating that there was an error applying virtual switch properties changes. You can see an example of such an error below.
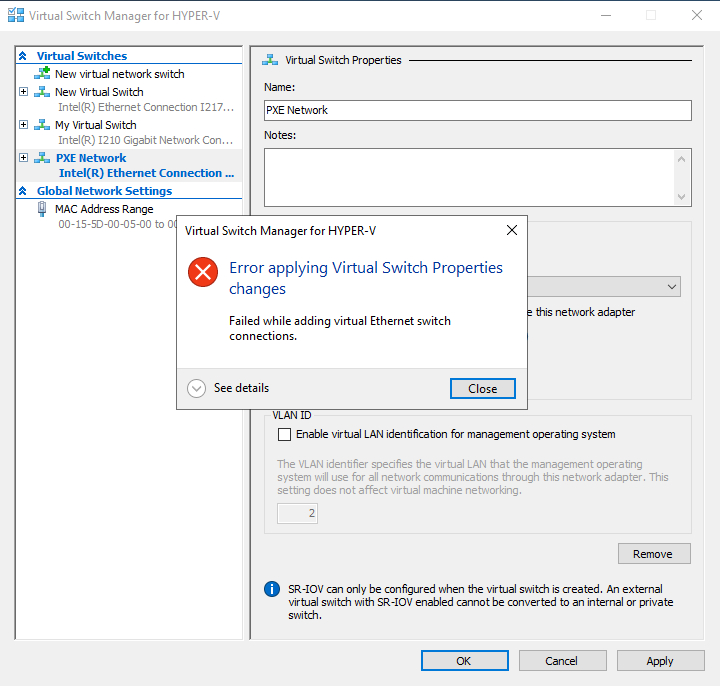
The error message shown above only occurs when you are creating an external virtual switch. The reason for this is that unlike an internal or a private virtual switch, an external virtual switch is bound to a physical network adapter. It is this binding that allows the virtual machines that are connected to the virtual switch to be able to communicate with the outside world.
The Hyper-V Virtual Switch Manager will allow you to create as many virtual switches as you want, but with one major caveat. Each physical network adapter can only support a single virtual switch. The error message shown above normally occurs when you try to create an external virtual switch and link that virtual switch to an Ethernet adapter that is already in use by another virtual switch. In fact, if you look back at the previously displayed error message, you will notice that you can expand it to see some additional detail. Doing so displays a message telling you that the adapter is in use. You can see what this looks like in the next figure.

So the rule is that you can only have one virtual switch for each physical Ethernet adapter. But what happens if you get this error or a similar error when trying to bind a virtual switch to an Ethernet adapter that is not currently bound to another virtual switch?
Every once in a while, you may run into a situation in which a previously existing virtual switch had used a particular virtual network adapter. However, when the switch was removed, the network adapter was not completely unbound from the virtual switch. Microsoft’s solution was to use a utility called NVSBind to deregister the NIC. The idea was to use the NVSBind command to display a full list of the adapters. Once you found the adapter that was having a problem, then you could use this command to unbind it:
nvspbind /u “Friendly NIC Name”
The problem with this technique is that Microsoft discontinued the NVSBind utility and it is no longer available for download. If you look hard enough, you can find NVSBind on some questionable Websites, but who knows if you are actually downloading a clean copy of NVSBind or a version of the utility that has been infected with malware.
Since the NVSPBind utility is no longer available, the best option is to try using PowerShell. You can use the Get-VMSwitch cmdlet to display a list of the virtual switches that appear on your Hyper-V host. If the old virtual switch (the one that had been using the adapter that you want to use for a new virtual switch) still exists, then you can use the Remove-VMSwitch cmdlet to get rid of the virtual switch.

So what can you do if that doesn’t work? There are two other possibilities, but both are drastic options. The first option is to move all of your virtual machines to another server and then reinstall Hyper-V from scratch. You will have to recreate the virtual switch, but this should fix the problem. In all honesty, this is the safer of the two options.
The other option is to completely wipe out the Hyper-V server’s network configuration and then set it all back up again. This is a really risky procedure, so you will want to make sure to move your virtual machines to another server. You will also want to back up your Hyper-V server. While you are at it, be sure to download the network adapter drivers that will be required by the Hyper-V host, because you will have to reinstall them.
The trick is to run the netcfg -d command. Again, this completely destroys your network configuration. You can see what this looks like in the next figure.

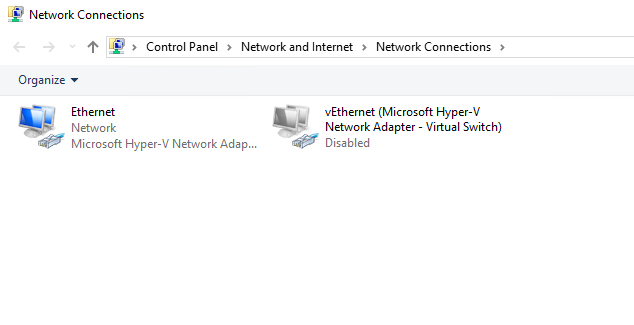
Once you have executed the netcfg -d command, you will have to reboot your Hyper-V server. What happens next depends on the state of your Hyper-V server. If you look at the figure below, you can see that Windows has disabled my virtual Ethernet adapter (the one used by the Hyper-V virtual switch), but reenabled my normal network adapter. Incidentally, the reason why this adapter says Microsoft Hyper-V is because the screen capture was taken from a nested virtual machine.
If you open the Virtual Switch Manager, you can see that the virtual switch is also gone.

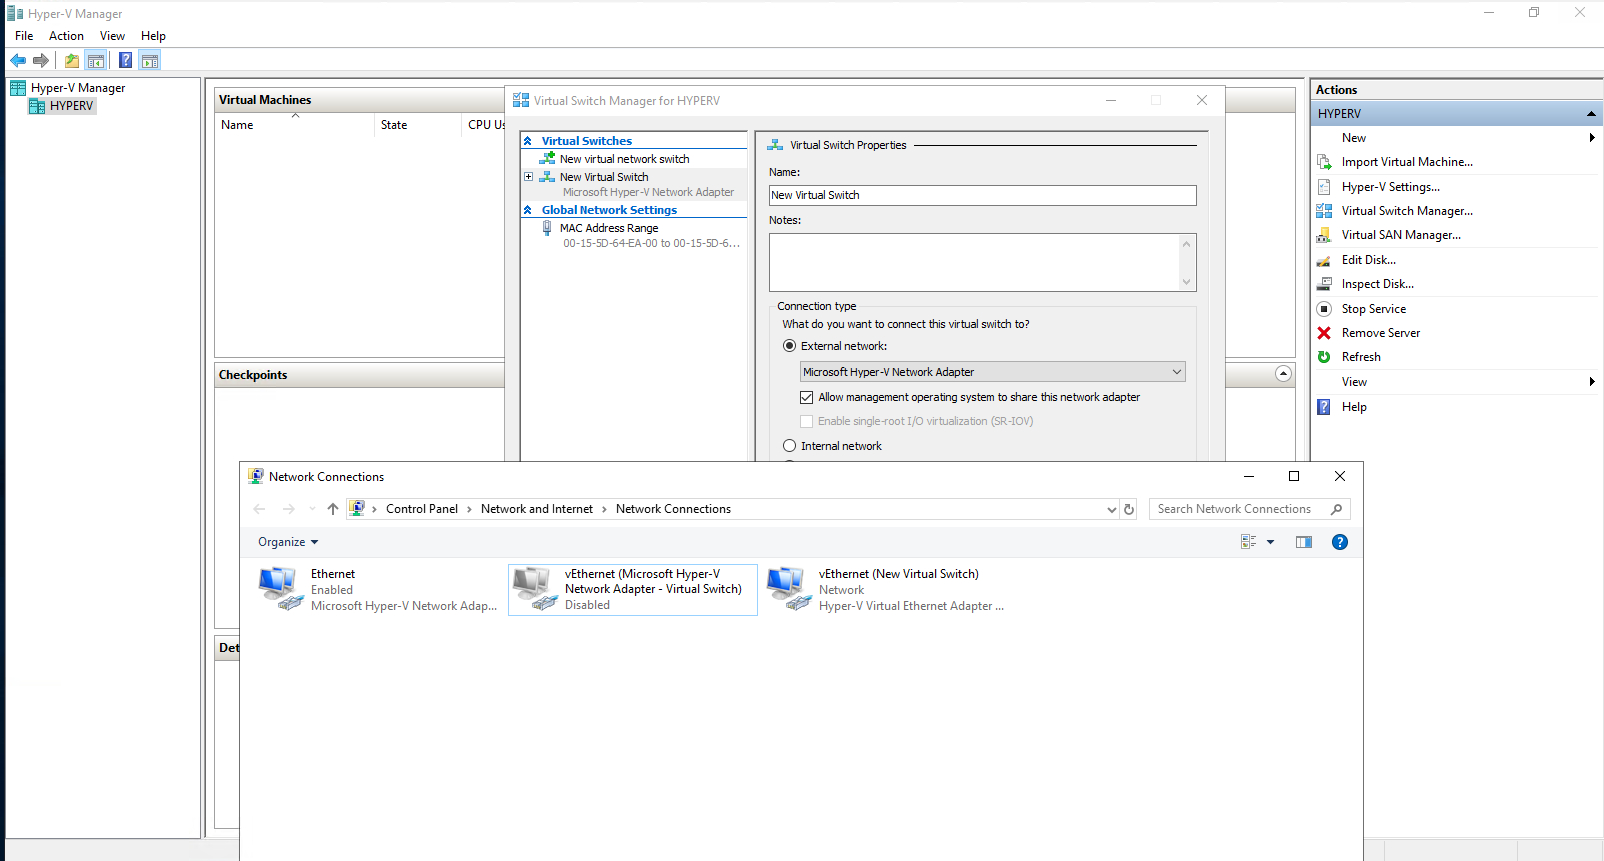
You should now be able to recreate your virtual switches without issue. As you can see in the next figure, the disabled virtual network adapter still remains, but when I created a new virtual switch, Hyper-V simply created a brand new virtual network adapter to use with the virtual switch.
Conclusion
I don’t recommend using the netcfg -d option unless you don’t have any other choice. My experience has been that when you use netcfg -d, it either works really well, or things go badly and you end up having to reinstall everything from scratch. In the case of the screen captures that I included in this article, using the netcfg trick worked perfectly and the whole repair process only took a couple of minutes. Depending on the state of the machine, success is not guaranteed and netcfg can be destructive. So use this trick at your own risk.


Brien, I found a very simple way to fix the same problem I had on my Server 2019 Hyper-V. I had two Virtual Switches using the first two of my four Ethernet ports on my HPE server. I had just uninstalled and reinstalled Hyper-V with a reboot in between each phase. When I tried to create a VS, I got the error. I was able to use the two other ports, however. Also, when running IPCONFIG the first two ports did not show up at all.
In desperation (because I was working remotely), I went into Network Connections in Control Panel. I found the first adapter and went to Properties. There I saw a checkmark beside Hyper-V Extensible Virtual Switch. Most of the other items were unchecked including IPv4. I unchecked the box and clicked OK. About 3 seconds later, it had reconfigured the adapter and my IPv4 address was back as it was and the port was active again. No netcfg -d tooth extraction was needed. Easy and GUI.