If you would like to be notified of when Scott Lowe releases the next part in this article series please sign up to our VirtualizationAdmin.com Real Time Article Update newsletter.
If you would like to read the first part of this article series please go to System Center Virtual Machine Manager – Part 1: Introduction and Prerequisites.
Introduction
Virtual Machine Manager 2008 R2 is Microsoft’s newest entry in the virtual machine management game and helps bring Microsoft a bit further along in the virtual infrastructure race by adding such features as Live Migration. In part one of this article series, I’d discussed all of the prerequisites that are necessary in order to have a successful installation of this product. In this, part two, I’ll provide you with step-by-step installation instructions.
With an understanding of the prerequisites introduced in part one of this series; it’s time to move on to installing Virtual Machine Manager 2008 R2. We’ll be installing two components in this article: the VMM Server and the VMM Administrator Console.
Some additional information
For my own installation, I’m installing VMM 2008 R2 to a Hyper-V-based virtual machine and will use the SQL Server 2005 Express SP3 installation included with VMM 2008 R2.
Before you get underway, you can also consider using Microsoft’s System Center Virtual Machine Manager 2008 and 2008 R2 Configuration Analyzer tool to make sure that your server is set and ready to go for VMM installation. Installation of this tool also requires that you install the Microsoft Baseline Security Analyzer. Once installation is complete, run the tool and you’ll get the screen shown in Figure 1, except with your own server name substituted. If you’re planning to run the VMM roles on different computers, you can provide different credentials to make sure that the tool has appropriate rights.
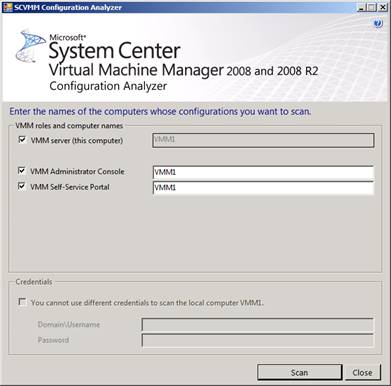
Figure 1: The Configuration Analyzer tool
After the scan process is complete, you’re provided with a report like the one in Figure 2. As you can see, the report lists errors and warnings that you need to address. VMM installation cannot continue until you address the errors. Warnings usually represent potentially error-prone positions but will not generally affect the installation process.
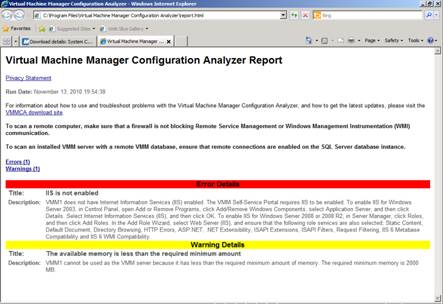
Figure 2: Configuration Analyzer report results
The report results in Figure 2 indicated that I had yet to install the IIS server to my intended VMM Server target computer. You’ll note that the Configuration Analyzer results also indicated exactly which IIS components are necessary for a successful VMM installation. In Figure 3, using Server Manager in Windows Server 2008 R2, I’ve kicked off the Add Roles Wizard and have made the IIS selections that match the requirements provided by the Configuration Analyzer.

Figure 3: As per guidance, I’m installing the IIS component
When the IIS component finishes installing, I’ll run the Configuration Analyzer again just to make sure I didn’t miss something.
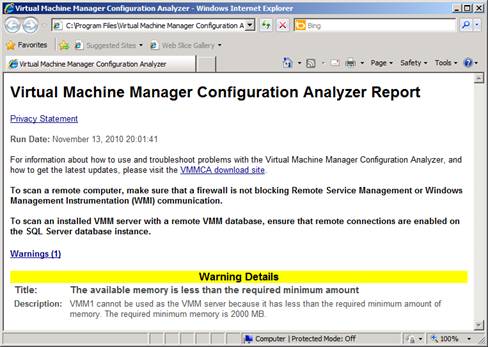
Figure 4: Success! No more errors.
VMM Server installation
Assuming that you’ve procured or built a system that meets the minimum requirements for VMM 2008 R2, let’s get underway with the installation of the VMM Server component.
The process starts by either inserting the physical VMM 2008 R2 media into your server or mounting the media on your physical machine. Either way, you’ll end up with a splash screen that provides you with a number of options. The one that we’re focused on is the installation of the VMM Server. Click that option.
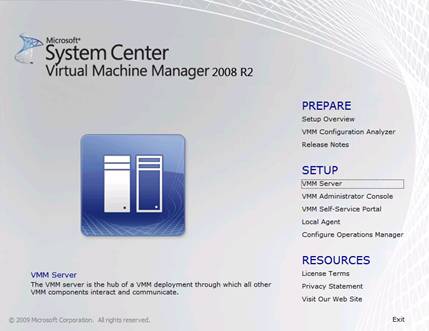
Figure 5: Click VMM Server to begin the installation
You must agree to the product license terms in order to continue the installation.
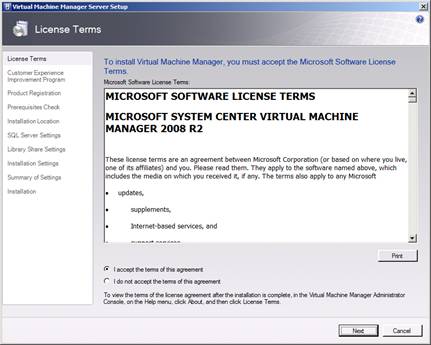
Figure 6: The License Terms page
Microsoft’s Customer Experience Improvement Program is designed to allow the company to gather information that can be used to further product development. While Microsoft indicates that they won’t intentionally grab personal information, understand that it is possible that some personal information might make its way to the company. In general, I like to participate.
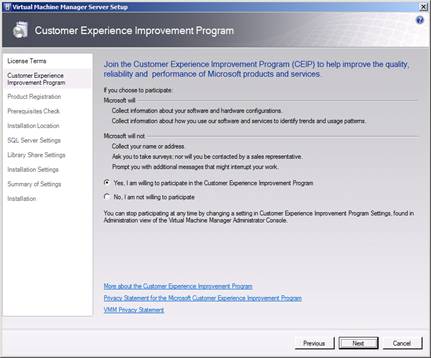
Figure 7: Do you want to take part in the Customer Experience Improvement Program?
Next up: Provide registration information for your VMM installation.

Figure 8: Product Registration page
Before the installation continues, it runs a quick prerequisites check to make sure that your system meets the necessary hardware requirements and that the software requirements are in place.
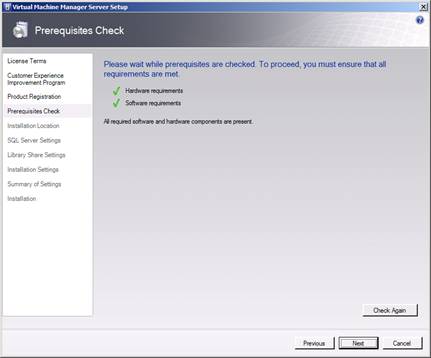
Figure 9: The installer runs a prerequisite check
Now, the real works begins; your first major decision is choosing an installation location for the VMM software. As you can see in Figure 10, the default location is C:\Program Files\Microsoft System Center Virtual Machine Manager 2008 R2.
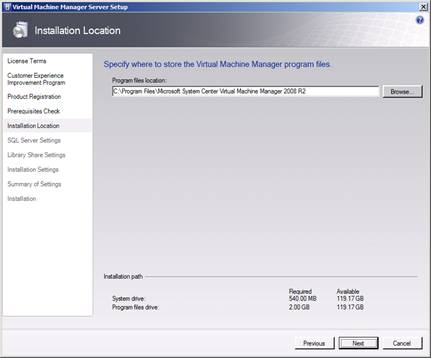
Figure 10: Choose an installation location
One of the more important decisions you’ll make revolves around the location at which you’ll run SQL Server – local or remote. If you choose the local option – Install SQL Server 2005 Express Edition SP3 – all you need to do is specify the location to which you’d like to install the database. If you’d rather use an existing SQL Server instance, provide the name of your existing server, a username and password with appropriate rights to create databases, the name of the instance on which the database should be created and the name of the database itself. If you want the installation process to create the database for you, select the checkbox next to Create a new database. See Figure 11 for more details.
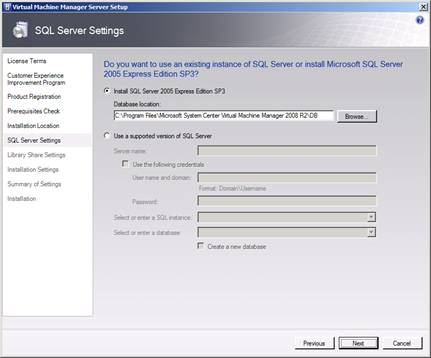
Figure 11: SCVMM 2008 R2 database options
The library server includes a number of components that make up a fully virtualized data center including virtual hard drives, machines templates, operating system ISO images and more. In the SCVMM world, it’s the job of the library component to bring all of these items together and made available for use. On the next step of the installation wizard, specify the name, location and description for the share you’d like to use for the VMM library.
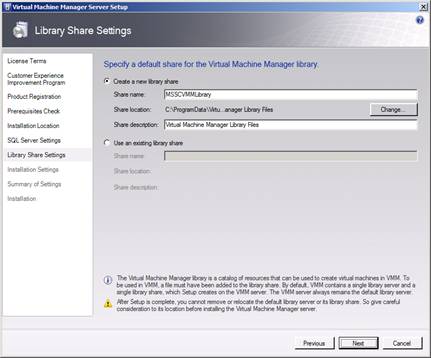
Figure 12: VMM Library settings
SCVMM uses a number of different communications methods depending on the component that is doing the talking. There are also a number of default communications ports that SCVMM uses for this communication, but these can be overridden if you’d like to use different ports. In Figure 13, you can choose to keep the default options or specify your own. If you decide to use different communications ports, make sure to make appropriate changes in firewall settings that you might have running.
On this page, you also need to decide under what account credentials the VMM Server will run. Since I’m running on a single system for everything, I’m just using the Local System account. If I was planning to install VMM components to multiple systems, I’d create a domain account and use that instead.

Figure 13: Choose communications ports and service account
Once you’ve made your selections, you have an opportunity – Figure 14 – to review your selections to make sure you haven’t made an error. Once you’ve clicked the Install button, you can monitor installation progress (Figure 15).
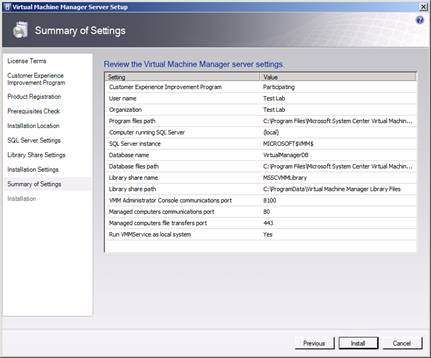
Figure 14: Installation summary
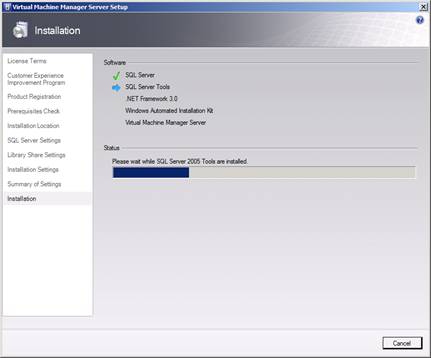
Figure 15: Installation is progressing nicely
Now, the VMM Server component is installed and ready to go.
VMM Administrator Console installation
With the VMM Server component in place, you need a way to administer it. That’s what we’re covering next! The VMM Administrator Console component achieves your administrative needs.
If you recall the splash window from Figure 5, you’ll recall that this is an option to install the VMM Administrator Console. Click that option to start. I’m not going to cover each and every screen here since most of them are the same as the ones you saw during the VMM Server installation. I’ll skip the following steps of the installation wizard:
- License Terms page
- CEIP page
- Prerequisites Check page
- Installation Location page
I will, however, give you a look at the Port Assignment page on which you choose the port on which the Administrator Console will communicate with the VMM Server. Make sure that this port assignment matches the port assignment you provided on the Installation Settings page of the VMM Server installation wizard shown back in Figure 13.
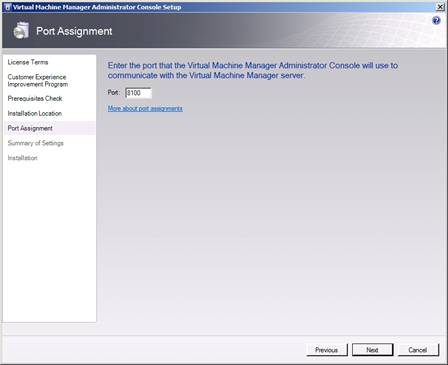
Figure 16: Choose an Administrator Console port assignment
As was the case with the VMM Server, the Administrator Console installation wizard ends with a summary page. Click the Install button to perform the install.
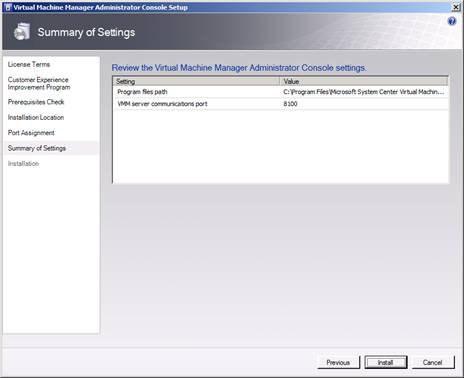
Figure 17: Administrator Console installation summary page
Introduction to the Administrator Console
To access the Administrator Console, go to Start | All Programs | Microsoft System Center | Virtual Machine Manager 2008 R2 | Virtual Machine Manager Administrator Console. The first time you run the console, you’ll get the dialog box shown in Figure 18. In this dialog box, provide the server name (or, localhost) and port number you defined during the installation. If you’re running just one VMM Server, select the checkbox next to Make this server my default. Click the Connect button to access the console.

Figure 18: Provide administration console connection settings
Once you’re connected to the console, you’ll see it in all its glory, just like in Figure 19. Note that the console is context-sensitive so as you move around screen contents will change.
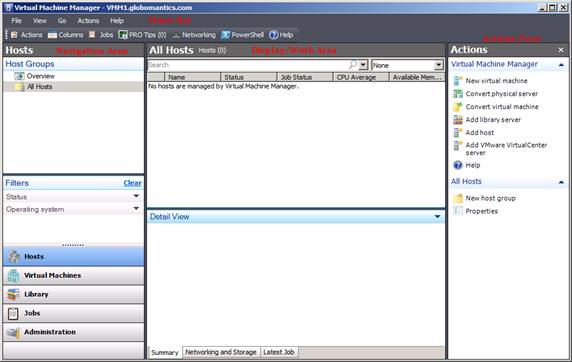
Figure 19: VMM Administrator Console
- Menu Bar. The menu bar and task bar (below the menu bar) provides you with quick access to some common management functions. The taskbar provides quick access to other management tools, such as PowerShell, the Actions pane (if it’s not visible already) and more.
- Navigation Pane. Options here will change depending on what view you have selected below. For example, when Hosts is selected, you’ll see host management information. When you have the Library view selected, you’ll get a navigation view like the one in Figure 20.
- Filters. As your VMM implementation grows, the console will start to get a bit unwieldy. You can use the Filters area to limit what you’re seeing in the console to make it easier to navigate.
- View buttons
– Hosts. Provides you with a place to manage hosts that are controlled by VMM 2008 R2, including adding new hosts and monitoring host status.
– Virtual Machines. Enables management of virtual machines running on managed hosts. Among your options: create, delete & modify virtual machine settings.
– Library. This is the place at which you add resources – files, templates, etc. – to the VMM Library.
– Jobs. Manage jobs, such as automating an update of the Library.
– Administration. This is the place from which you manage the overall VMM Server installation, such as assigning user roles and viewing a status dashboard.
Once you’ve selected a component to view, the display/work area displays the results from that area so you can make further configuration changes.
– Detail View. The Detail View area simply provides more details from the Display/work area.
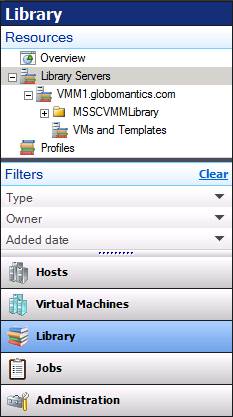
Figure 20: The Library view is selected
Summary
You now have a working System Center Virtual Machine Manager 2008 R2 implementation and a basic understanding of the console layout. In part 3, we’ll start to work on managing hosts and virtual machines.
If you would like to be notified of when Scott Lowe releases the next part in this article series please sign up to our VirtualizationAdmin.com Real Time Article Update newsletter.
If you would like to read the first part of this article series please go to System Center Virtual Machine Manager – Part 1: Introduction and Prerequisites.


