If you would like to read the next part in this article series please go to Welcome to Hyper-V 3.0 (Part 2) – A Hyper-V 3.0 virtual machine deep-dive.
Introduction
A few months ago, Microsoft made available the first preview of the upcoming Windows Server 8 product, which includes a first real look at Hyper-V 3.0. Much has been written about the new features and capabilities coming in Hyper-V 3.0, but I wanted to start seeing it in action. So, I bought a new server for my lab (a Dell PowerEdge R410), installed the Windows Server 8 Developer Preview and went to town.
My lab server has the following stats:
- 2 x quad core Inter Xeon 5503 processors.
- 32 GB RAM.
- 2 x 146 GB 10K RPM SAS disk.
- Connected to an EMC VNXe iSCSI-based storage array.
My first order of business was installing the Hyper-V role on the server. This process hasn’t changed much at all since Windows Server 2008 R2, so I’m not going to cover it here. I will, however, be discussing the creation and configuration of a virtual machine in Hyper-V 3.0. In this part, we’ll cover the creation of the initial virtual switch necessary for your virtual machines to communicate on the network and then we’ll walk through the creation of a new virtual machine. In Part 2, we’ll cover each and every configuration option for your new virtual machine.
If you’re following along at home, I’m assuming that you have a Windows Server 8 machine up and running with the Hyper-V role installed and that you’re ready to get started.
Get the networking running
Before I can get on with the process of creating a virtual machine in Hyper-V 3.0, I first need to create a virtual switch to which the virtual machine can connect. Until I do so, the step in the virtual machine creation process that prompts me to attach the VM to a network won’t have any available networks to work with.
In Figure 1 below, you can see that I’ve created a virtual switch named External network that is, strangely enough, connected to the external network. To accomplish this, go to the Virtual Switch Manager and choose the Create virtual switch option. Accept the defaults and make sure that the new virtual switch is connected to the physical network adapter that handles your external network connectivity.
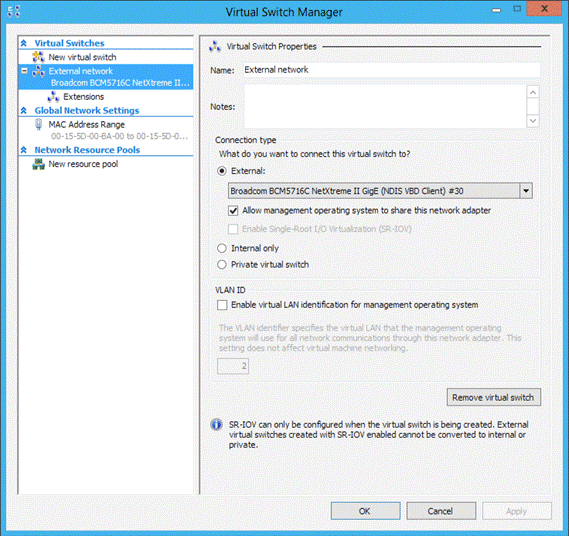
Figure 1: The Virtual Network Manager
On a Hyper-V 3.0-based system, there are also some virtual network extensions that you can work with. You can see these in Figure 2.
- Microsoft NDIS Capture. A driver that allows capturing of network information traversing the virtual switch.
- Microsoft Windows Filtering Platform. “Windows Filtering Platform (WFP) is a network traffic processing platform… consists of a set of hooks into the network stack and a filtering engine that coordinates network stack interactions.” The filtering platform provides a standardized method by which Microsoft and third party vendors can implement filtering modules that meet specific needs.
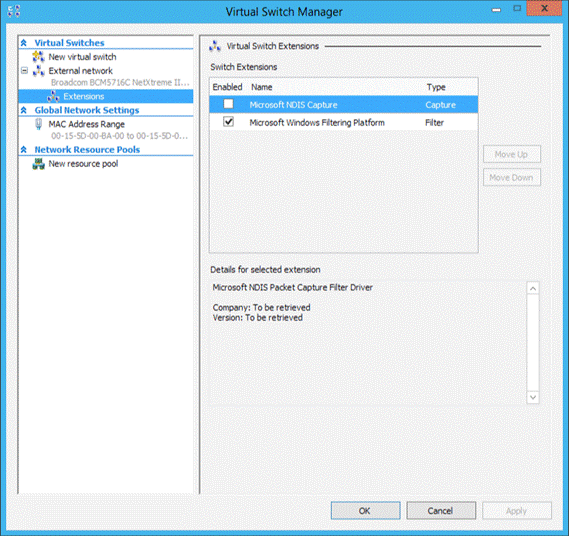
Figure 2: Virtual switch extensions
Create a virtual machine
Now that you have a network to which you can connect a newly created virtual machine, let’s create a new virtual machine. If you’ve used Hyper-V before, you already know that this is a wizard-driven process. To start the wizard, right-click your Hyper-V host server and, from the shortcut menu, choose New > Virtual Machine (Figure 3).
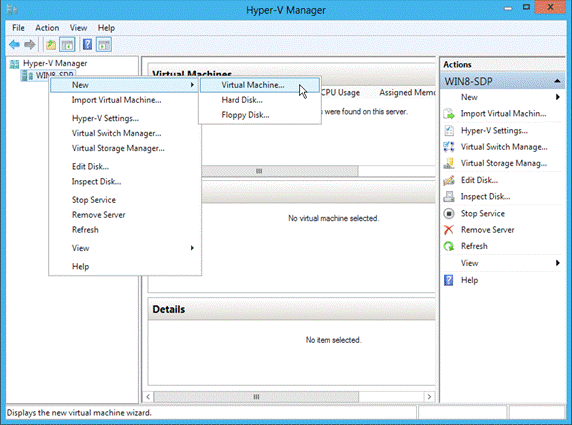
Figure 3: Create a new virtual machine
As I mentioned, this will start a wizard. On the wizard’s first page, there’s not much to see. You can simply click the Next button to proceed (Figure 4).
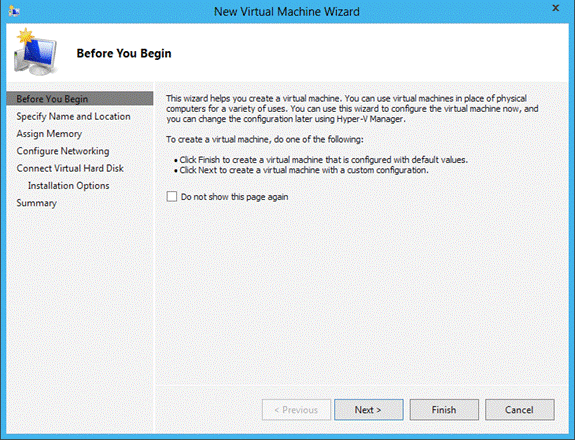
Figure 4: Introductory information
Next, you’re asked to specify a name for the new virtual machine and to choose if you’d like to store the virtual machine somewhere different than in the default location. To do so, select the appropriate checkbox, which you can see in Figure 5, and then provide the location where the virtual machine files should be stored.
In most cases, you’ll either redefine the default location at which you intend to store virtual machines (which you can do from the Hyper-V Settings page) or you will, for each VM, identify a new location since most enterprises use non-local storage for virtual machines.
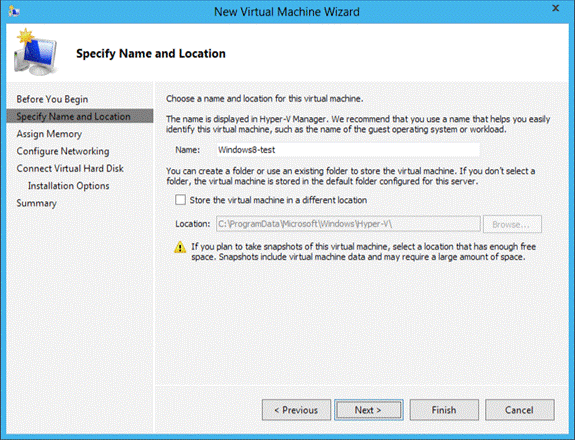
Figure 5: Provide a name and location for the new virtual machine
Every virtual machine needs RAM and the next page of the wizard provides you with a place to specify the amount of RAM you’d like to provision in your new VM. As you can see in Figure 6, I’m allocating 2 GB of RAM for my new virtual machine.
Also on this page, you’ll notice an option entitled Enable-Hyper-V to manage the amount of memory dynamically for this VM. When this option is enabled, you’re allowing Hyper-V to proactively manage memory in an effort to use the host RAM more efficiently and increase the number of virtual machines that can run on a single host.
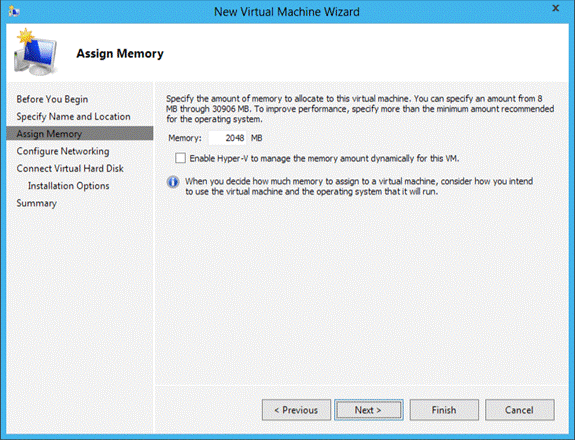
Figure 6: Configure memory options for the new virtual machine
Your new virtual machine also needs a way to communicate with other servers and with the outside world. That’s the job of the network connection. You’ll choose your network connection on the Configure Networking page of the wizard, shown in Figure 7. Note that I’ve opted to connect this virtual machine to the external network virtual switch that I created earlier in this article.

Figure 7: To which network would you like to connect this virtual machine?
Next up, your virtual machine needs storage. Here, you have three options. You can create a new virtual hard drive, use an existing virtual hard drive or choose your storage device at a later time. In Figure 8, I’ve opted to create a new virtual hard drive using the defaults, which specifies a size of 127 GB. Note that the location and the virtual hard drive name are also default entries. Note also that the new virtual machine uses Microsoft’s new VHDX format, which enables a virtual drive of up to 16 TB in size.
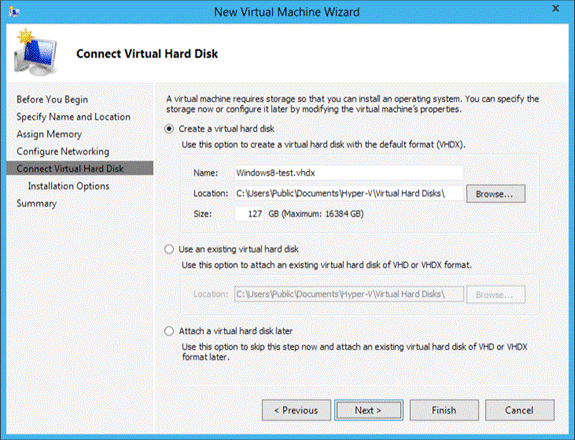
Figure 8: Choose your virtual storage option
Now that you’ve chosen your memory, storage and network options, you need to tell Hyper-V what you’d like to do in terms of an operating system. At this point, you can tell Hyper-V that you want to choose your operating system preference later, which is what I have done, as shown in Figure 9. Alternatively, you can point Hyper-V at either an ISO image file or at physical host-based installation media. In some cases, you might have a floppy disk that contains your installation media or you can choose to install your OS from a network-based installation server.
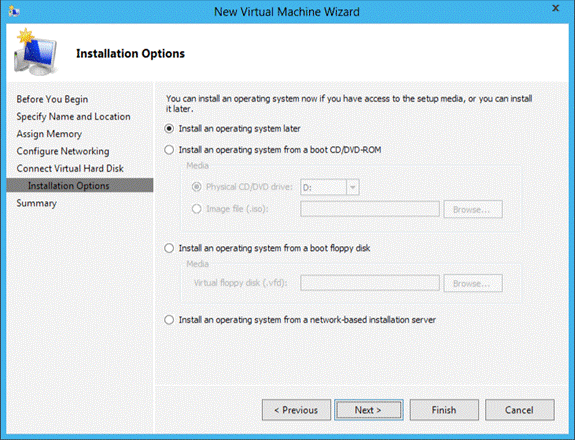
Figure 9: Choose your OS installation option
Once you’ve made all of your selections, the wizard provides you with a summary screen on which you can review your selections. When you’re ready to create your virtual machine, click the Finish button.
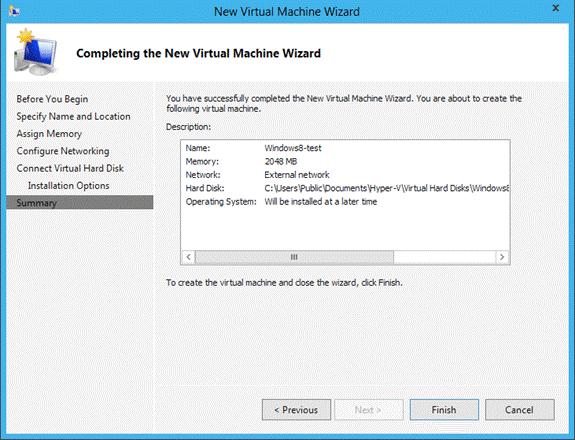
Figure 10: Review the Summary page
Once the virtual machine has been created, you’ll see that there is now an entry in the Virtual Machines box in the Hyper-V Manager. Right now, that new virtual machine is in an Off state and is shown in Figure 11.

Figure 11: The new virtual machine has been created
Summary
You’ve now created your virtual machine and, if you wanted, you could start it up and begin to use it. But, that’s no fun! We have yet to explore the myriad of options that are at your disposal when it comes to fully configuring your new system. That will be the topic of the next part in this series.
If you would like to read the next part in this article series please go to Welcome to Hyper-V 3.0 (Part 2) – A Hyper-V 3.0 virtual machine deep-dive.


