Even though Windows 11 was only recently announced, organizations need to begin assessing the impact that a Windows 11 deployment will eventually have on their organizations. More specifically, this means evaluating the applications that are being used within your organization for compatibility with Windows 11 so you’re ready when once the new operating system is released.
Being that it will likely be a while before Windows 11 is officially released, it probably doesn’t make sense to compile a comprehensive inventory of the applications that your organization is using and test every application for Windows 11 compatibility. That will, of course, need to be done eventually, but for right now, my recommendation would be to focus on your most important applications and to see what both Microsoft and the application vendors have to say about how well those applications will work with Windows 11. Fortunately, there is a free tool that can help you with this process.
Windows 11 compatibility tool
Microsoft’s Assessment and Deployment Kit (ADK) can help you to prepare for an eventual Windows 11 deployment. Although the ADK is Windows version-specific, Microsoft has already released a Windows 11 version of the tool. You can download the tool here.
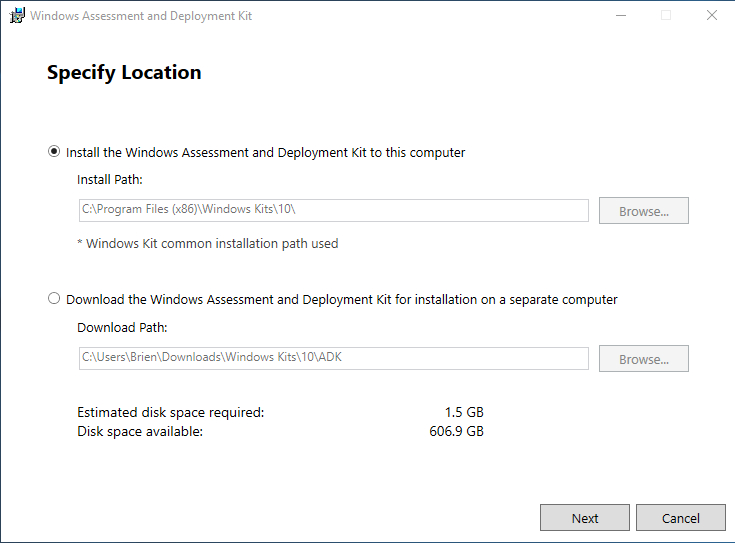
When you download the kit and launch the installer, you will see a screen similar to the one shown in the image below. The main thing that I wanted to show you about this particular screen is that the tool is estimated to consume 1.5 GB of disk space. It is worth noting, however, that the ADK is made up of numerous individual components, most of which will not be needed for the technique that I am about to show you. Hence, the actual amount of space that will be required will be far less than what is shown in the screen capture.
Click Next a few times and you will eventually arrive at a screen that asks you which components you want to install. You should deselect all of the components and then select the Application Compatibility Tools option. This will cause the estimated disk space value to drop to less than 10MB. You can see what this looks like in the screenshot below.

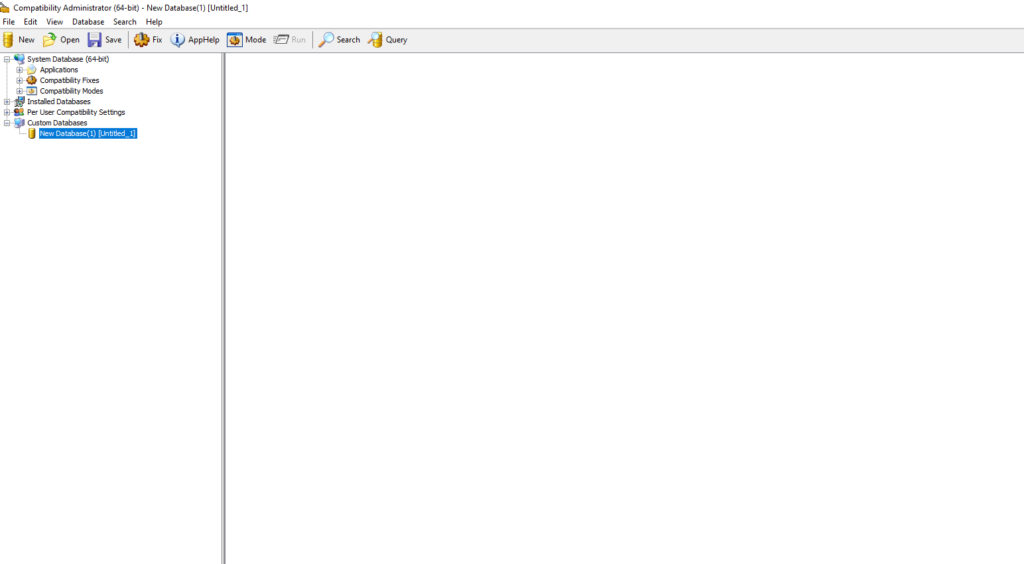
When the deployment process completes, launch the Compatibility Administrator (preferably the 64-bit version). You can find it in the Start menu’s Windows Kits folder. You can see what the Compatibility Administrator looks like in the following image.
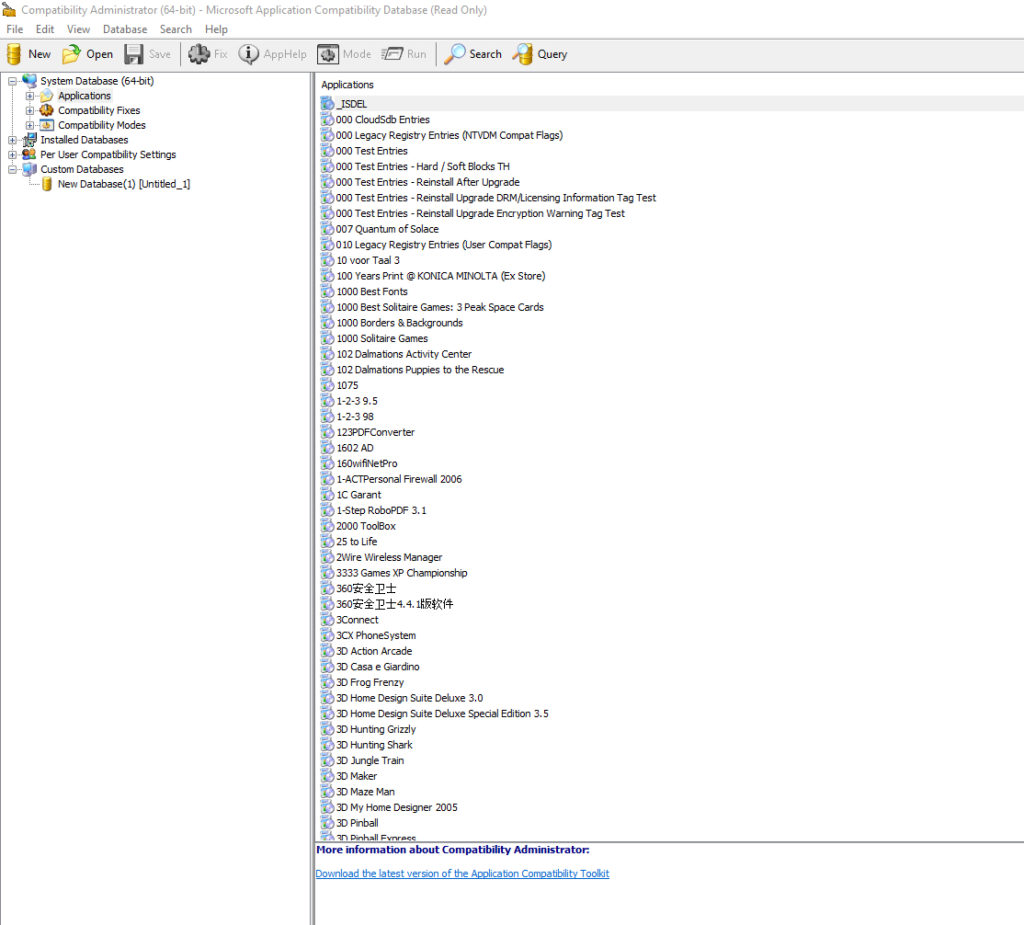
Many, but not, all applications are in the database
The Compatibility Administrator is essentially just a database of Windows applications and their Windows 11 compatibility information. While it is true that the database does not contain every application that has ever been created, it does include a huge number of applications, and more will likely be added over time. You can access the list of applications that are included in the database by selecting the Applications tab, as shown in the next image.
In addition to the list of applications, the database also contains a list of compatibility fixes. These fixes are actions that can commonly be taken in order to make an application run correctly. If you look at the following image, for example, you can see that I have selected a fix called DisableAnimation. The description of the fix, which appears at the bottom of the screen, indicates that this fix (when applied) removes animation from menus and from list boxes.

Verifying compatibility with Windows 11
Now that I have shown you the basic database structure, let’s get back to the subject at hand and talk about how to use this tool to verify application compatibility with Windows 11. There are two ways that you can use this tool. As you probably already guessed, the first method is to locate your application within the application list and then double-click on it to see where things stand.
If you look at the next image, you can see the fixes that have been applied to Acrobat Reader 7. You can click on the individual fixes to see what they do, but aside from that, you can’t really do anything else. The reason for this is that Microsoft has already addressed the compatibility issues. You will notice that the Fix icon in the toolbar is grayed out, as is the Save button. However, these buttons can be used if you apply a fix to an application that isn’t already in the database.
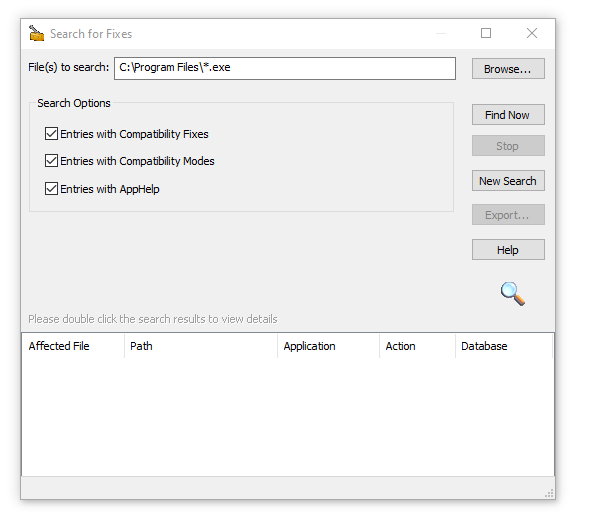
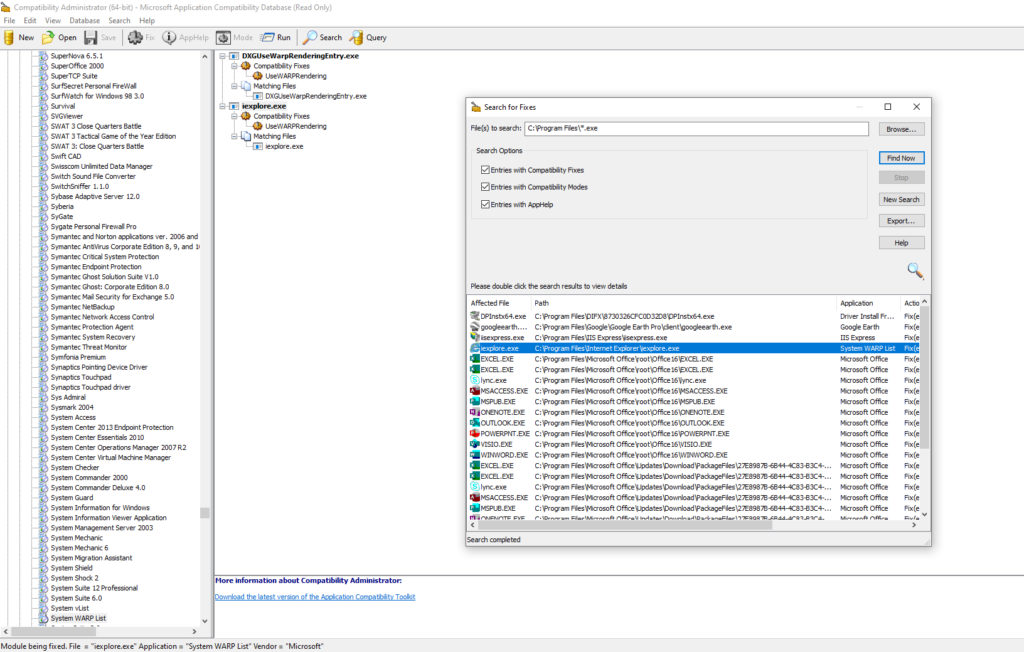
The other way in which you can use the Compatibility Administrator is to assess applications that are installed locally on the machine. To do so, click on the toolbar’s Search icon. When you do, Windows will display the Search for Fixes dialog box, shown below. Enter the path and filenames that you want to search for, and then click the Find Now button.
Upon doing so, the tool will return a list of the executable files that reside in the specified location. You can click on any one of these files to see its compatibility fixes. Better still, there is a Run button on the toolbar that you can click to execute the file (although you will likely have to provide the file’s path before the tool will be able to launch the application). That way, you can verify that the application does indeed run on Windows 11. You can see what all of this looks like in the next screen capture.
A good tool, but actual testing is still needed
Although the Compatibility Administrator should not be treated as a substitute for application compatibility testing, the tool can help give you a sense of which applications Microsoft expects to work with Windows 11. This can help to expedite your compatibility testing efforts.
Featured image: Shutterstock / Microsoft