If you missed the previous articles in this series, please read:
- Deploying Vista – Part 1: Understanding the Windows AIK
- Deploying Vista – Part 2: Understanding Windows Setup and the Windows Imaging File Format
- Deploying Vista – Part 3: Understanding Configuration Passes
- Deploying Vista – Part 4: Understanding Deployment Scenarios
- Deploying Vista – Part 5: Using Sysprep
- Deploying Vista – Part 6: Using Windows SIM
- Deploying Vista – Part 7: Creating a Minimal Answer File
- Deploying Vista – Part 8: Unattended Install from DVD Method
- Deploying Vista – Part 9: Automating the Machine OOBE
- Deploying Vista – Part 10: Understanding the Windows Preinstallation Environment
- Deploying Vista – Part 11: Working with Windows PE
- Deploying Vista – Part 12: Understanding Image-Based Deployment
- Deploying Vista – Part 13: Performing Image-Based Deployment
- Deploying Vista – Part 14: Understanding Windows Deployment Services
- Deploying Vista – Part 15: Implementing Windows Deployment Services
- Deploying Vista – Part 16: Configuring Windows Deployment Services
- Deploying Vista – Part 18: Managing Windows Deployment Services
- Deploying Vista – Part 19: Managing Windows Deployment Services (Continued)
- Deploying Vista – Part 20: Working With Discover Images
- Deploying Vista – Part 21: Working With Capture Images
- Deploying Vista – Part 22: Deploying Images using Windows Deployment Services
- Deploying Vista – Part 23: Unattended Image Deployment Using Windows Deployment Services
- Deploying Vista – Part 24: Understanding Microsoft Deployment Toolkit

In the previous two articles of this series we saw how to install the Windows Deployment Services role on a Windows Server 2008 server and how to perform the initial configuration of this role. One of the things this initial configuration process does is create the image store on your Windows DS server. In this present article, we’ll look at how to work with your image store by adding images to it.
Boot vs. Install Images
There are two types of Windows images you will need to work with when you populate the image store of your Windows DS server. These two types of images are:
-
Boot images – These are used to boot your PXE-enabled bare-metal target computers in order to start the Windows Vista installation process on them. The Sources folder on your Windows Vista DVD product media has a default boot image in it named boot.wim which you can use and/or customize to perform a remote network boot of bare-metal client computers on your network.
-
Install images – These are the Windows Vista operating system images you will be installing on your target computers. The Sources folder on your Windows Vista DVD product media has a default install image in it named install.wim to install Windows Vista onto the client computers you have booted using your boot image.
Note:
You can use the default boot and install images as is, or you can customize them as desired. We’ll look at how to customize images in a future article of this series.
Adding Boot Images
The first step in working with the image store of your Windows DS server is to add a boot image to the store. What’s important here is to add the right boot image. You should always use a boot image from Windows Vista with Service Pack 1 (or later) product media, not from Windows Vista RTM product media. That’s because if you use the boot image from the RTM product media, you won’t be able to take advantage of certain advanced Windows DS features that were added later when Windows Server 2008 was released. These advanced Windows DS features include multicast deployment and other features we’ll look at later in this series of articles.
Note:
For our scenario, we’ll use volume-licensed Enterprise Edition of Windows Vista with Service Pack 1.
To add the default boot image to your image store, insert your Windows Vista SP1 product media in the DVD drive of your Windows DS server and cancel the AutoPlay dialog if it appears. Then open the Windows Deployment Services console and select the Boot Images folder of your server (Figure 1).
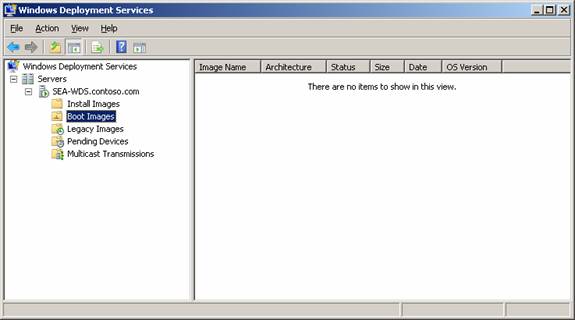
Figure 1: No boot images have been added yet to this Windows DS server
Now right-click the Boot Images folder and select Add Boot Image. This launches the Windows Deployment Services – Add Image Wizard (Figure 2).
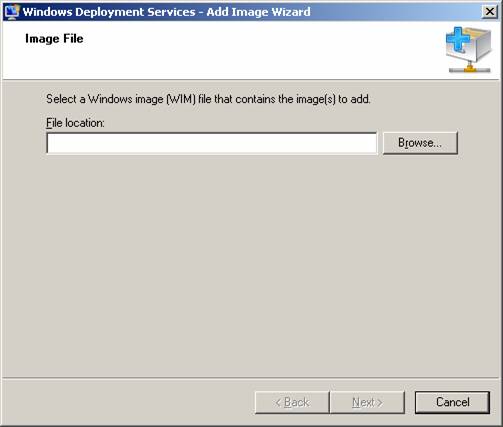
Figure 2: The Add Image Wizard
Click Browse and use the Windows Explorer dialog to locate and select the boot.wim file in the Sources folder on your Windows Vista SP1 Enterprise DVD (Figure 3).
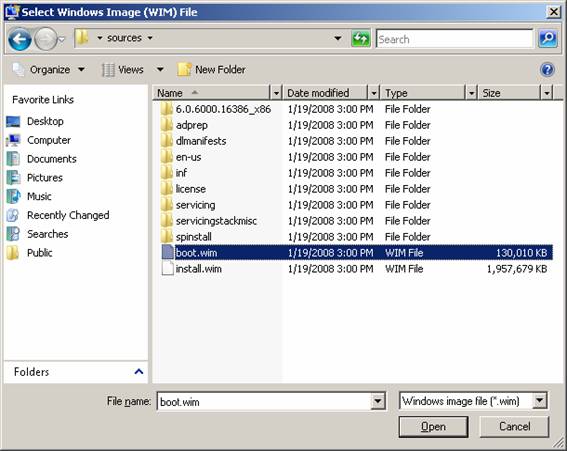
Figure 3: Selecting the default boot image on your product media
With the boot.wim file selected, click Open to add the path to the image to your wizard (Figure 4).
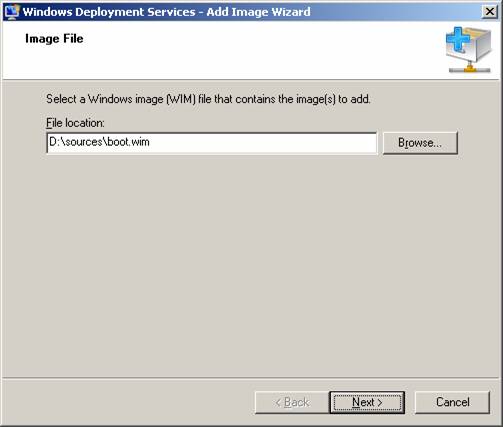
Figure 4: Adding the default boot image to your image store
Clicking Next brings up the Image Metadata page, which lets you specify a name and description for your boot image. The default name and description are shown in Figure 5, but you can modify these if desired.
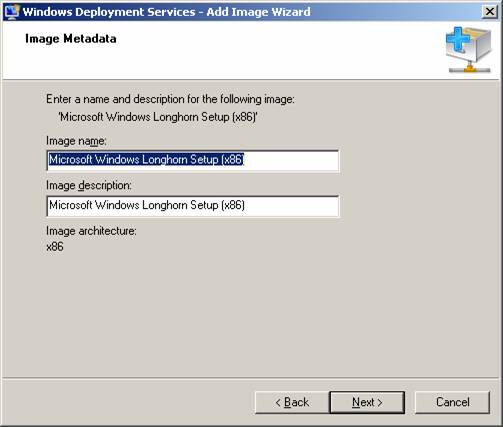
Figure 5: Specifying a name and description for the boot image
Clicking Next displays a Summary page that lets you verify your actions before performing them (Figure 6).

Figure 6: Summary page of the Add Image Wizard
Clicking Next begins the process of adding the boot image to your image store (Figure 7).
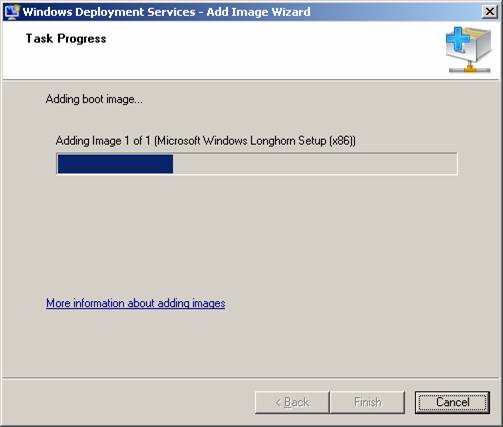
Figure 7: The boot image is being added to the image store
Once the operation is complete, click Finish. Your Windows DS Console should now display the added boot image as shown in Figure 8.

Figure 8: The default boot image has been added to the image store
Adding Install Images
The next step in working with the image store of your Windows DS server is to add an install image to your store. Before you do this however, you should create at least one image group in your store. Image groups are logical folders used to organize your install images so you can manage them more easily. File resources are shared between images in an image group, and this means using image groups lets you make more efficient use of disk storage on your Windows DS server.
Let’s begin by creating an image group on our Windows DS server. To do this using the Windows DS console, right-click on the Install Images folder of your Windows DS server and select Add Image Group from the shortcut folder, then type a descriptive name for your image group as shown in Figure 9.

Figure 9: Creating a new image group
Clicking OK adds the new image group to your store as shown in Figure 10.
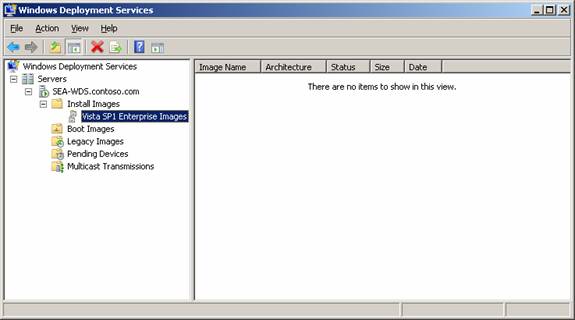
Figure 10: Image group for Vista SP1 install images
Now right-click on your new image group and select Add Install Image from the shortcut menu. This launches the Windows Deployment Services – Add Image Wizard again, and like before when you added a boot image, you browse to the install.wim file in the Sources folder on your Windows Vista SP1 Enterprise product media and open the image. The default name and description for the install image is displayed on the List Of Available Images page of the wizard; use this page to select the operating system version you want to install (Figure 11).

Figure 11: Select the operating system version you want to install
Note:
In the above figure only one version of the operating system is available to install. This is because we’re using volume-licensed media (Vista Enterprise). If you use retail media, you will have a choice between installing several operating system versions such as Vista Business and Vista Ultimate, and you must be sure to install only the version for which you have purchased a product key.
Now continue through the wizard and add the install image to your store in the same way that you added the boot image earlier.
Adding Images Using WDSUTIL
You can also use the WDSUTIL command to add both boot and install images from the command-line. For example, to add the default boot image from your Vista SP1 product media using WDSUTIL, type the following command:
WDSUTIL /Add-Image /ImageFile:”D:\Sources\boot.wim” /ImageType:boot
To create a new image group named Vista SP1 Enterprise Images in your store, do this:
WDSUTIL /Add-ImageGroup /ImageGroup:”Vista SP1 Enterprise Images”
To add the default install image from your Vista SP1 product media, do this:
WDSUTIL /Add-Image /ImageFile:”D:\sources\boot.wim” /ImageType:install /ImageGroup:”Vista SP1 Enterprise Images”
In the above examples we assume that D: is the drive letter of your server’s DVD drive.
Conclusion
In this article we have seen how to add boot and install images to our Windows DS server. We’ll be using these images soon for deploying Vista SP1 Enterprise onto bare-metal systems, but first we’ll examine some further configuration options for Windows DS and that’s the topic of the next article in this series.
If you missed the previous articles in this series, please read:
- Deploying Vista – Part 1: Understanding the Windows AIK
- Deploying Vista – Part 2: Understanding Windows Setup and the Windows Imaging File Format
- Deploying Vista – Part 3: Understanding Configuration Passes
- Deploying Vista – Part 4: Understanding Deployment Scenarios
- Deploying Vista – Part 5: Using Sysprep
- Deploying Vista – Part 6: Using Windows SIM
- Deploying Vista – Part 7: Creating a Minimal Answer File
- Deploying Vista – Part 8: Unattended Install from DVD Method
- Deploying Vista – Part 9: Automating the Machine OOBE
- Deploying Vista – Part 10: Understanding the Windows Preinstallation Environment
- Deploying Vista – Part 11: Working with Windows PE
- Deploying Vista – Part 12: Understanding Image-Based Deployment
- Deploying Vista – Part 13: Performing Image-Based Deployment
- Deploying Vista – Part 14: Understanding Windows Deployment Services
- Deploying Vista – Part 15: Implementing Windows Deployment Services
- Deploying Vista – Part 16: Configuring Windows Deployment Services
- Deploying Vista – Part 18: Managing Windows Deployment Services
- Deploying Vista – Part 19: Managing Windows Deployment Services (Continued)
- Deploying Vista – Part 20: Working With Discover Images
- Deploying Vista – Part 21: Working With Capture Images
- Deploying Vista – Part 22: Deploying Images using Windows Deployment Services
- Deploying Vista – Part 23: Unattended Image Deployment Using Windows Deployment Services
- Deploying Vista – Part 24: Understanding Microsoft Deployment Toolkit
- Deploying Vista – Part 25: Preparing Microsoft Deployment Toolkit for Deploying Vista
- Deploying Vista – Part 26: Deploying Vista Using Microsoft Deployment Toolkit
- Deploying Vista – Part 27: Automating a Light Touch Installation
- Deploying Vista – Part 28: Configuring Distribution Shares
- Deploying Vista – Part 29: Configuring Distribution Shares (Continued)


